Still not sure I’ll be able to stay for the entire show but I’m building as if I can. Trying to enter a handful of models, but still have some final details to finish on these two.
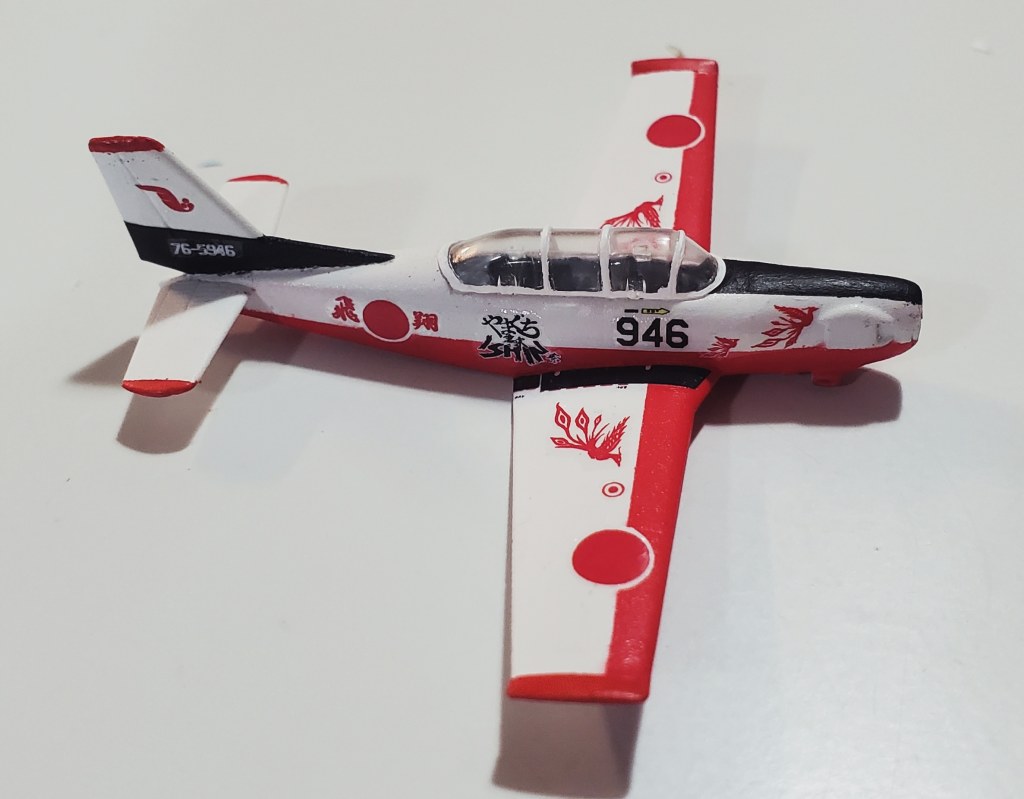
The first is a 1/144 Platz Beechcraft T-34 Mentor which I’ve converted into a Fuji T-7 of the JASDF. 3D printed parts, custom decals, etc. Just need to apply a final top coat, touch up some details, and attach the gear. Hoping to enter this in the Collections category along with 3 other T-34 kits and a Beech Bonanza. None are good enough to win I suspect, but they sure do look neat together.
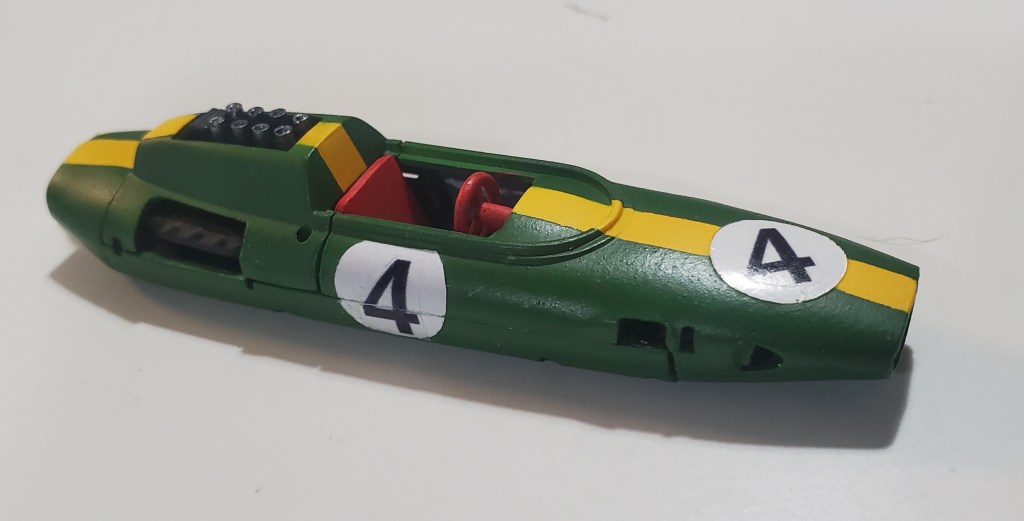
The other is the 1/48 Lotus I started on a few weeks ago. In the same condition as the T-7. Needs a top coat, details touched up, and the suspension parts attached (hopefully the Molotow chrome is dry – more discussion on this disaster of a process in the future).
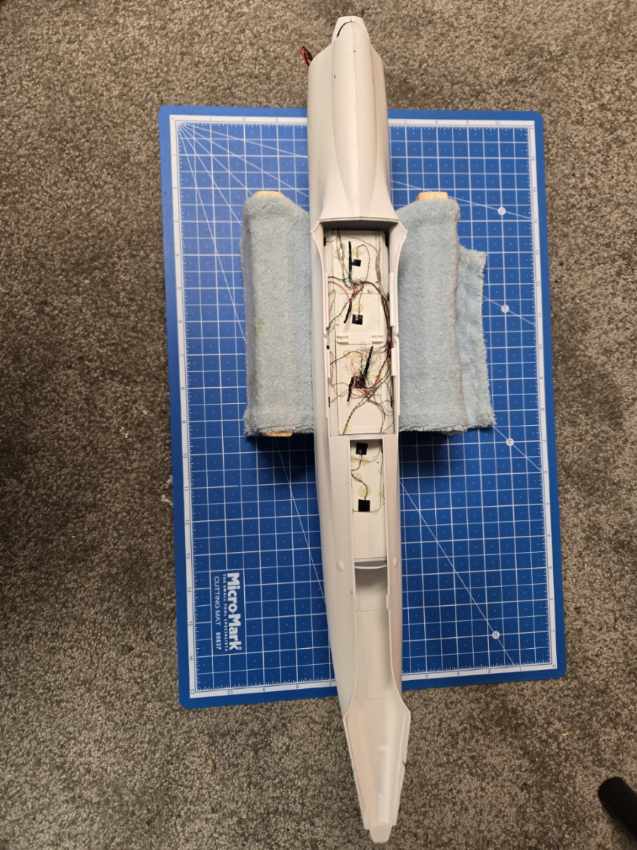
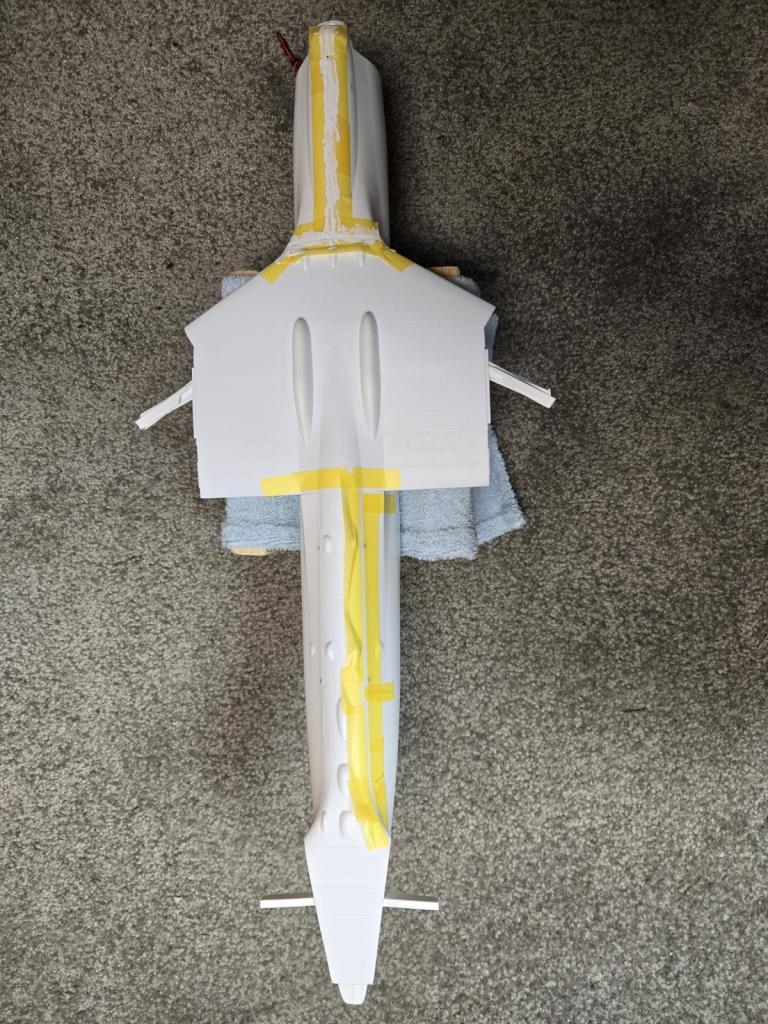
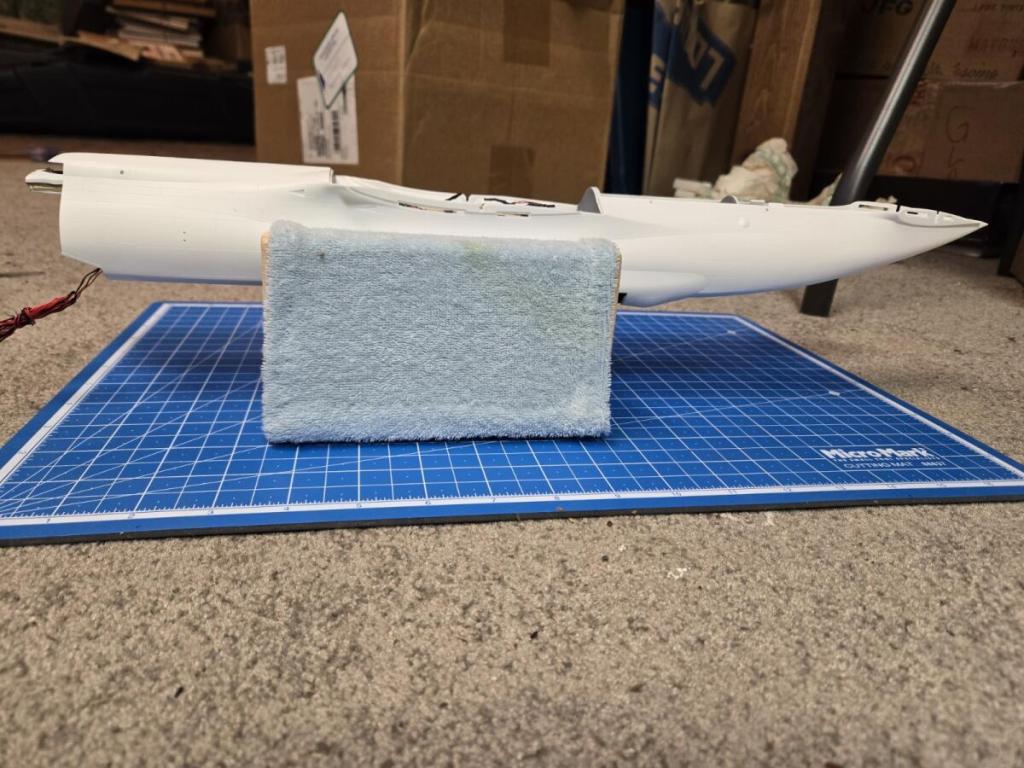
Here are a few pictures of the AN-225 getting back under way. Two of them are looking at the start of the fuselage assembly with one last look at the wiring before it gets closed up. One of what I am calling a bouquet of tires, all 32 of them. They are actually painted now with the wheels about ready for painting. The last one is the start of the filling and sanding due to a less than stellar fit of the fuselage parts.
– Tom
(Tom sent this to me on 3/21 and I typed up the post but forgot to publish it until today – Chad)
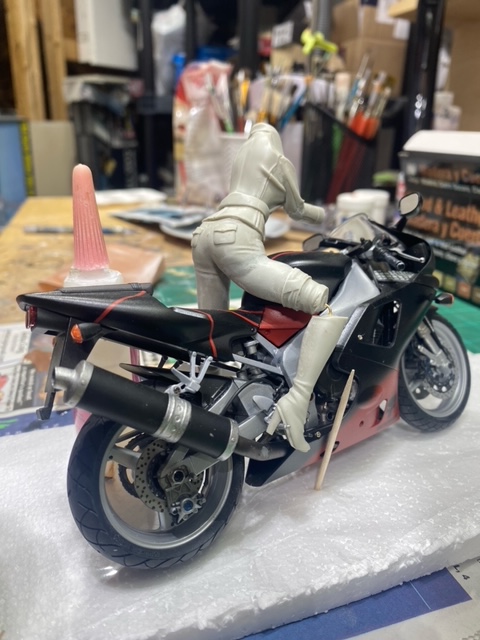
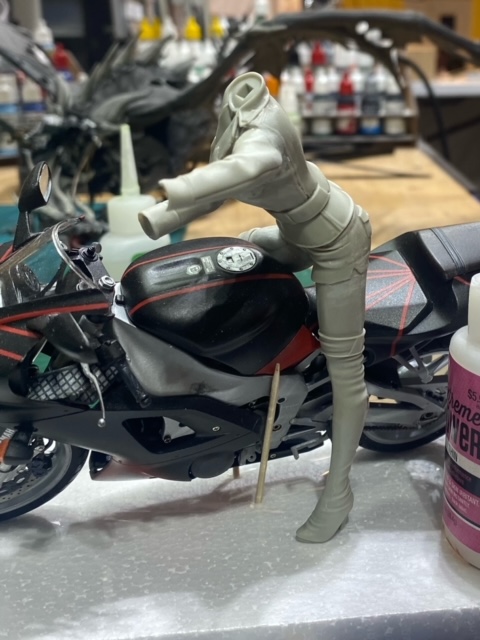
Okay gents here is a quick update to the assassin babe bike rider. I have re-attached her right upper leg to the torso and her arms are on. I put her right lower leg on and super glued it to the attachment wire while she is on the bike to ensure her legs fit to the bike. Still have a lot of MagicSculpt to go to get her in shape for a coat of primer to see where the defects may be and do some “plastic surgery” (no pun intended) to finalize her reformation prior to painting.
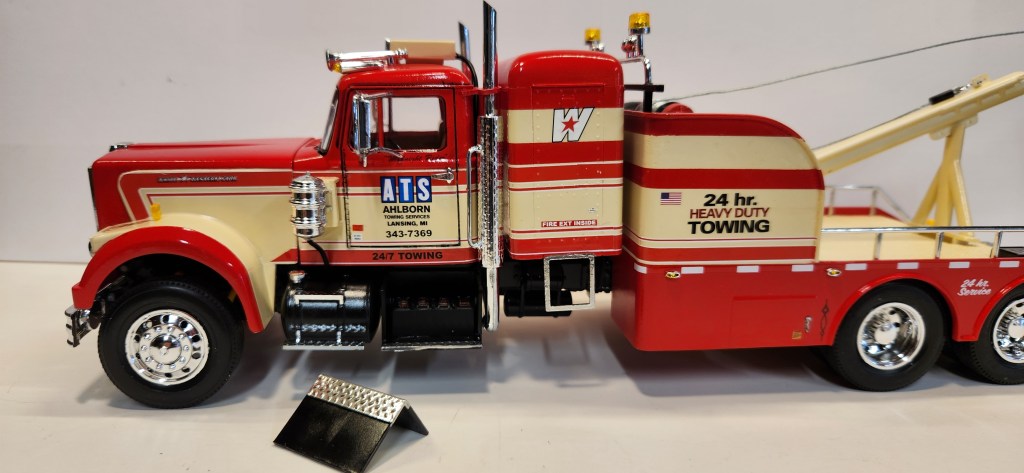
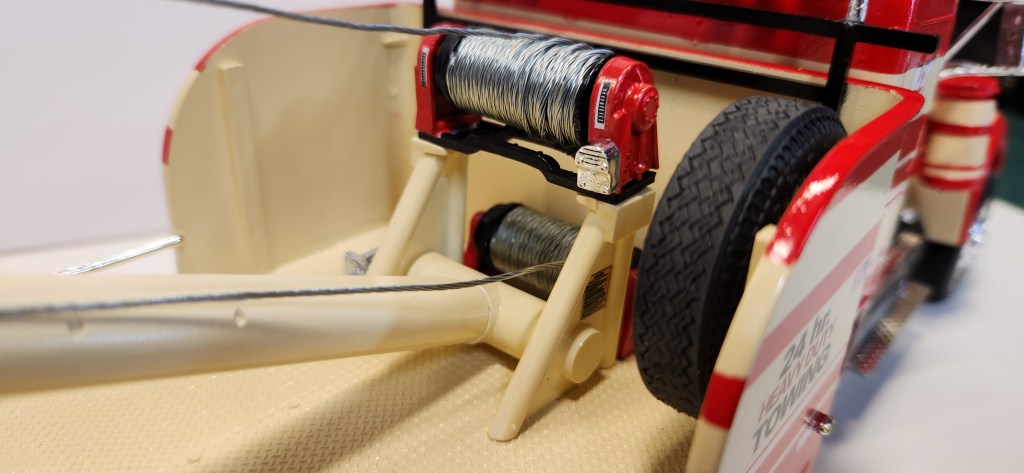
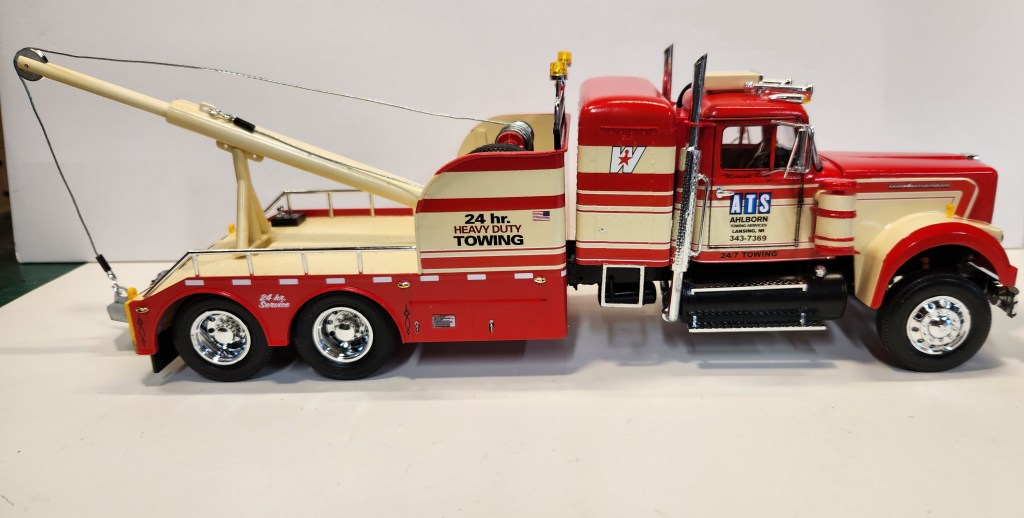
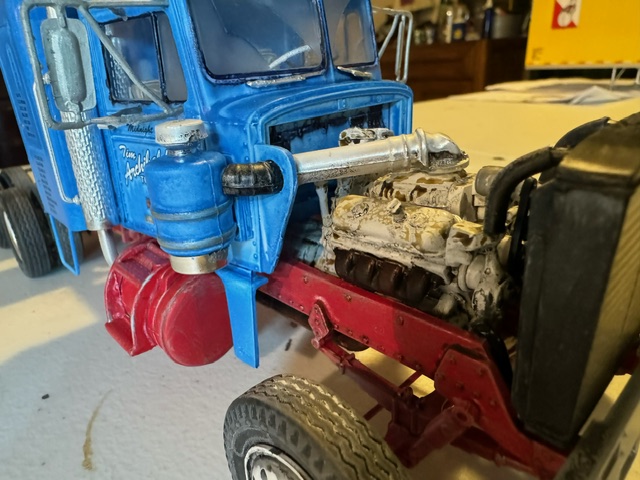
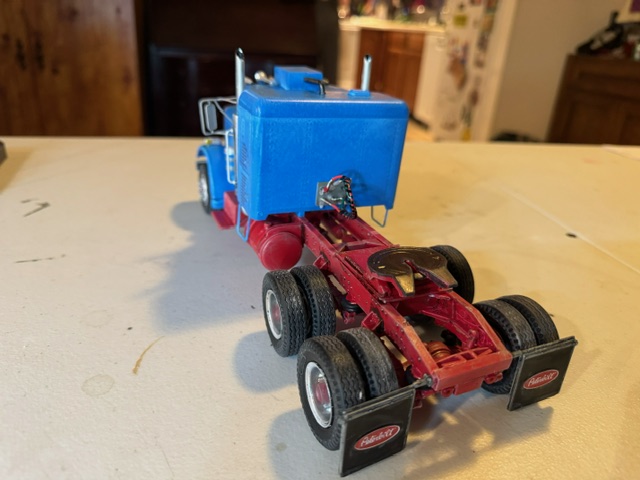
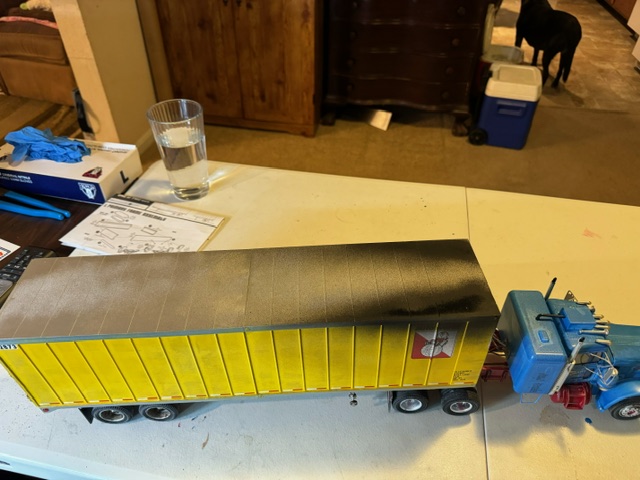
I took a White Western Star tractor and converted it to a Big Stick wrecker.
I used the Western Star chasis and stretched the frame 2.5 inches to accommodate the wrecker bed and pirated Kenworth single sleeper bunk. I used Moebius wheels and tires instead of the stock spider wheels. The paint is Model Master enamel Guards Red and Light Ivory. The exhaust was used from the AMT Peterbilt wrecker kit, along with the cab running lights and air horns. The steel cable on the Big Stick wrecker is thin picture framing wire.
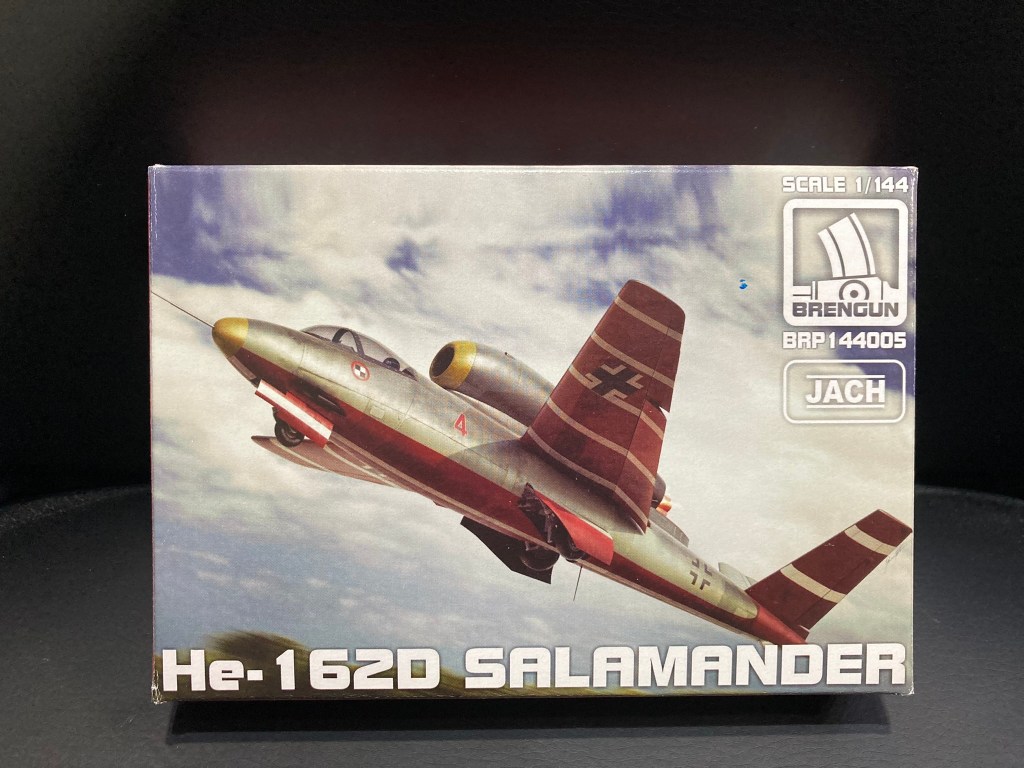
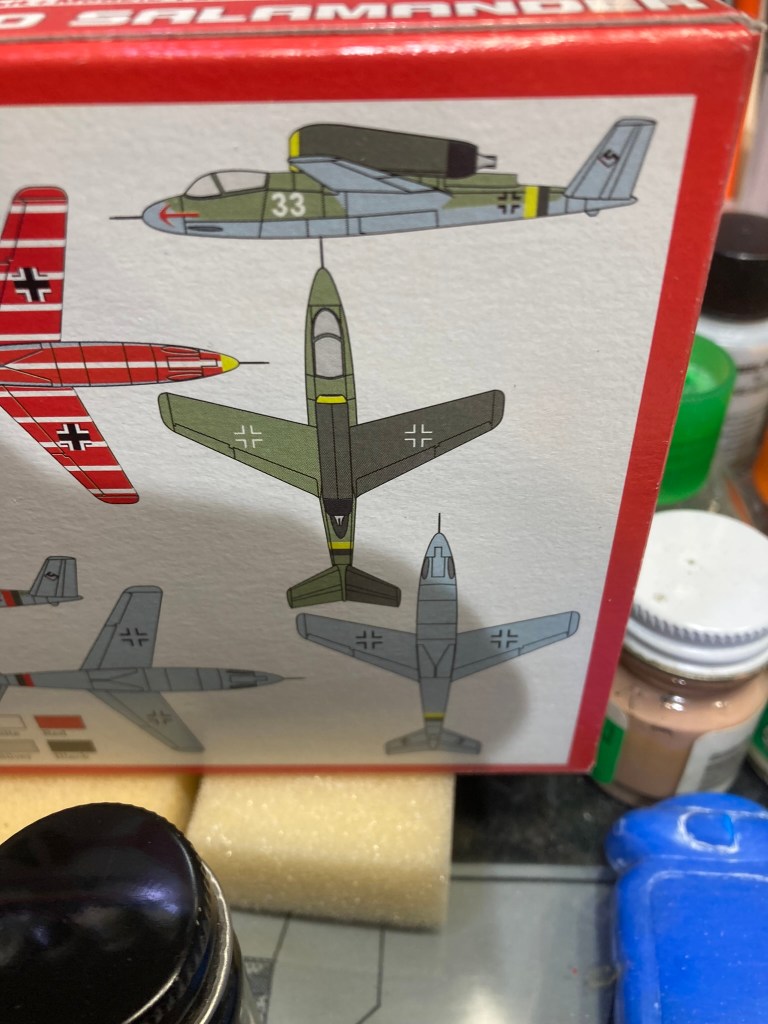
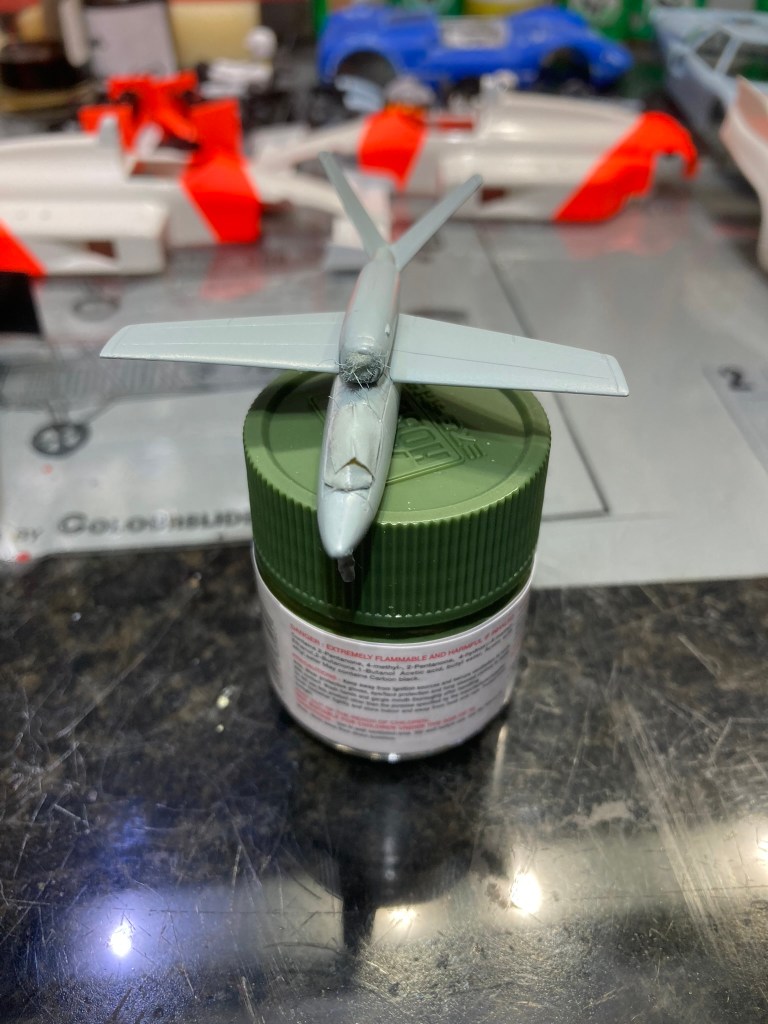
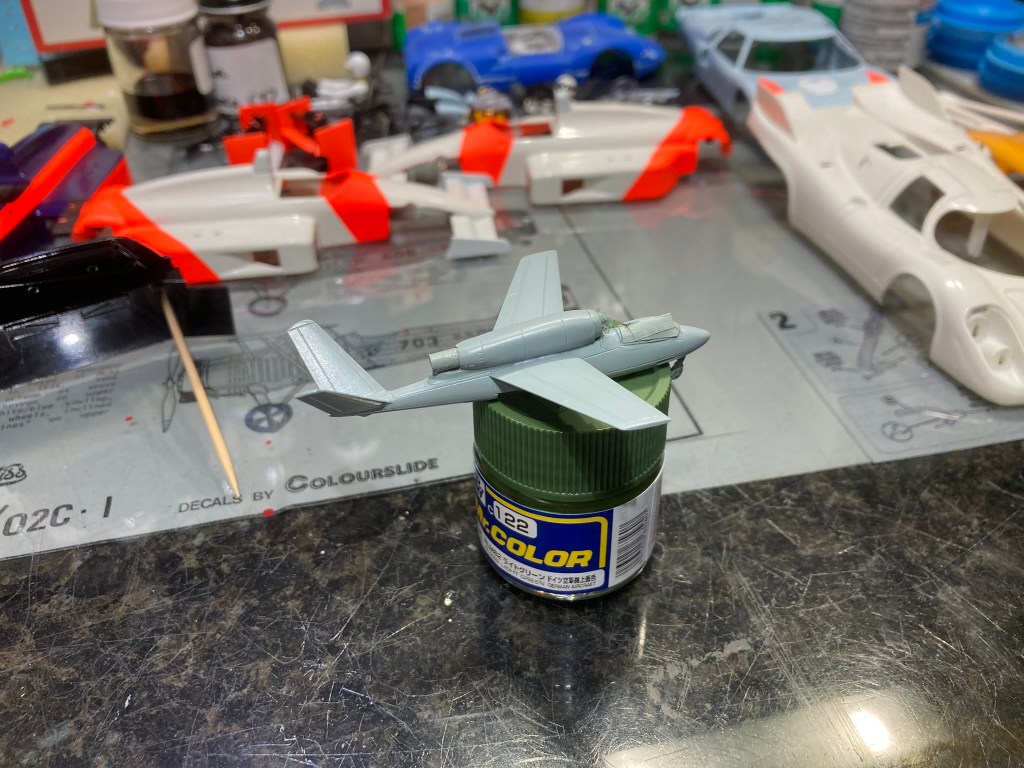
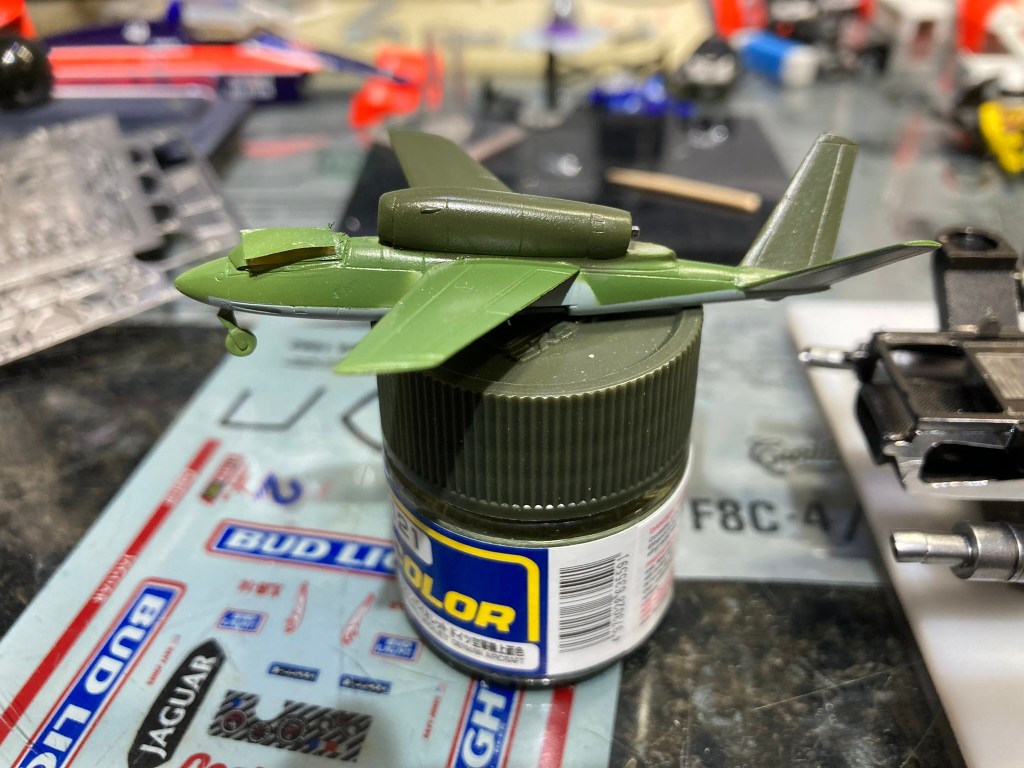
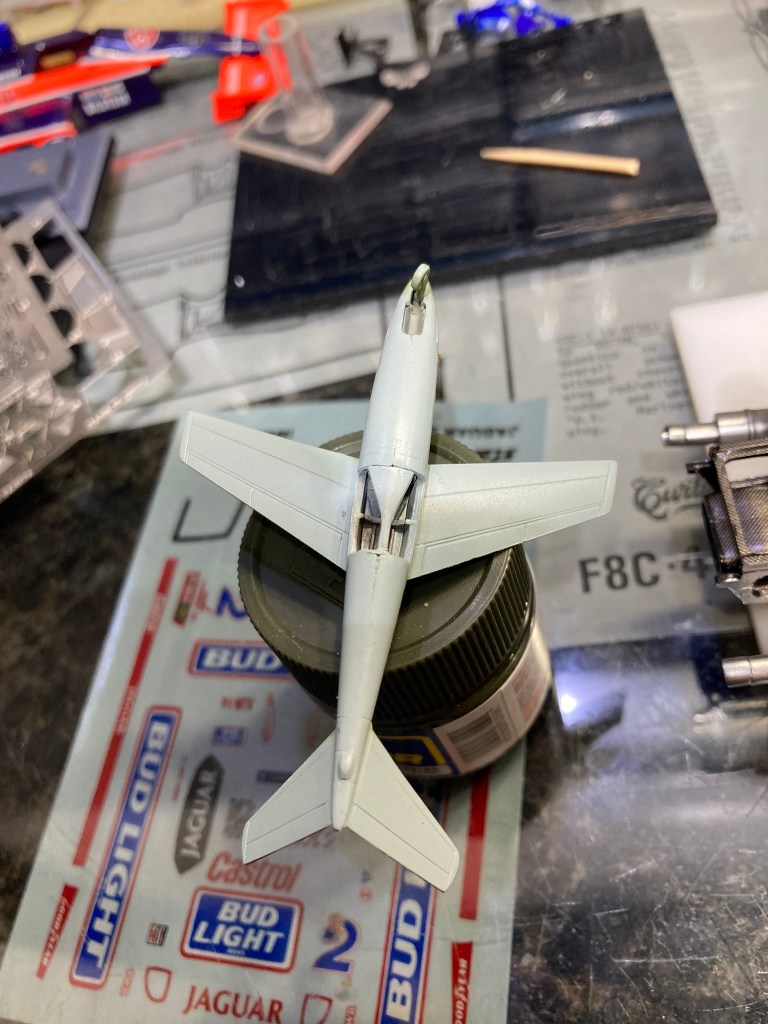
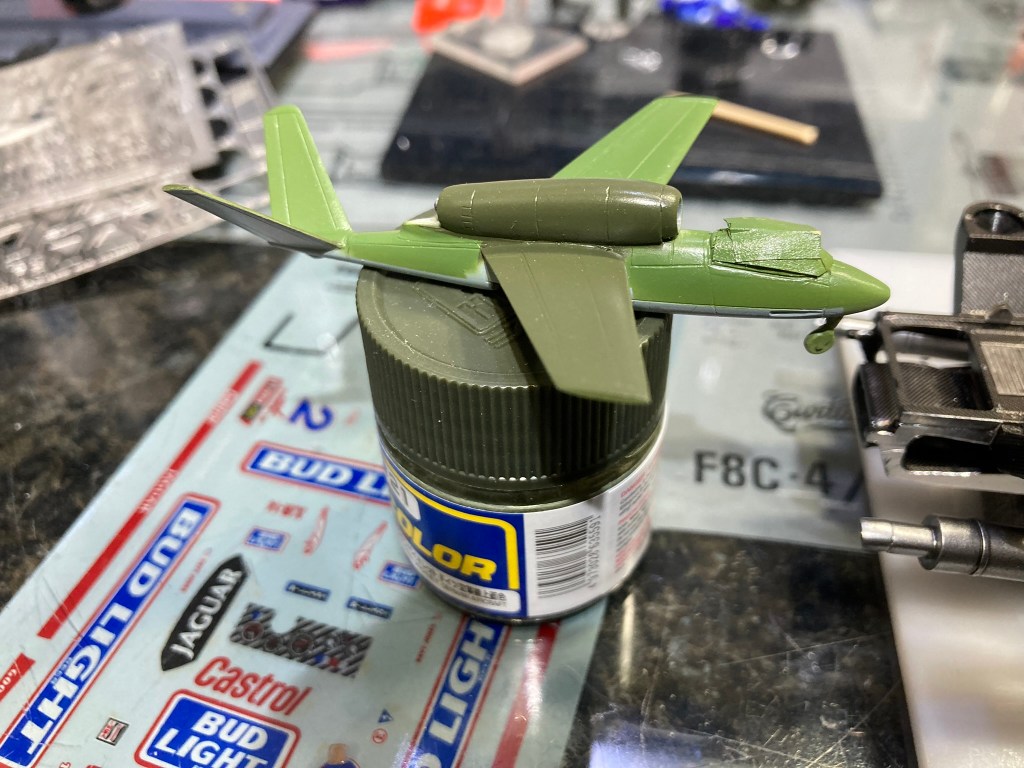
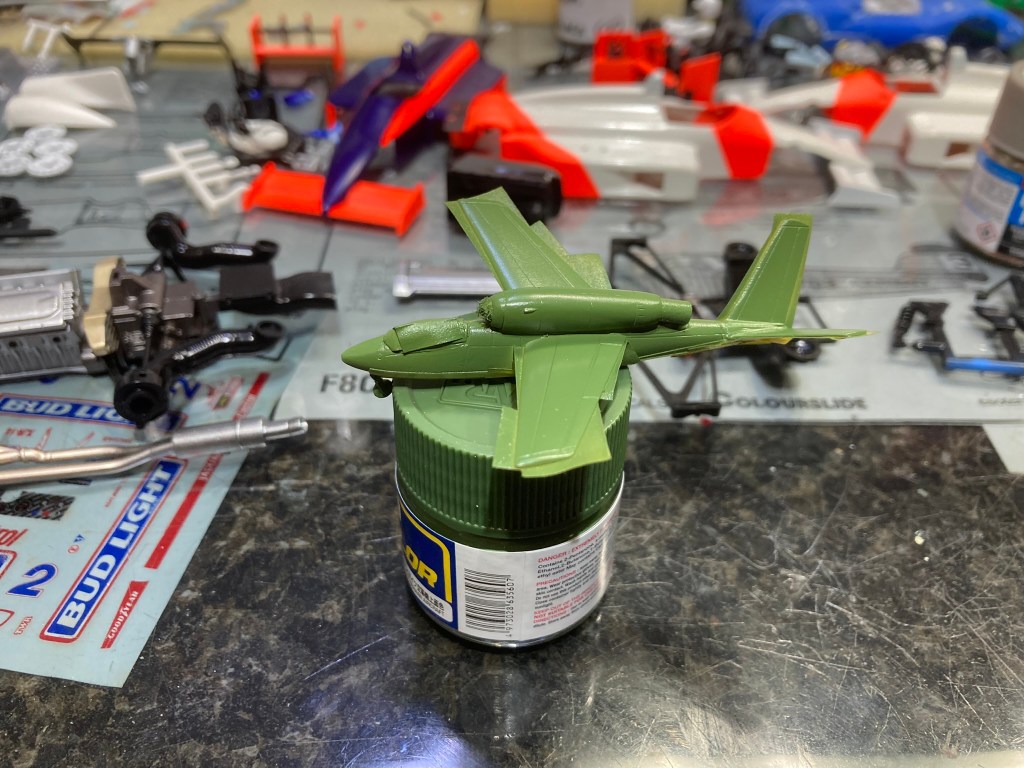
One of the many Plastic Model Clubs I am an active member of is an informal group that meets (almost) monthly in near Purcelville, VA. Been meeting with this group of guys for more than 20 years. Every year we pick a “Build the same kit” subject. For 2023 it was “Any German Jet from WWII (including Luftwaffe 1946 aircraft)”. As I know my time is more limited than ever, I picked one of the several 1/144 Luftwaffe kits I had in my stash. The Brengun He 162D. This was a version that had swept forward wings and a “V” tail. It was never built or flown, so a Luftwaffe 1946 subject.
The kit is very basic. It does have a cockpit and wheel wells. I behaved myself and set out to build it OOB. Most of the year I was able to dabble a bit here and there, always missing the color I needed to paint, so that slowed me down. I used Mr Color Exclusively on this build, except the Polly Scale “wood” color for inside the Engine Nacelle and Tamiya LP-30 sliver for the Intake Spike. This paint is so thin when you spray it you get the coverage you want in 1/144 and doesn’t obliterate the details that you get with Testors or Vallejo paints (YMMV). The fit is rather bad. Parts can be too short, too long, or too large. Lots of test fitting and using styrene shims for a proper fit.
Right now, I have the exterior painting done and ready for decals. I picked the RLM 81/82/78 scheme to stay away from the feathering and mottle finish of the others. I know my limits and my sanity well enough to stay away from that.
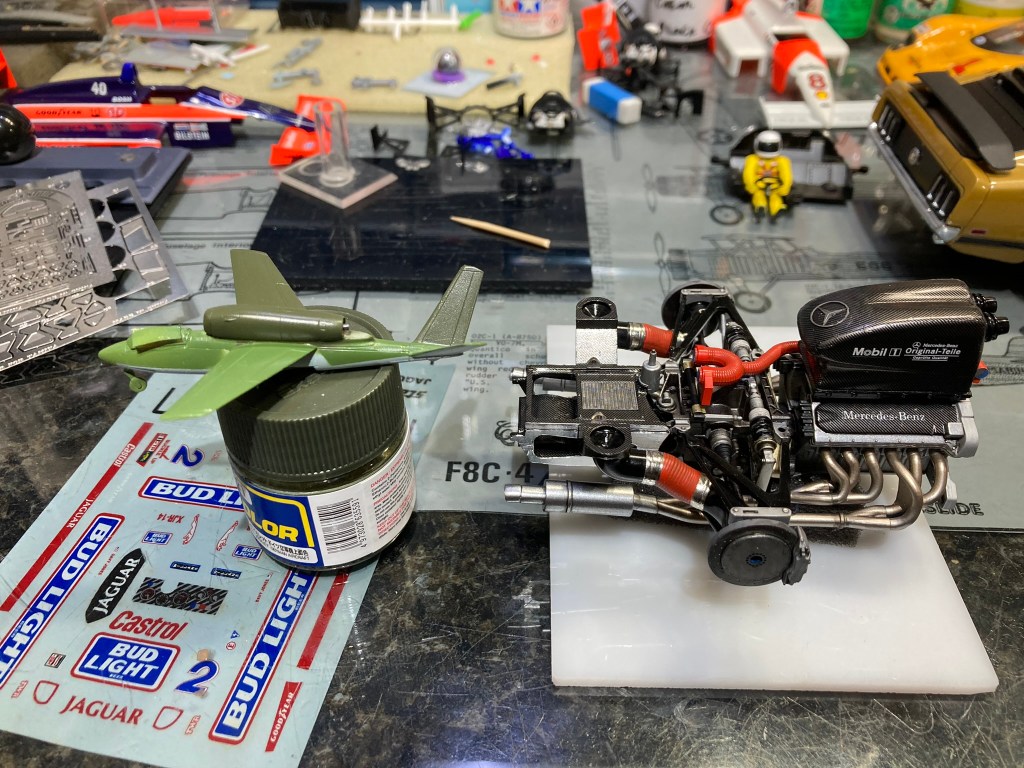
I included some picture of my build progress and one to compare the size vs the Mercedes CLK GTR engine that has had most of my attention of late and a link about the He 162.
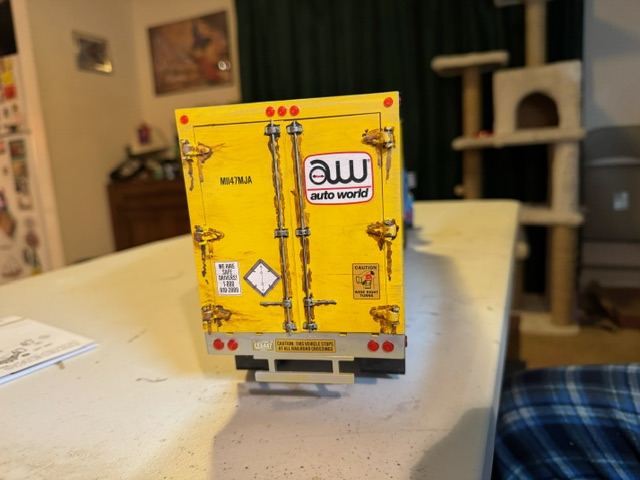
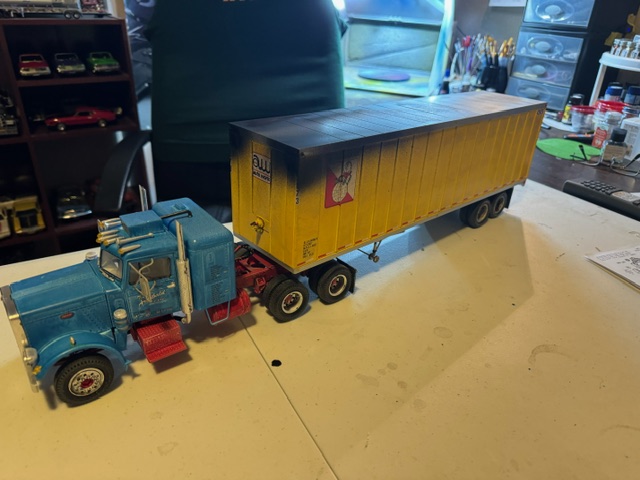
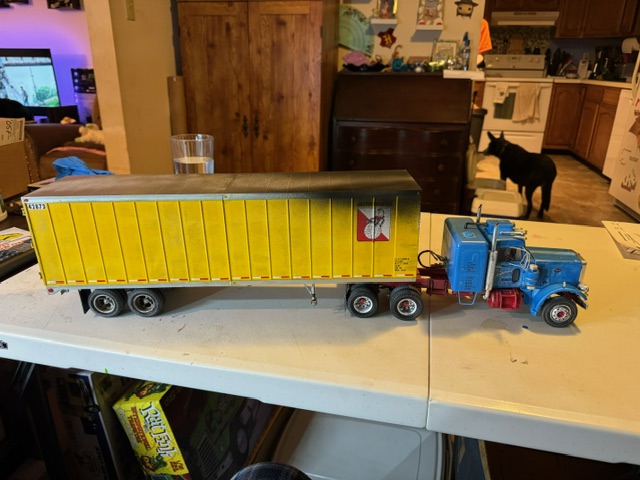
Started off with the AMT California Peterbilt and mated it with the AMT Big Rig Semi Trailer. Both kits had a fair amount of casting flash but not a big deal. Goal in mind was to make a beat up tired setup.
After initially assembling the chassis, noted it was warped. Had to massage it to straighten. Other minor issues were the instructions aren’t the most clear as far as the rear axles/brake chamber locations. Also there are no hood hinges which is a little disappointing. So not a super fan of the kit, but I think it turned out well.
Into the trailer……this kit just sucks. Lots of fitment issues and seam filling needed. The tires are rock hard and I couldn’t get the rear door/hinges to co-operate. I ended up gluing the doors closed. Instructions are only marginally better than the truck.
Anyway, I used Tamiya acrylics for all the colors and ACE house brand MATTE clear. Just so happens the clear reacted with the Tamiya and actually improved my beat up, faded look. This was my first real attempt at weathering and other than the rear of the trailer, I think it turned out well. This is headed to the NOVA show, so we’ll see how it does.
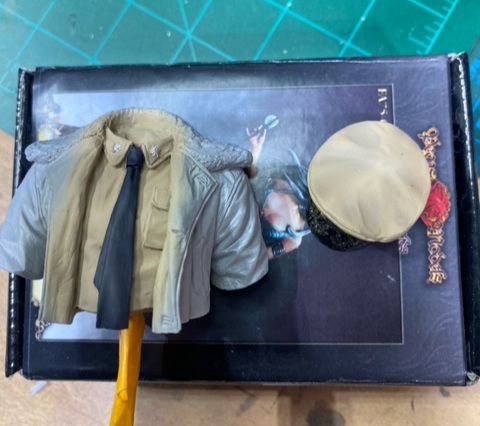
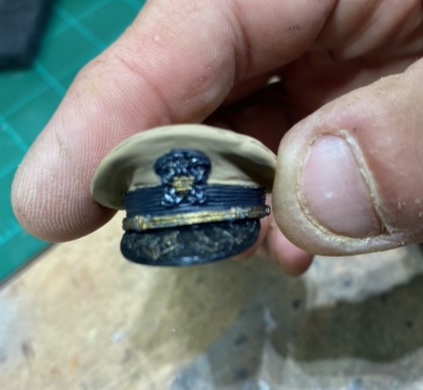
Hey gents. Here is the start of the 1/10 scale Naval officer bust. The box art had the figure wearing Navy blues but I prefer the khaki uniform. The cover (hat for you landlubbers) is done and the khaki shirt is pretty much done. I mixed some AK lacquers to get the khaki color then added a darker and lighter shade of the mix for the folds. The black tie is AV vallejo black-grey with a wash of flat black. The cover’s band around it had the same application color but AV vallejo shiny black was used for the bill area Off to the face and the leather jacket!
I finally had some time to work on my 2024 “Build the same kit” project for another club I belong to. 2024 is any “Civilian Vehicle”. Hopefully this will be one I will actually complete.
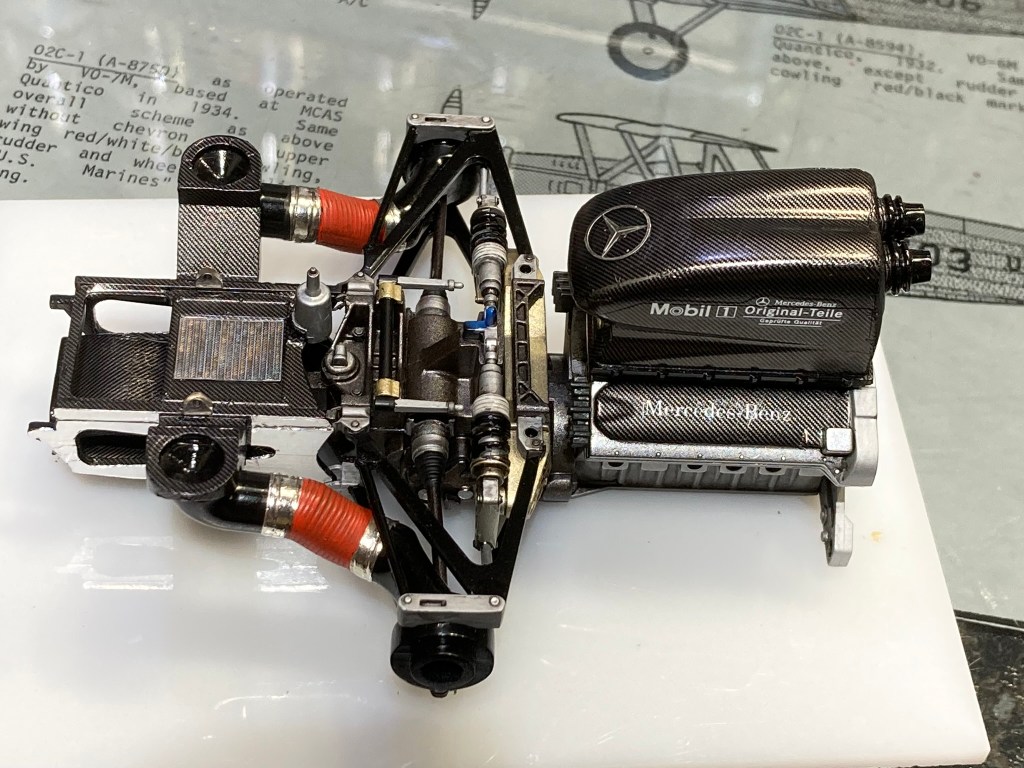
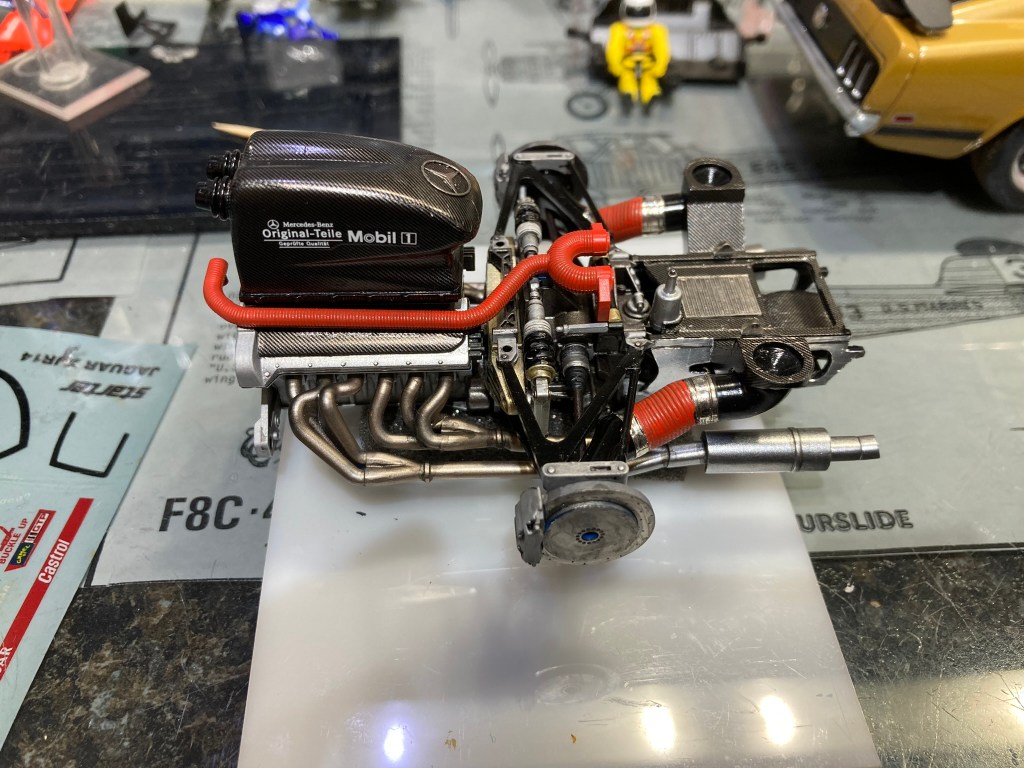
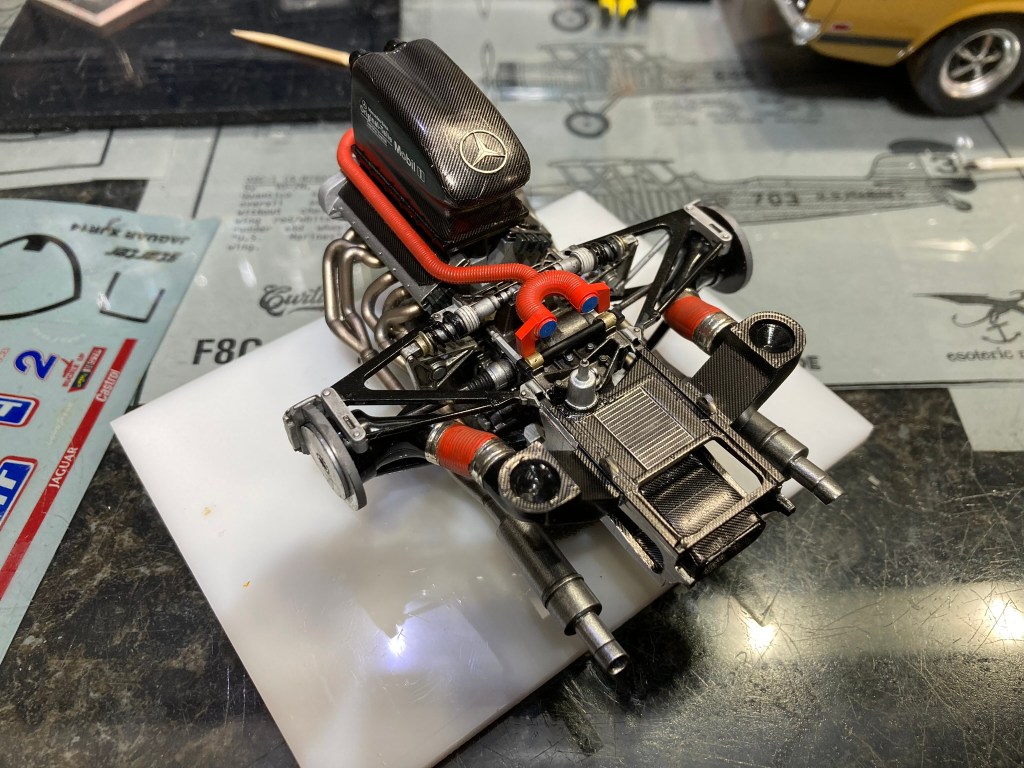
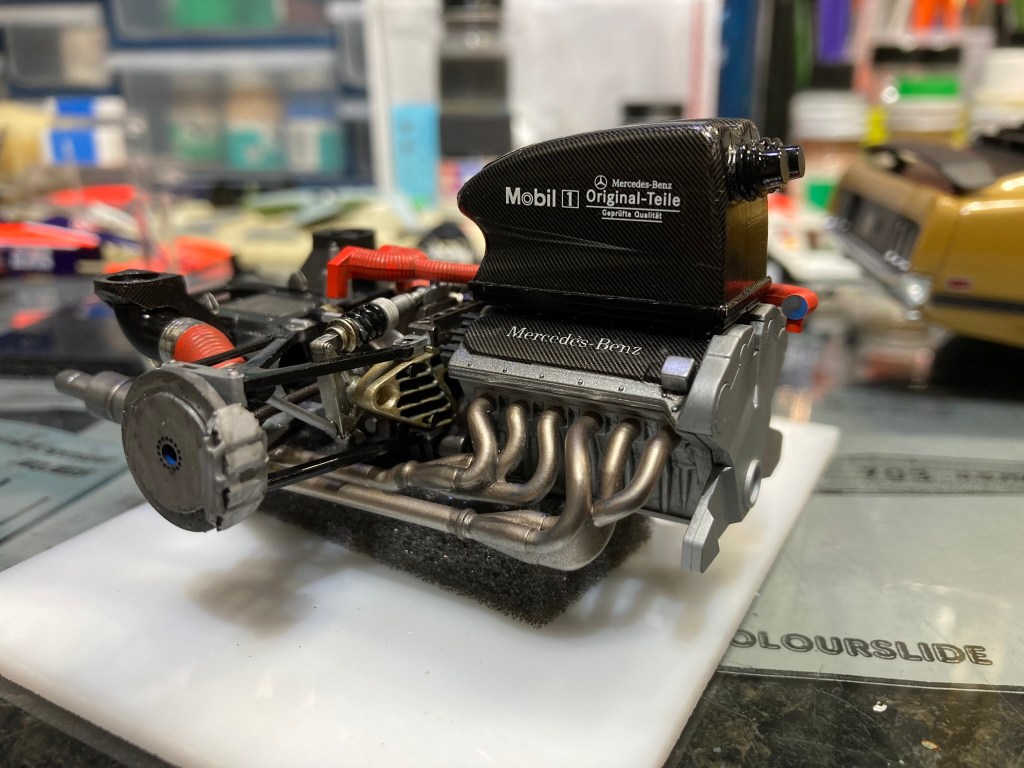
My subject is a 1/24 Mercedes CLK GTR. A 1998 FIA GT 1 Sports car. This particular version is know by it’s Sponsor “Original Teile” , a blue car that features a “wrap” that exposed the rear engine. I had spent a long time gathering the parts and references to build this car. My original intent was to use the “Clear” body version from Tamiya, but the rarity of this issue was to much to resist selling it, so after finding a an open kit at a show in 2023, I also sold my sealed kit and got to work.
Picture of the Kit, the almost useless Photo-etch set, Scale Motorsport decals, and Bare Metal Foil that I am using on this build.
This kit has a ton of decals. Almost the entire body, chassis, interior, and part of the engine was Carbon fiber. I’m guessing 3-4 sheets of Scale Motorsports 1024 Carbon Fiber decal sheets will be needed. One of the packages from them has a pattern printed on the back of the sheet to allow proper fitment and placement of the decals. Carbon Fiber has a grain like wood. So one tries his best to make it match. It’s also very thick as it has a very slight texture to it. So it’s not a project to try if your “decal game” isn’t your strength.
After Priming and painting the body, I worked on the engine. Tamyia kits do follow the typical American Car kit assembly pattern: engine, interior, chassis, & Body. I finished the engine over the weekend. At least as much as I can until it is installed into the chassis. The block was pained Tamiya Flat Aluminum. The Transmission was Gunze Sango Burnt Iron, and the crash structure Gloss black. The Heads and rear part of the exhaust were painted Bare Metal from Model Car Garage. The exhaust headers are Alclad Pale Burnt Metal. Some of the more exotic colors you see are from Tamiya LP line of colors: Titanium Gold, Titanium Sliver, Gun Metal, Burnt Iron, and Gloss Aluminum to name a few. As you can see, there is a bunch of Carbon Fiber. The Air Box, crash structure , Heads, and rear wing supports all required decals. The Outside of the crash structure had a heat reflecting finish, so I replicated it using Aluminum Bare Metal Foil.
The Photo-etch set has a lot of parts, most not needed and over engineered. I did find some useful, however. For the engine, I used the transmission cooler and a pair of brackets . The set provides parts to re-build the rear wishbones and some of the support structure. Lots of micro sized rivets and tubing to put together that didn’t add one thing to the kit, and wasn’t any better than the kit provided parts.
I will provide updates as I complete sections. Interior is up next, but first I need to finish my 2023 “Build the same kit”- German Jet Aircraft from WWII.
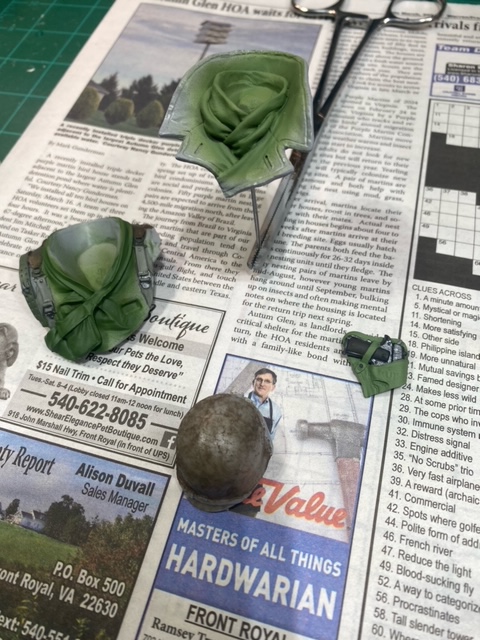
Hey gents. Here is a start of a bust of Captain Dick Winters of Easy Company. I am doing this on reverse, in that I will paint his jacket last and doing the relief work first (straps and stuff). I dabbed a light layer of Ammo non-slip on the helmet to give it that rough steel texture. Will let it dry a full day before priming it and eventually painting it. The pistol holster and the more green looking straps were AK lacquer airbrushed color but the off-green and browns are AV Vallejo acrylics brush painted. The jacket will be AV Vallejo as well and brushed on.
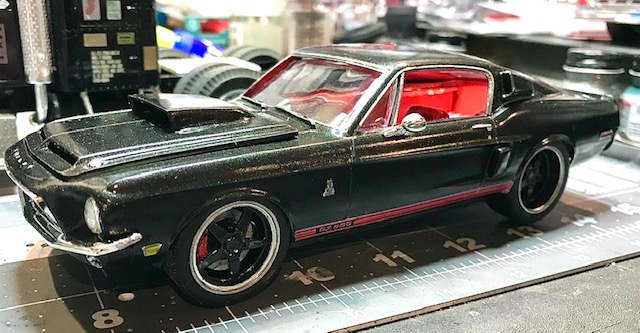
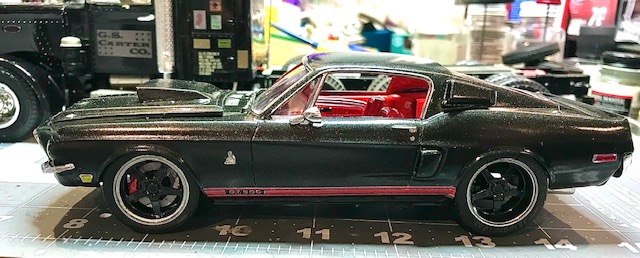
Here is the Shelby GT500 all finished. The little details of this kit were nearly its undoing. The grille/bumper assembly fit is atrocious, the exterior mirrors are cartoonishly ill proportioned. The interior tub was molded with the alignment pins crooked making the interior sit funny relative to the body. All overcome with patience and profanity. Lol