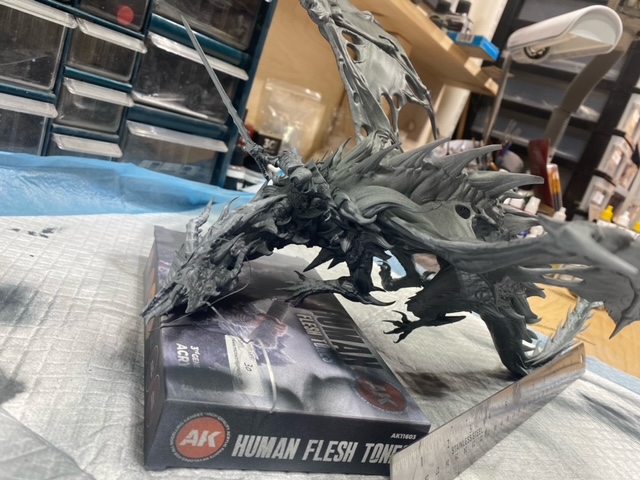
Gents. Here is layer 1 of the colors of the ruined castle the dragon goes on. A lot more highlighting, shading, and washes to go. Plus some more updated photos of the dragon.


– Chris

Gents. Here is layer 1 of the colors of the ruined castle the dragon goes on. A lot more highlighting, shading, and washes to go. Plus some more updated photos of the dragon.
– Chris
I’ve decided on two kits I want to build, hopefully in time for the Richmond show, but if not then at least by April for NOVA’s. An ambitious goal given how slowly I build these days, but I need a challenge to get me motivated I think.


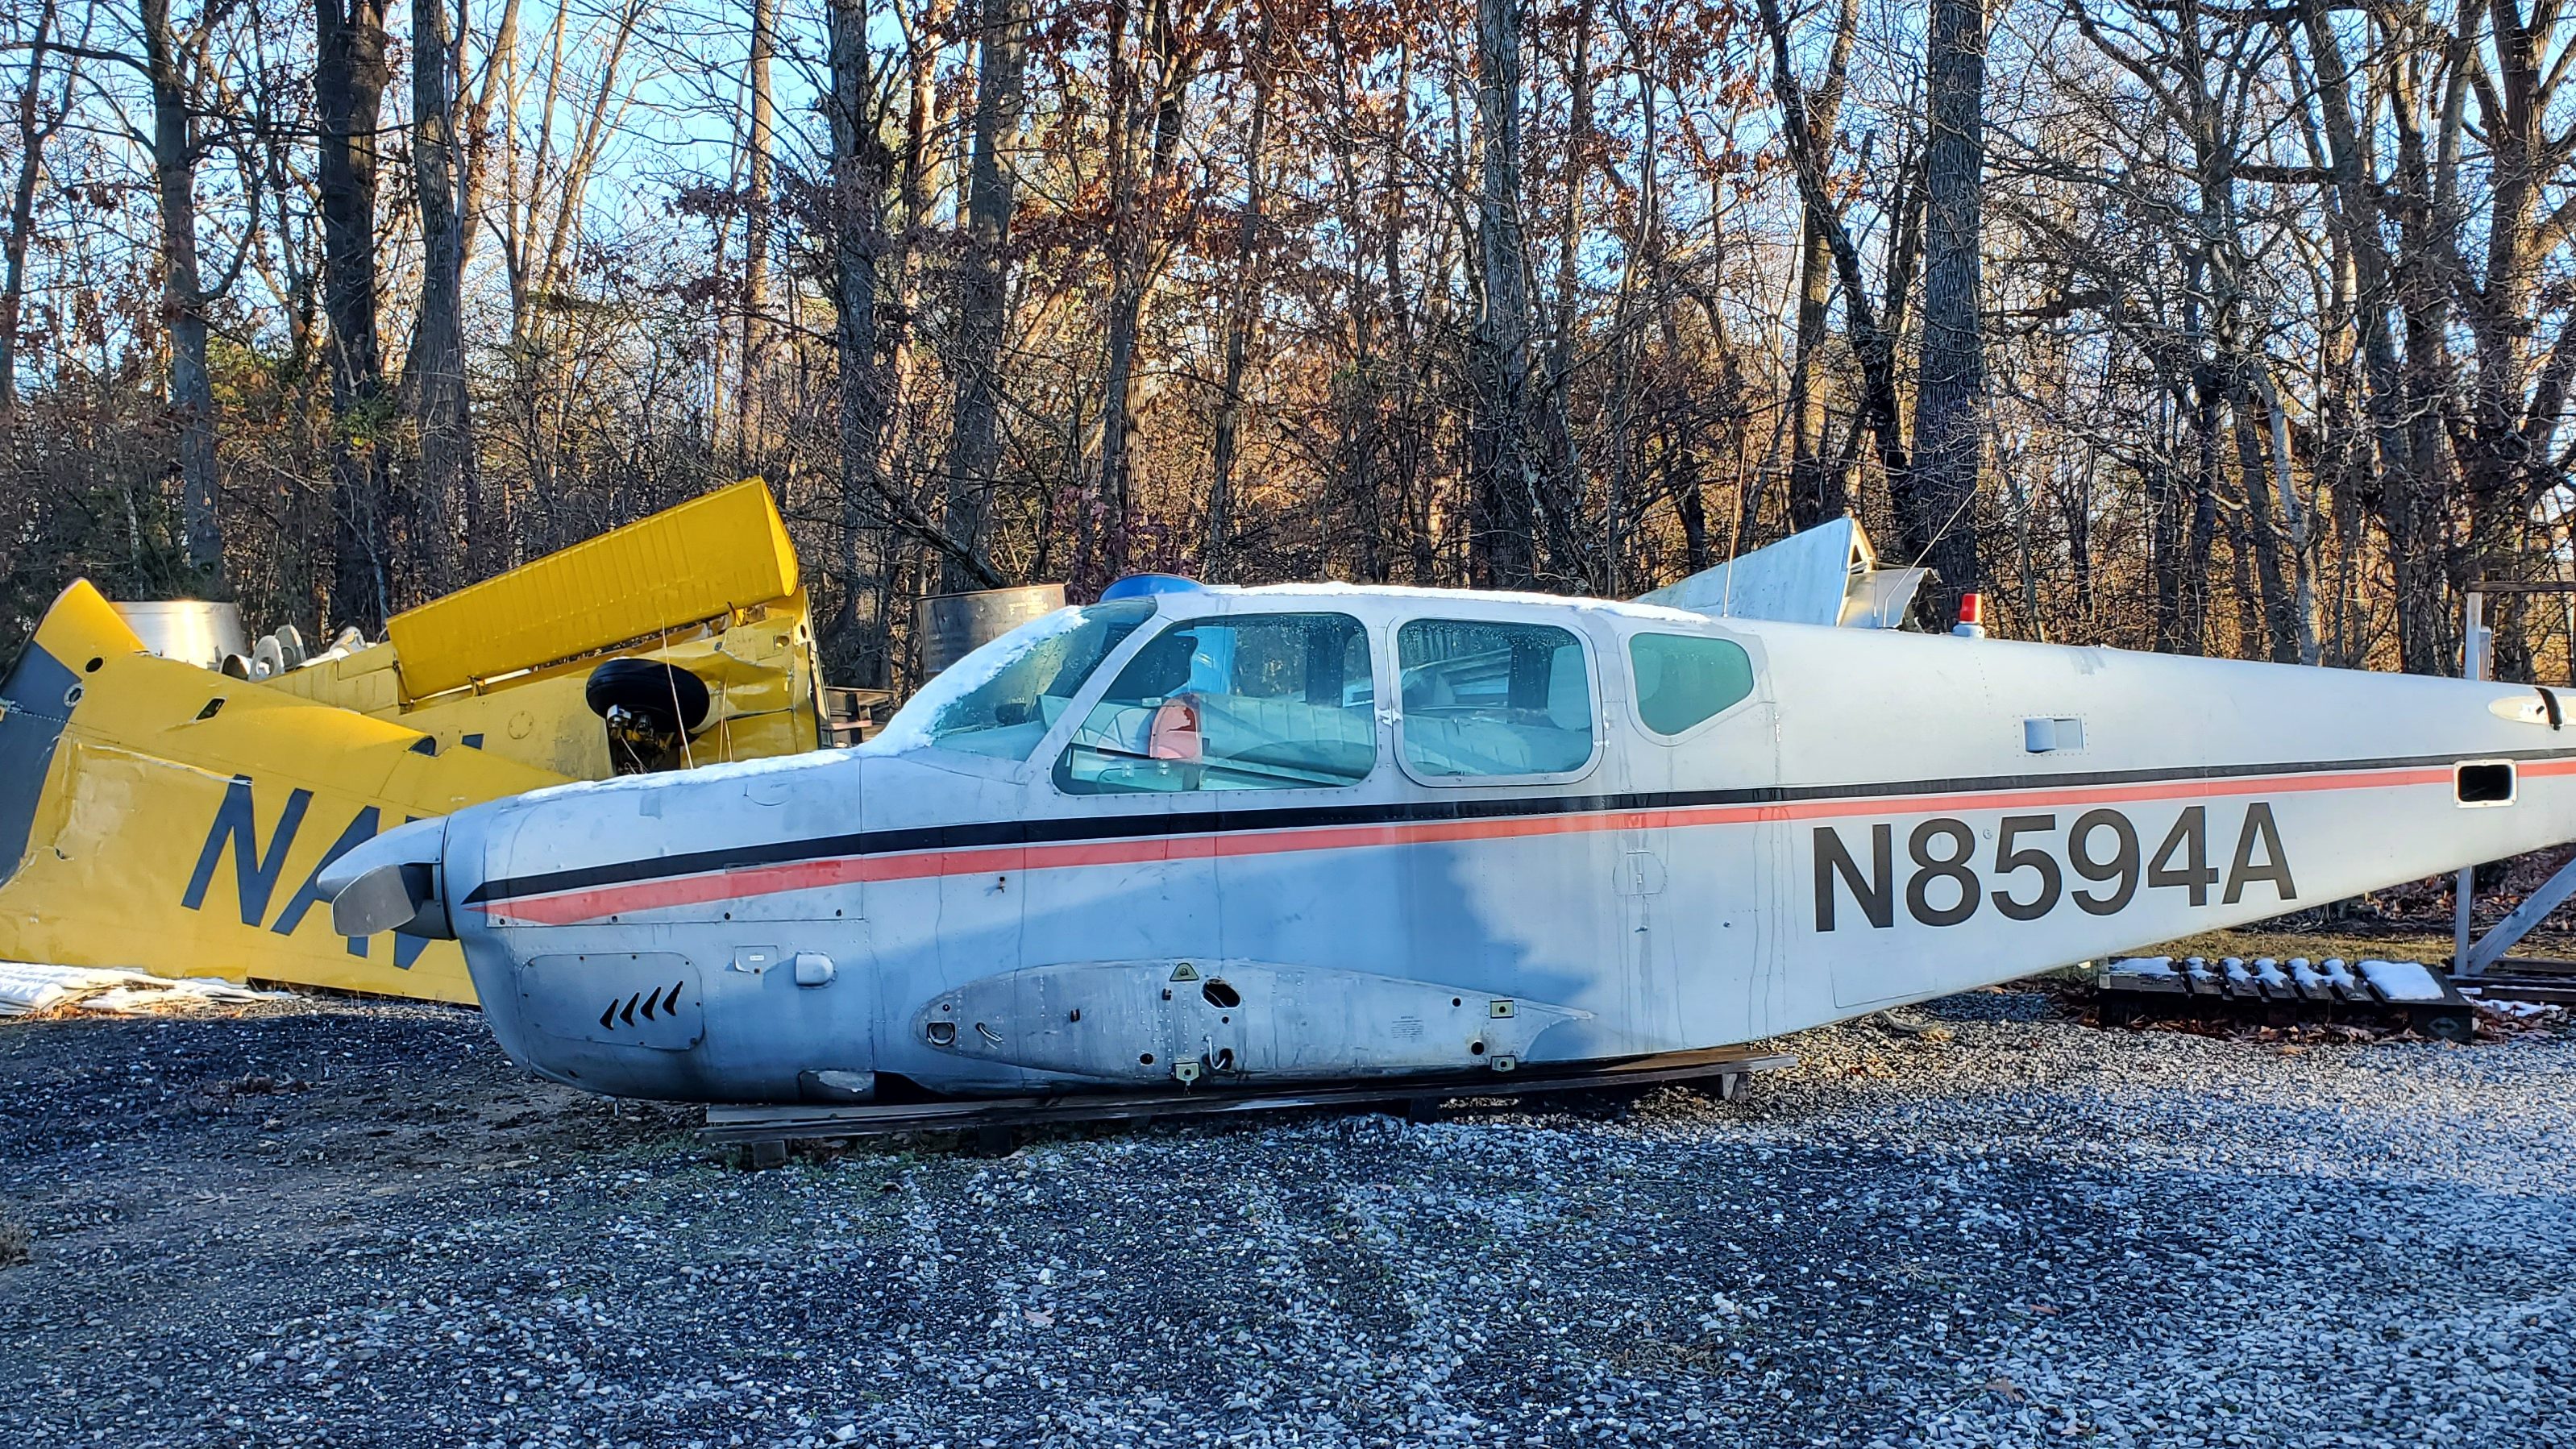
One is a 1/48 Bonanza. This will eventually be kept on my desk at work, where we work with these aircraft regularly. I’ve only ever built 2 other 1/48 planes, but the Bonanza is small so it won’t feel too massive I hope. Looking at how poor the landing gear details are I’m probably going to build it gear-up and utilize the stand they provide. Goal is to make it look like one we salvaged last year. Grey paint schemes aren’t very common and I think it looks more interesting (and easier to paint!) than white.
To recover from such a massive plane, the other is a super tiny 1/35 Harley WLA. My plan is to modify it and turn it into a post-war “bobber” by removing some parts and chopping up others. I’ve started on this one already and it’s going to be quick I think. Already chopped the rear fender, removed the front, etc. Still need to decide on a color and then figure out how to paint it….going to have to use a brush for most of it I imagine. Haven’t decided on what kind of base to put it on but I think it’s definitely going to need something to spice it up a little.

Wish me luck!
-Chad
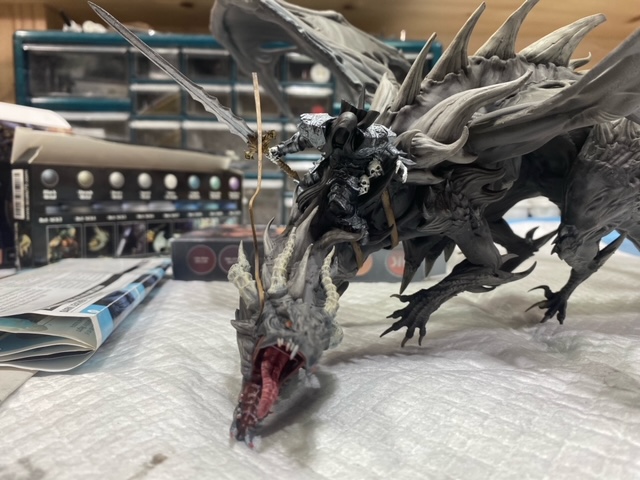
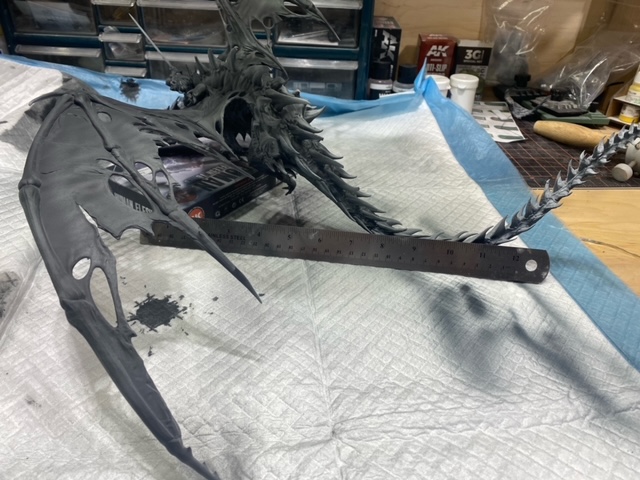
Hey gents. Here are a few photos of the Nazgul (?) and dragon. I put a ruler in there so you can see how big this thing is! I have started putting on via airbrush the initial coat-it has taken over 4 airbrush vials and it’s not even fully covered. Back to the hobby store to get some more paint!
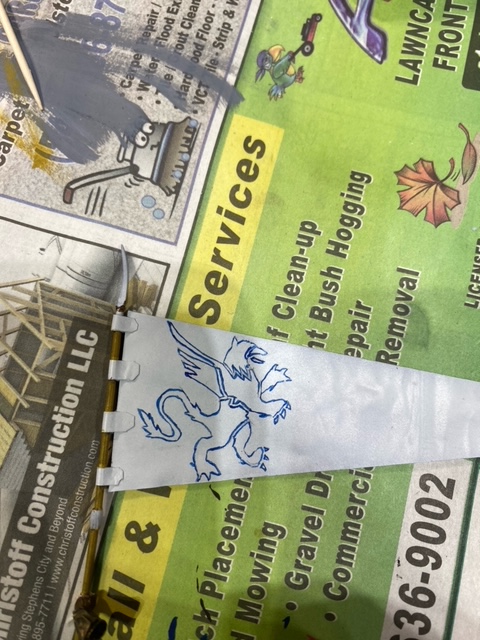
Hey gents. Working on a female middle ages knight. Here is her pennant flag being worked on. That was a bit of fun!

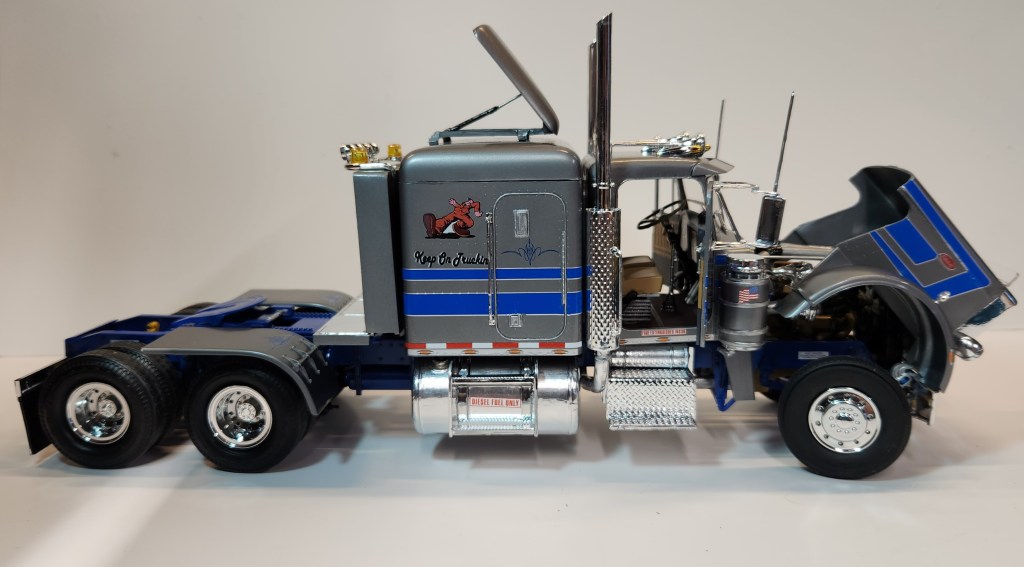
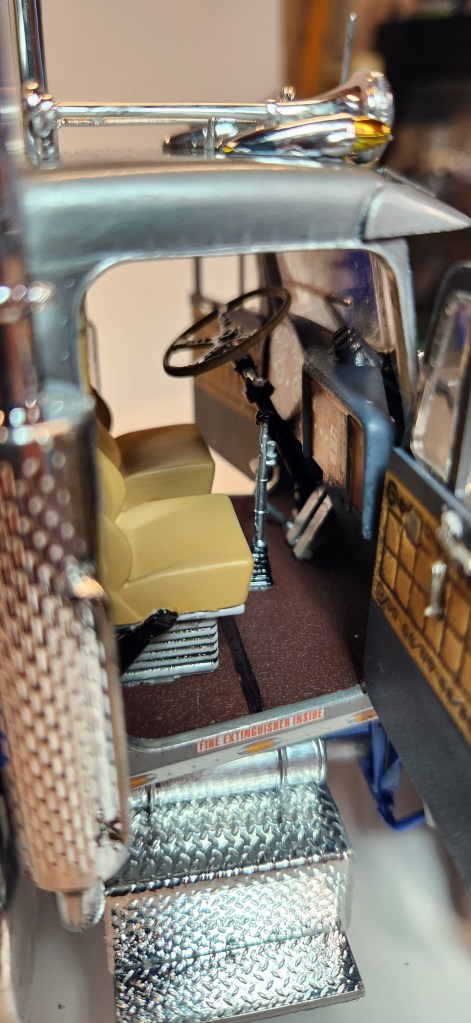
I just completed the 1/25 Revell level 5 Peterbilt 359 conventional tractor. It is quite the detailed kit with cab doors that open and close. I can say overall it’s a great kit with one flaw or exception. The tires that come with it are too skinny and super soft, they tend to compress on the finished model. Many builders have had this problem. I switched out the tires with some AMT truck tires and they look great.
The tractor is pretty much a box build with only a couple additions. Tires, aftermarket decals “Keep on trucking” made by Modeltruckin.com Jerry Reeter. The tool box on the rear of the sleeper was scratch built as the tool box comes as a flat piece of diamond plate with doors. Expanding it looks more realistic. The fuel tanks were wrapped using metal AC tape giving a more realistic metallic look. I added an Italeri light bar to the top of the tool box with emergency lights for an industrial look as well.
One struggle other builders may encounter is the door hinges. A bit tricky but easily solved.
Kit decals are quite nice as the stripes laid out cleanly.
– Scott


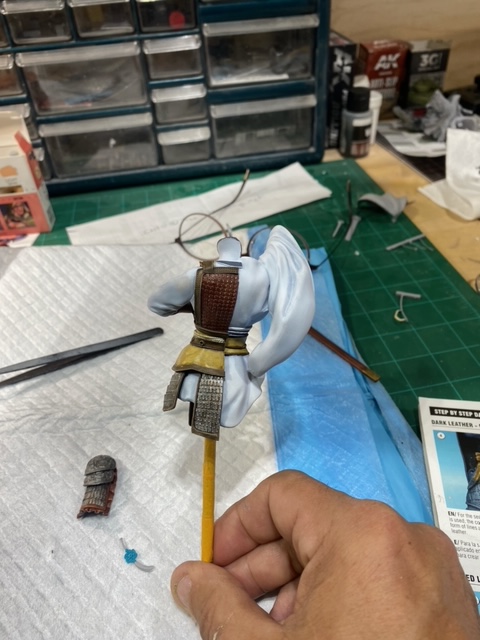
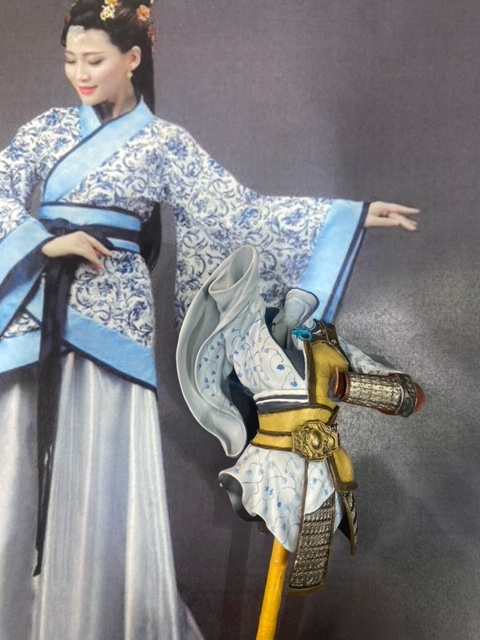
Hi Gents. Here is the Chinese female warrior bust so far. Just about set to paint in the oriental-themed flower print on the blue blouse. Wish me luck—-I may need it!

Ross has completed another kit in record time. He provided some photos and details along the way but finished everything before I could post a single update! -Chad
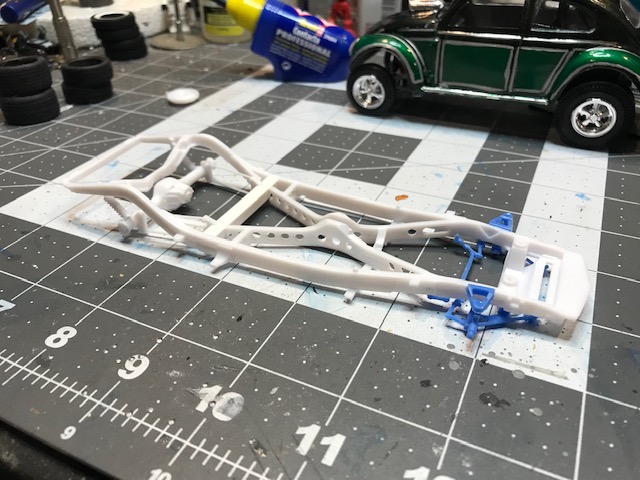
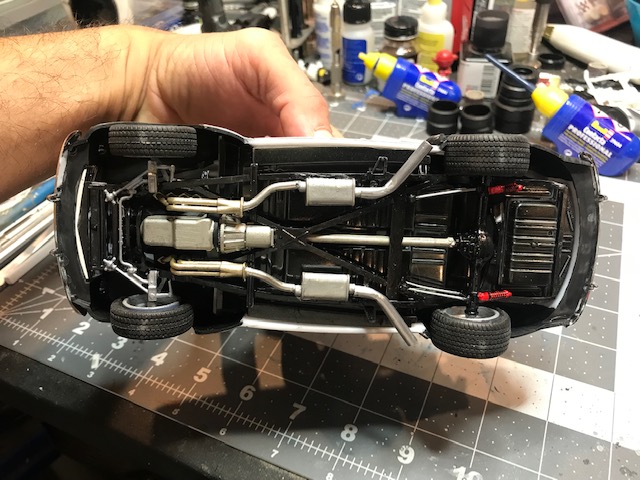
From Ross: The chassis has been converted to independent suspension 65 Nova front and four link rear. The engine is an Ardun overhead valve converted flathead V8 (with supercharger!). Wheels and engine were sourced from Tx3DCustoms with thanks to Jeff Muir for telling me about them.


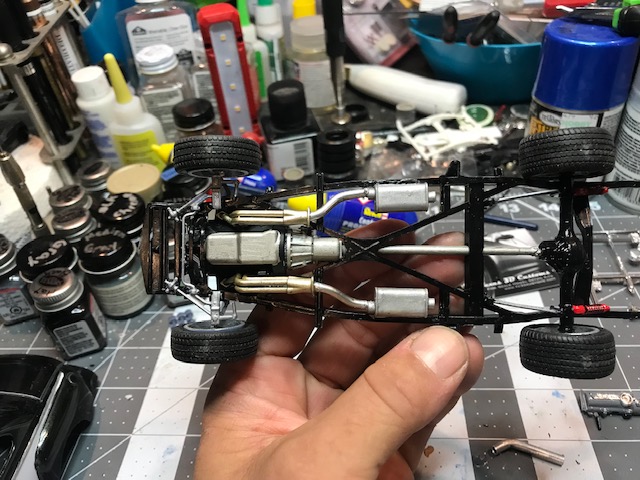
Here you can see the rear seat delete done in sheet styrene, front seats are Porsche 911. Finally the exhaust made with resin mufflers and solder, held together with E6000 glue.

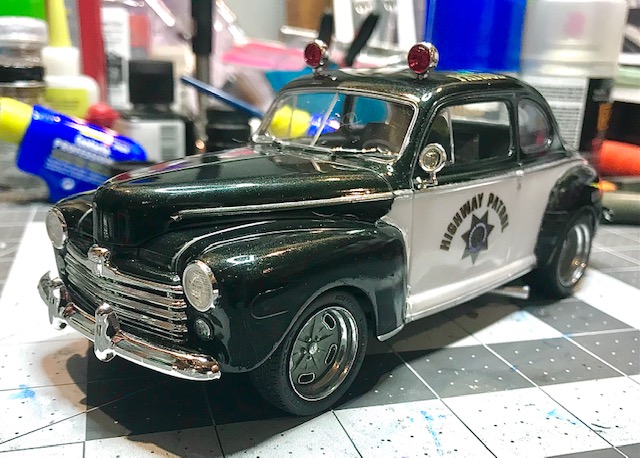
Buttoned up and decals on. The exhaust ended up being solder, resin, and aluminum tube!

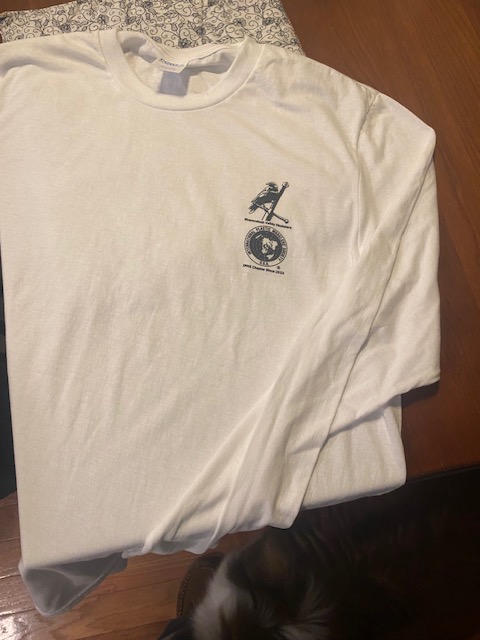
Good day gents, it’s time for a white sale! My wife had club shirts made as a surprise! Here is a photo of one of them. If you would like one, they are $20. I have 8 larges and 4 XLarges, but will order more and extra sizes once these sell out. They cost 16.66 each to make, so the club can make 3.34 off the sale of each shirt. I will bring them to the next meeting for interested buyers. The shirts are a cotton/poly blend and have our club and IPMS logo printed on them.
-chris
No in progress pics of this one. Kit is a Japanese Union Model Co. kit I’m very on the fence about decals, on one hand it needs something, but on the other I don’t want to cover the paint work. What do you all think?
-Ross


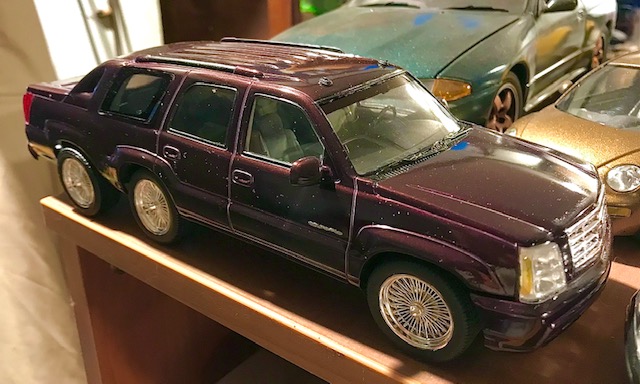
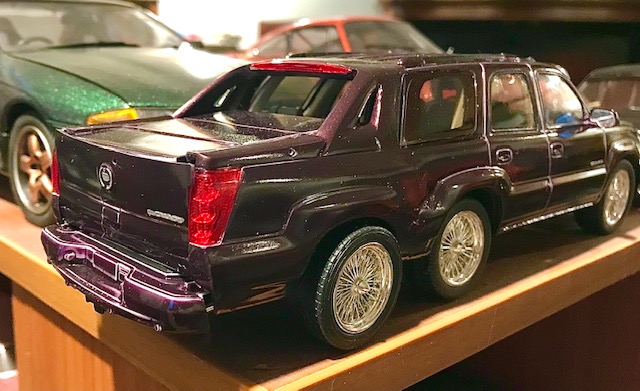
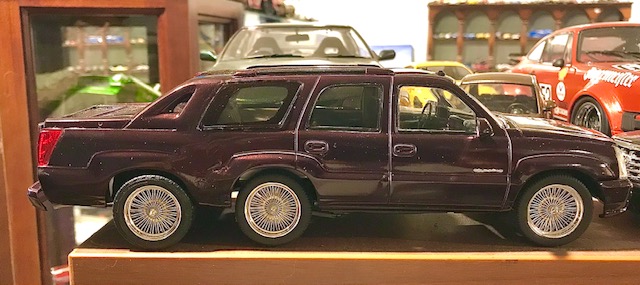
The details are: three kits one AMT Escalade EXT combined with two Revell Escalade kits. The EXT had its rear three quarter cut off just at the C pillar, this was then grafted to the shortened rear end of the first Escalade. The first join and putty work of this can be seen in the first round of photos.


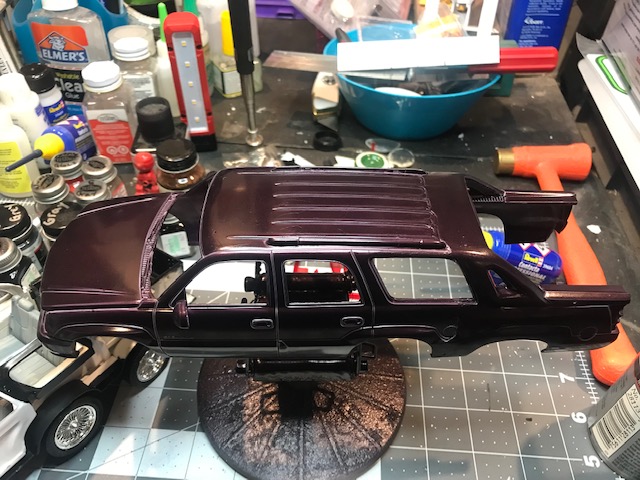
The chassis of the EXT was also sectioned and grafted to the chassis of Escalade #1 for the chassis seen in the first round of pictures. The interior of said Escalade needed to be shortened and reshaped to fit around the bed/box assembly of the EXT it was now joined to.
The tailgate is a combination of Silverado 1500 and Escalade rear hatch skin joined and puttied to shape, while the rear bumper is unmodified EXT. Just another Frankenstein monster from my workbench.
-Ross
