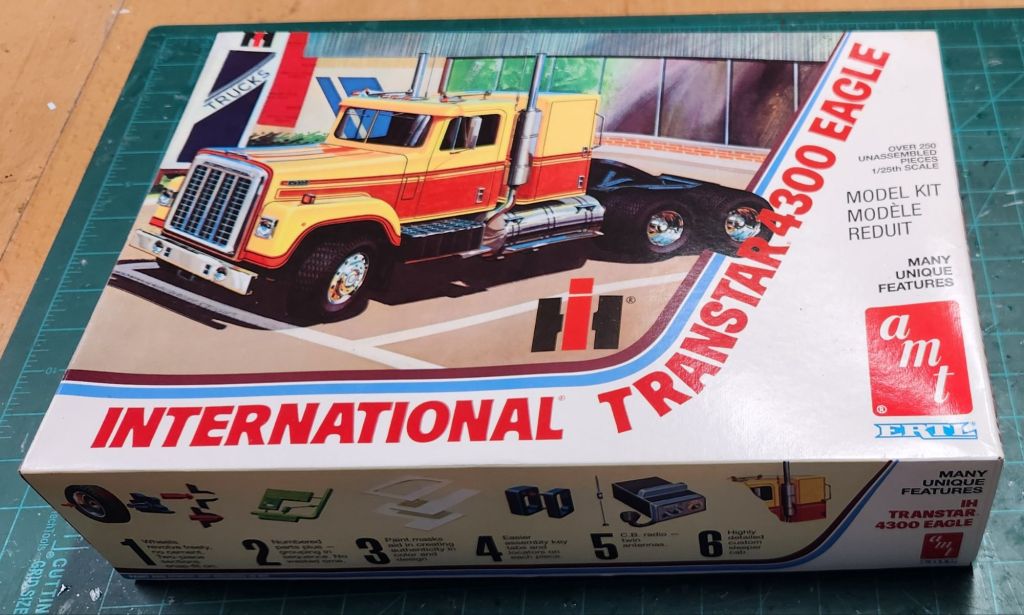
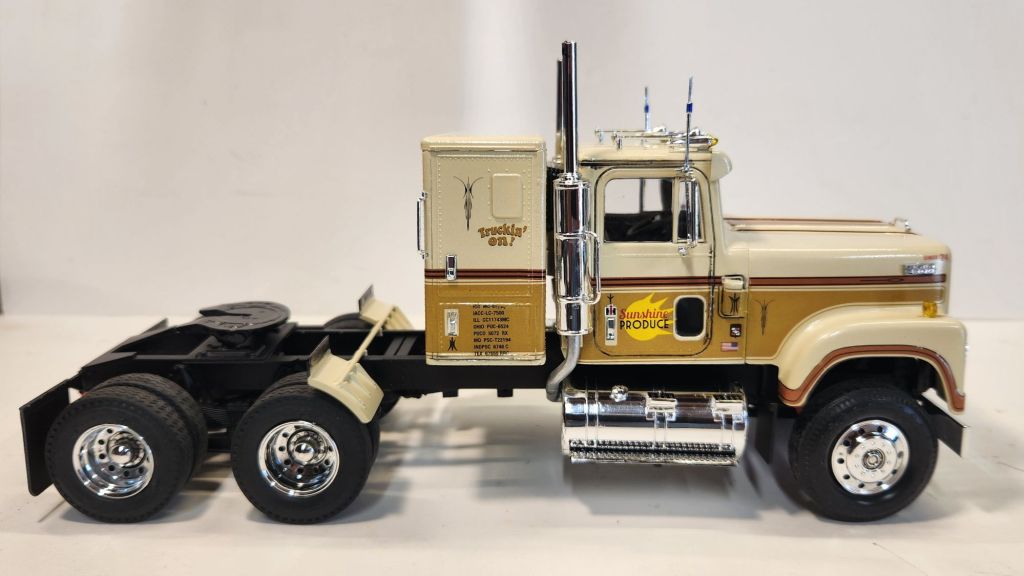
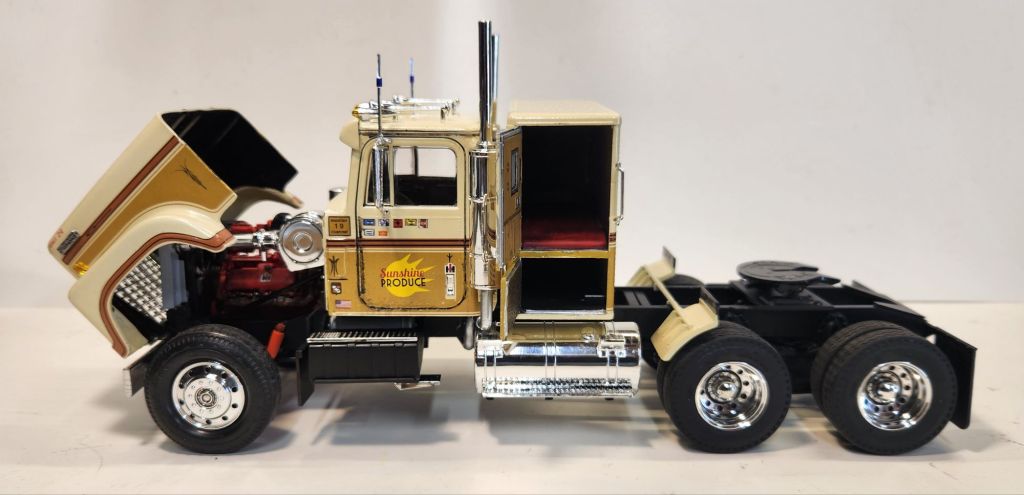
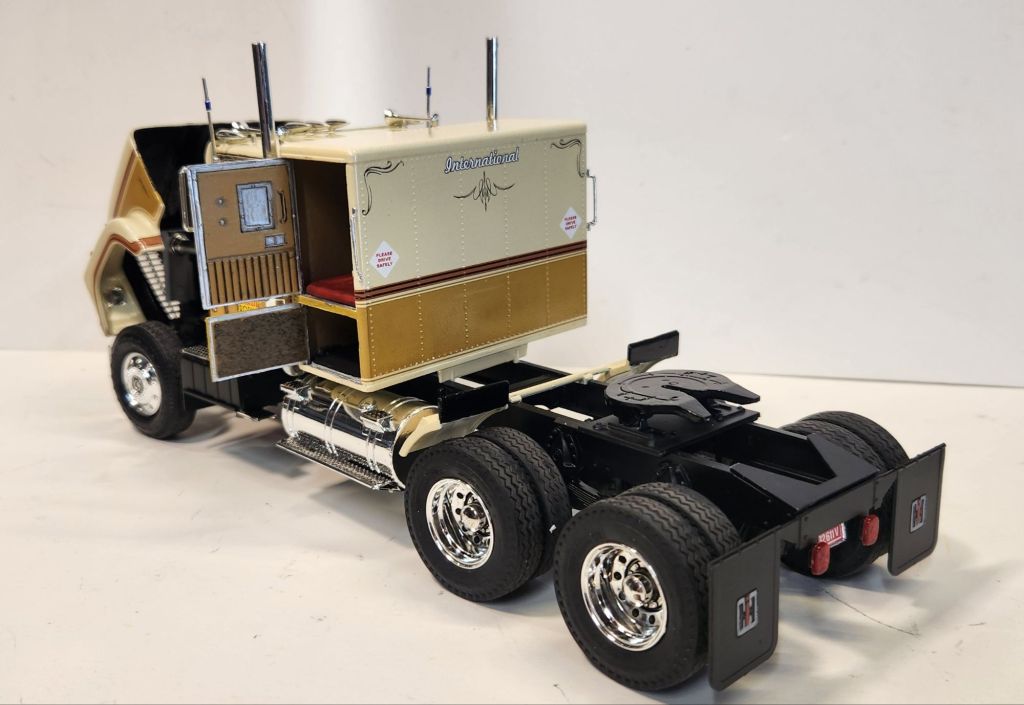
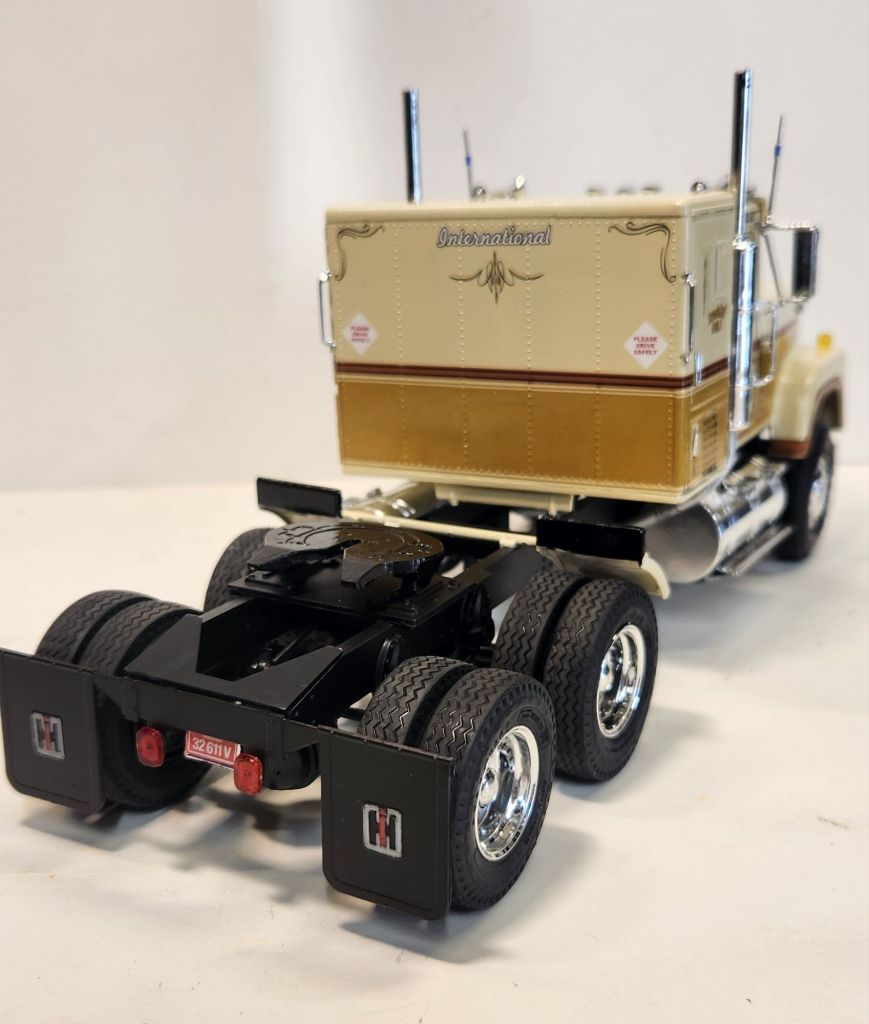
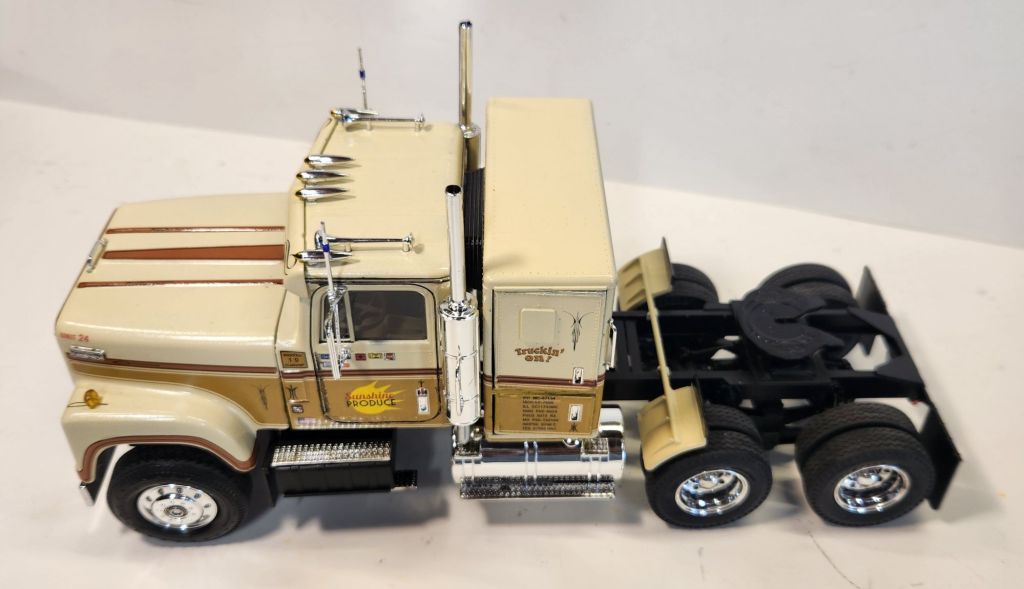
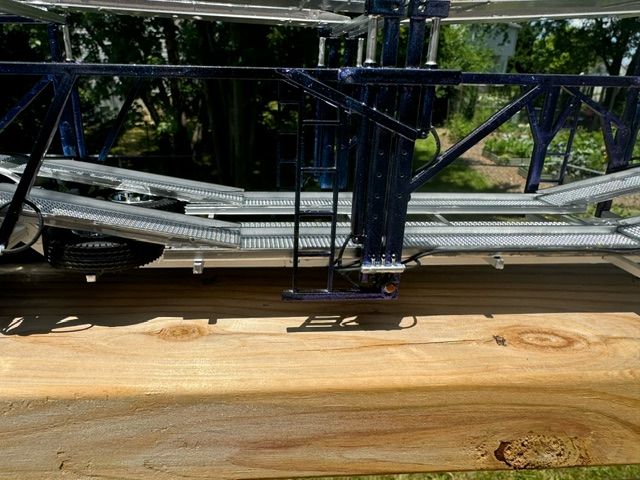
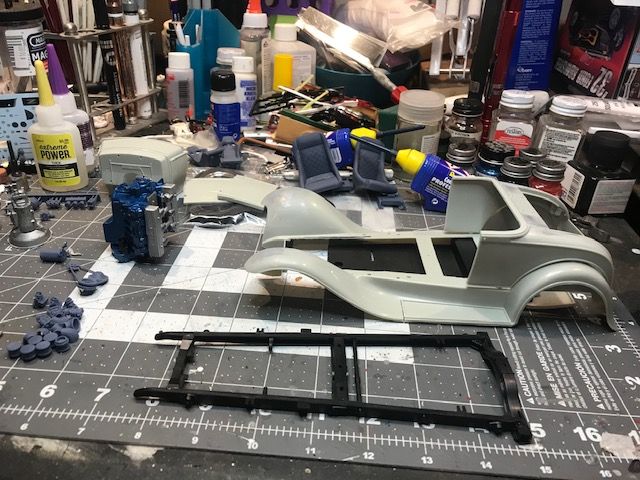
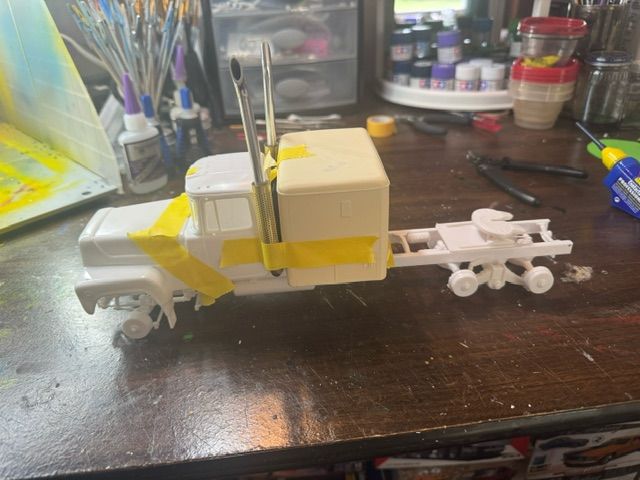
Latest build completed. AMT 1/25 International 4300 tractor has been completed. It’s a nice kit with little flash on the parts. The assembly is quite precise as parts fit very well. There are 2 issues a builder of this kit should be aware of.
The front axle needs to be moved forward 1/4 inch. The front wheels then will then be centered under the fenders. The 2nd issue is the windshield. It does have the slight bend in the center and doesn’t fit flush in the cab. Easy fix! Just cut the windshield right in the center using a hobby saw.
I used Light Ivory white for the body base color. The decals are from the kit. The sleeper doors open and close on the drivers side, its a nice feature and the interior details can be seen unlike other Big Rig sleepers. The model build is box stock.
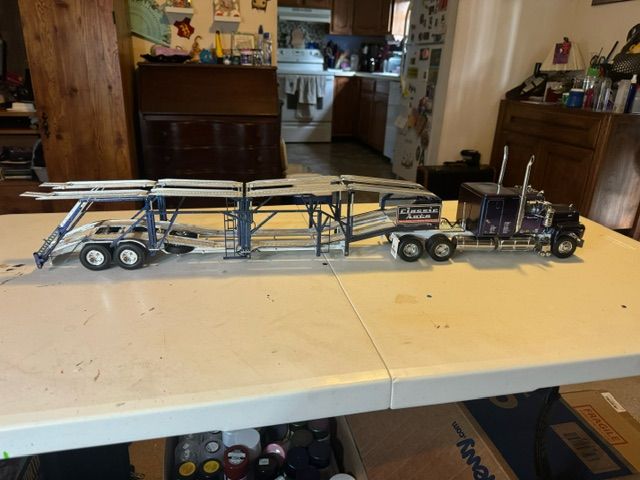
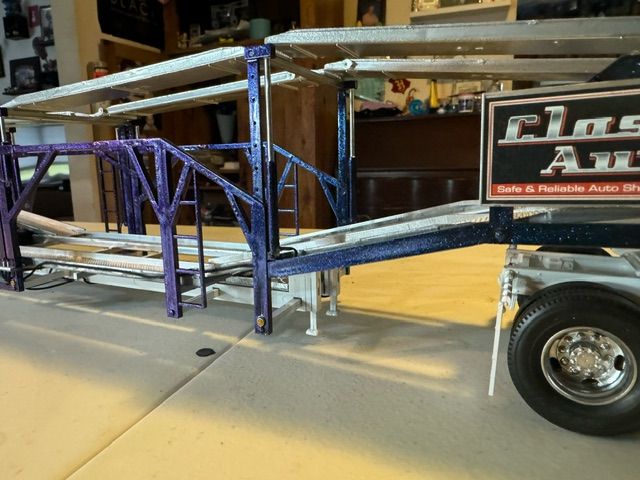
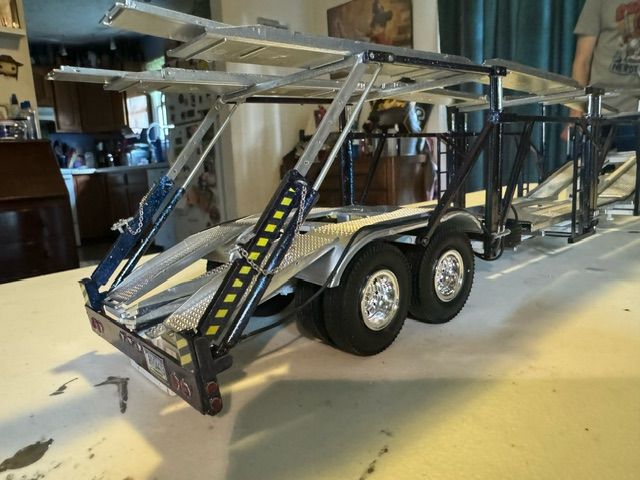
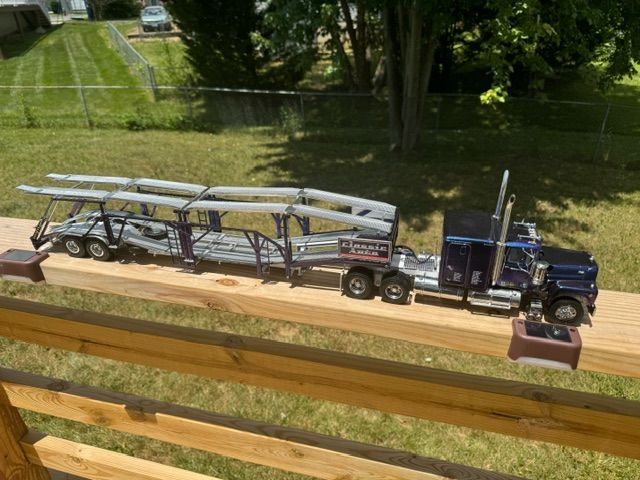
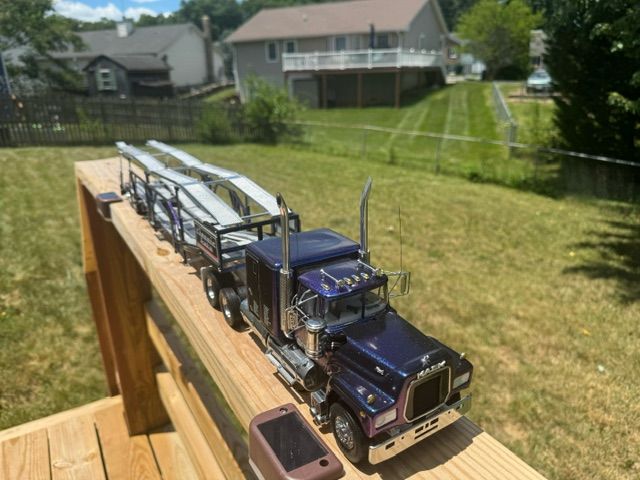
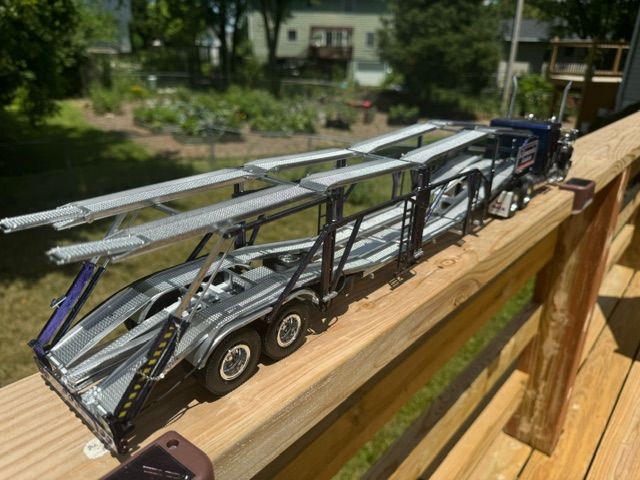
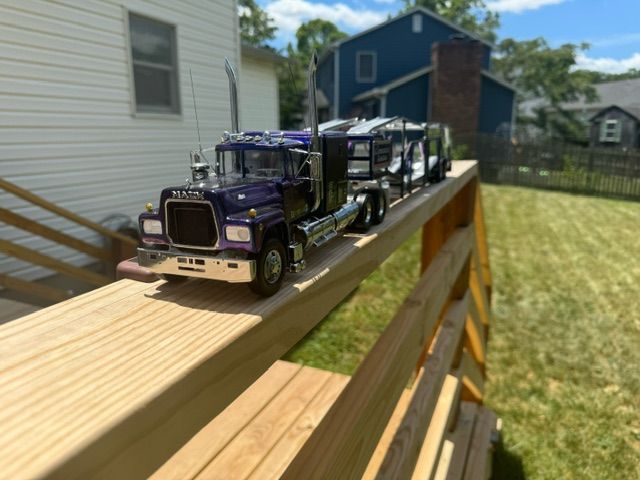
I took the comment of Ross’s about a car carrier for my Mack and ran with it. This is the Revell 6 car carrier painted to match my most recent Mack. The kits looks intimidating, but it goes together very well and without much fuss. The only part of the build that is a pain in the a$$ are the hydraulic lines. The lines have posts to attach them to the handles and the distribution blocks, but not the cylinders. Is I were to build an other, I would drill small holes and add a small piece of wire to glue the tubes to. All in all, u think it turned out well.
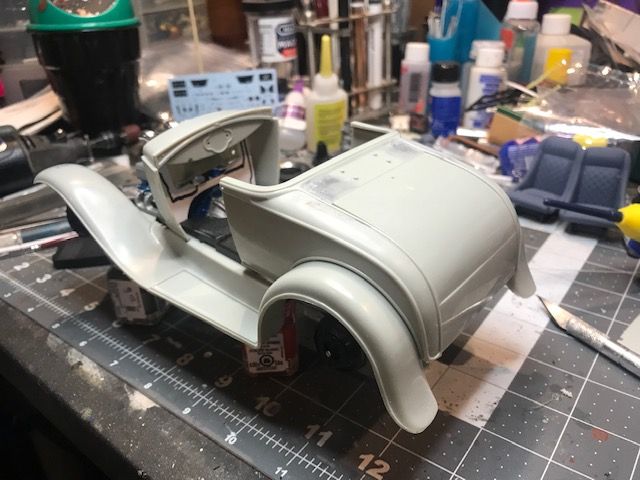
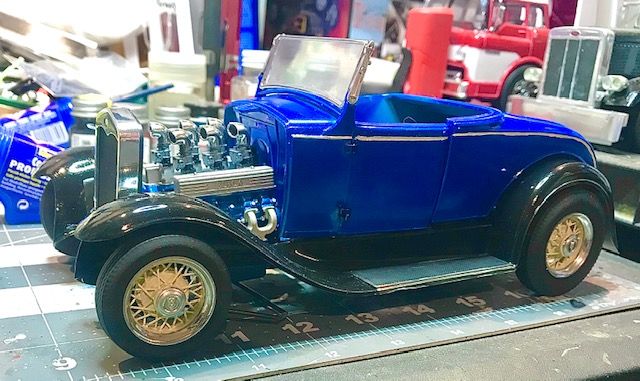
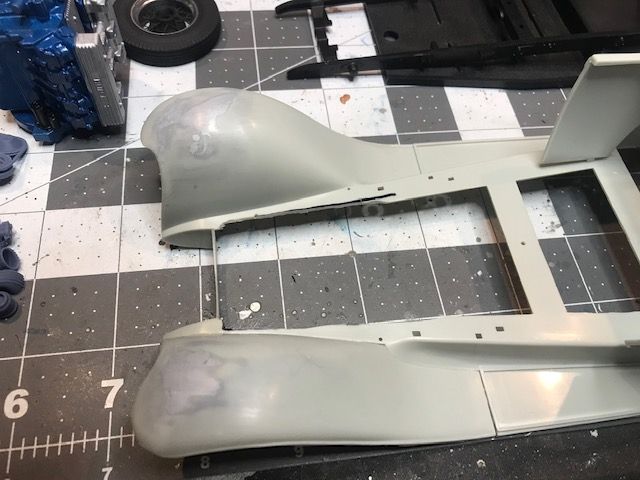
More progress on the Model A. Turns out, getting a Buick Nailhead into an otherwise stock Model A is not for the faint of heart. The frame, fenders, floorboards and transmission ALL required major alteration to achieve the fit you see in these photos. The ride height and stance have also been “adjusted” to my liking. A process which also required extensive reworking of the axles, and mounting points to achieve.
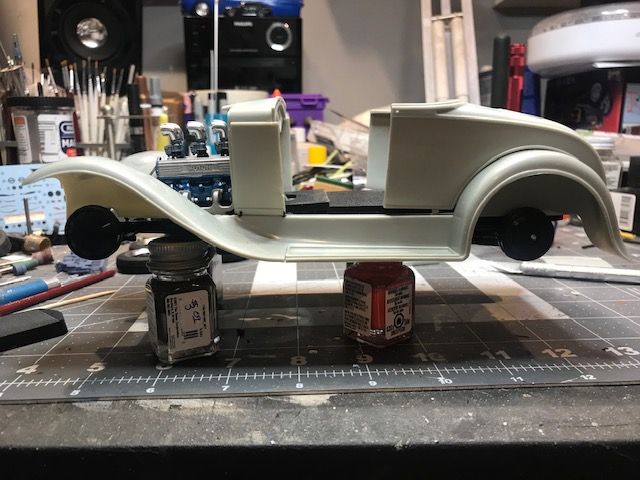
Next up is paint. The plan is a metallic Washington Blue with gloss black on the fenders. The interior will be saddle brown. I’m deciding on the wheel color currently, but am leaning towards a light yellow color called “straw” with matching pin striping of the body.
Body and fenders in paint, body fit to chassis has been finalized. Trying out a pinstripe that matches the wheels, which I really like. Just haven’t decided on whether I need more pinstriping yet. Still have the interior paint work to get done, then it’s on to details and final assembly.
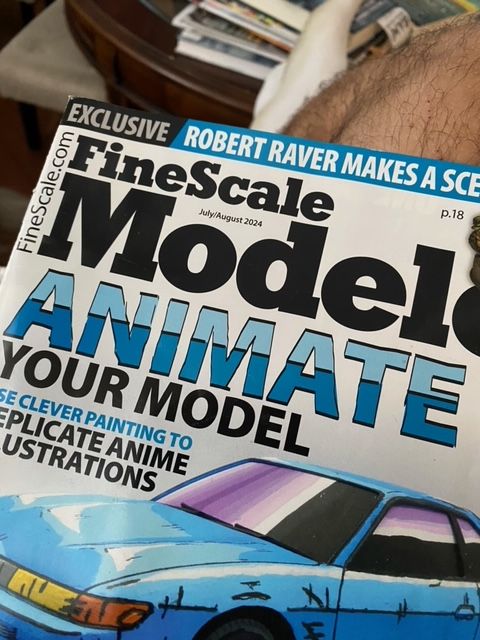
Gents. If you are wanting to jump into figures then you have to get good at doing the eyes. You are in luck as Fine Scale Model magazine July/August 2024 issue has a very nice primer on doing eyes. The article is relatively short and well written. Doing eyes on a 54mm (1/35 ish) figure is quite hard due to the small size but on large figures and busts, you can do a lot of detail. The eyes have it!
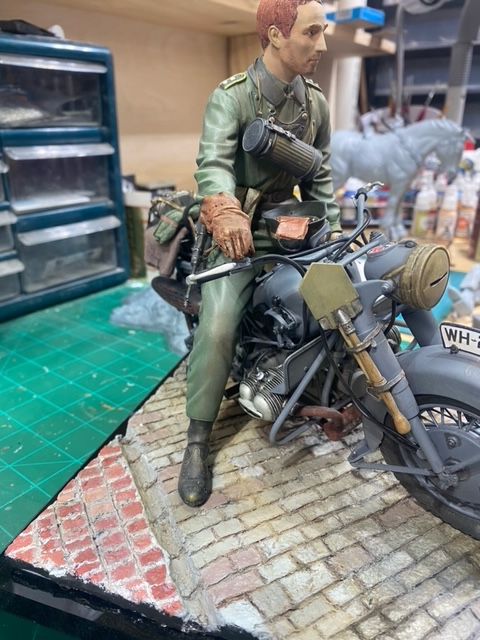
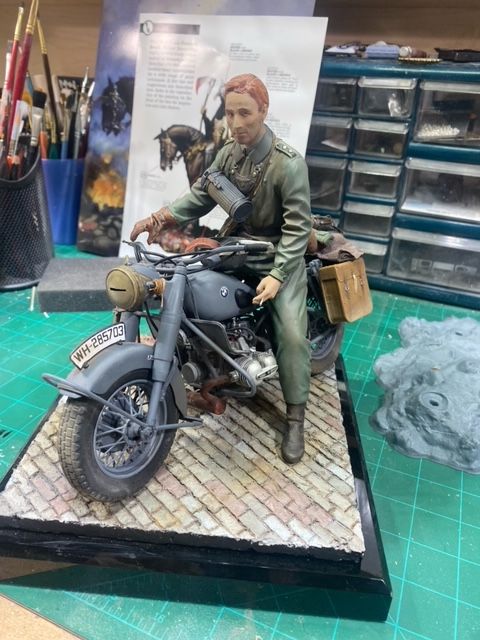
The collaboration project is all but done. Here is the figure on the base and motorcycle. Note the little cigarette pack in the upside down helmet! I like powders for weathering so I used greys and browns on the bike to match the rider. No mud or heavy dried dirt this go round.
Cheers.
Lets see how this collaboration effort fares at up coming shows!
With my creativity flowing again I have started the build of a kit I scored at the NOVA show. This is a Minicraft 1:16 31 Ford Model A. The kit comes with some of vintage hot rodding’ greatest hits, a souped up flathead V8, dropped axle, quick change rear end, reversed steel wheels and white wall tires. Some of this stuff I’ll keep, some I will not. The Flathead is out, along with the wheel/tire package. In their place will be a 6 carb Buick nailhead V8 and 32 Ford wire wheels with “big and little” black wall tires. The ride height will also be getting a large adjustment, once I mock up the chassis and see where everything sits. The stock height headlight bar mounting points as well as all the chrome gingerbread on the rear deck have been removed and puttied over. More to come…
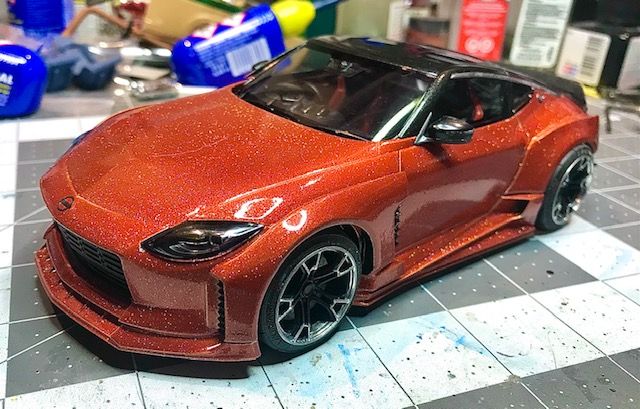
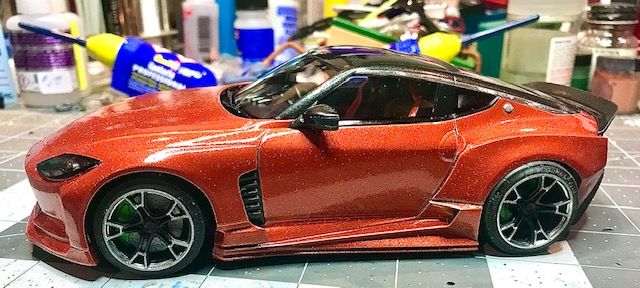
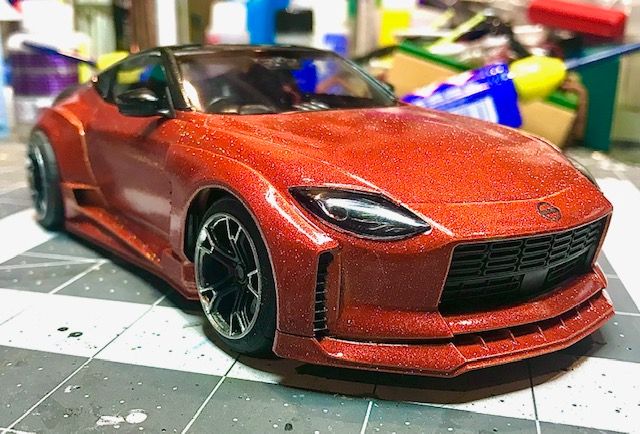
The slump is over! Finally got this one finished after struggling with paint issues and a motivational crisis. This is a 23 Nissan Z which has been augmented with a full wide-body kit and lowered suspension with wheels/tires. All add ons were sourced from Texas 3D Customs whom I have raved about in the past (they are fantastic I cannot recommend them highly enough).
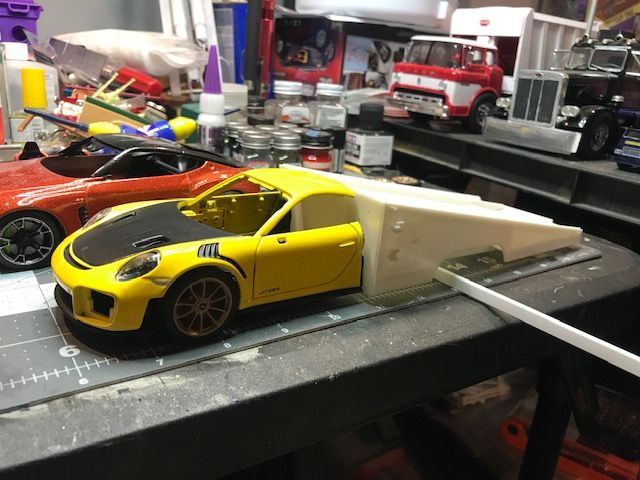
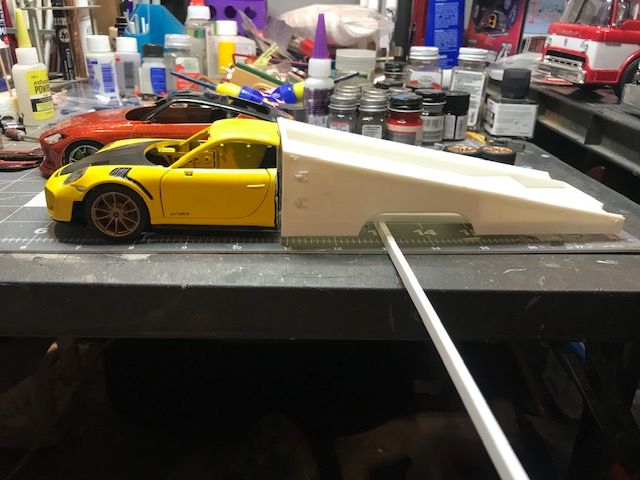
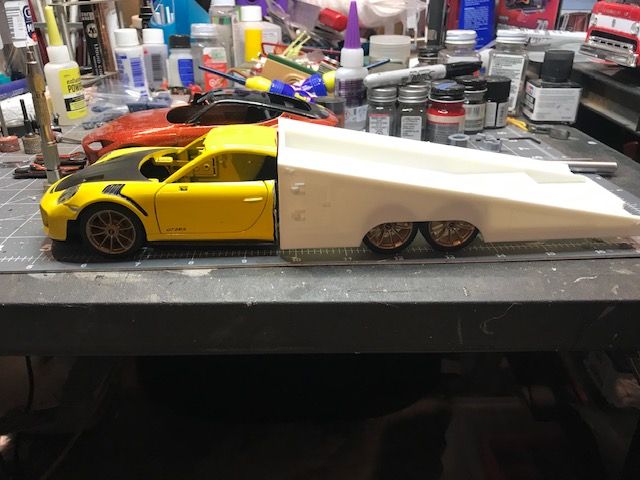
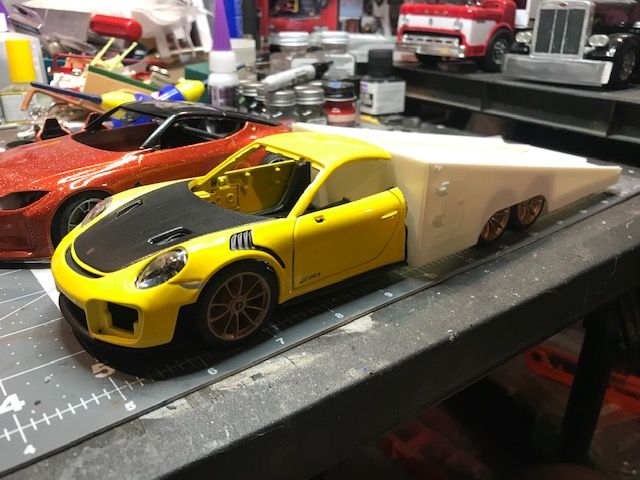
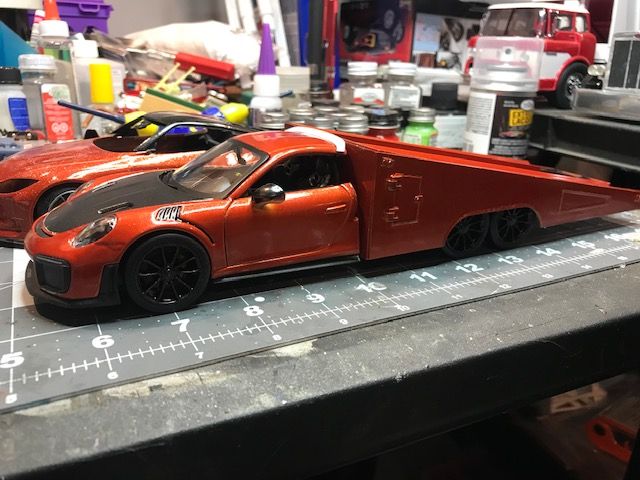
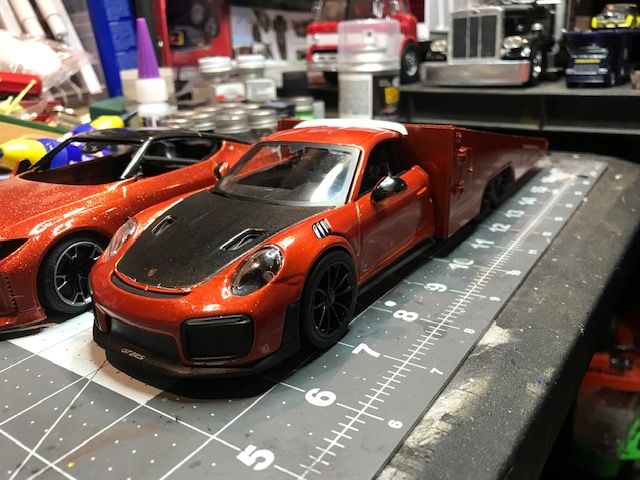
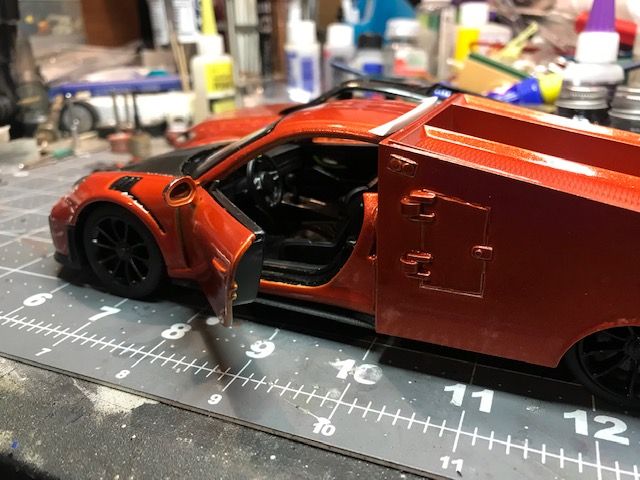
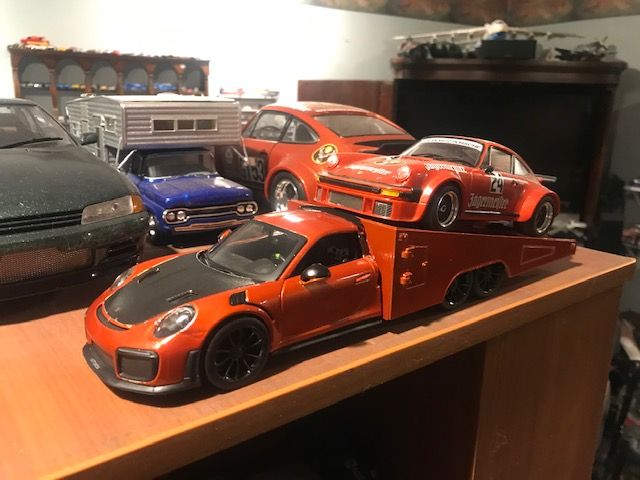
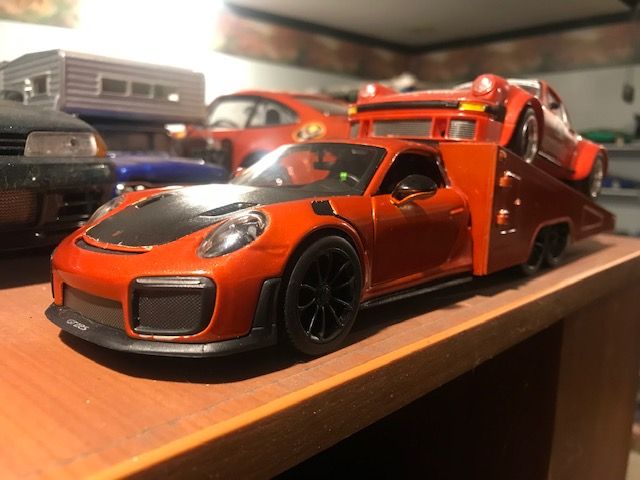
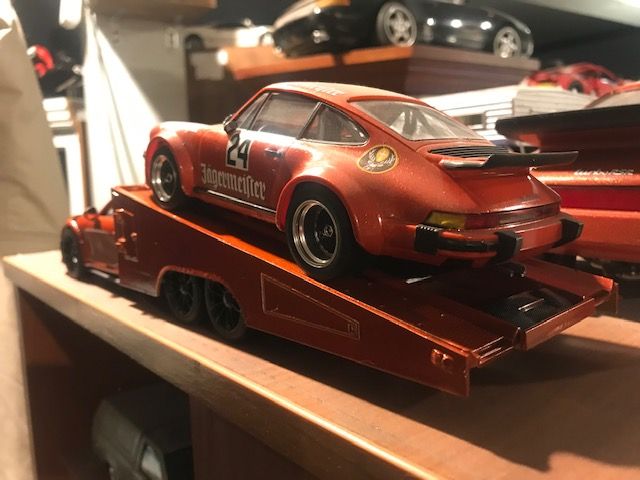
While extricating myself from a protracted building slump I was gifted a Maisto Assembly Line series die cast build it kit of a Porsche 911 GT3 RS. I already have one of these great little kits all built up so I really didn’t know what to do with number 2. Until I got to thinking about the “orange” theme of the upcoming PennCon show. I have in my stash a “racers wedge” back half of a ramp truck and thought “Why not try to build a Porsche ramp truck?
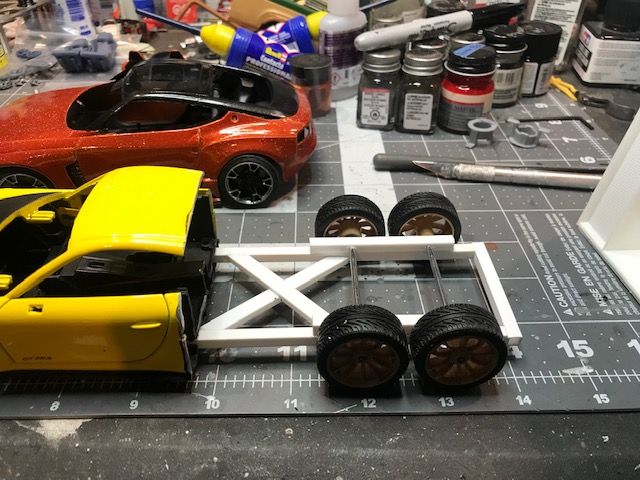
So here is my latest kit bashing. The metal body of the Maisto was cut in half right behind the B pillar. I then created a rear chassis section incorporating all four of the kits wheels in the rear. These kits come with two sets of wheels so I only needed to raid my spares for two matching tires for the front of the vehicle. The ramp portion was then assembled and grafted to the front portion with CA glue. The gap between the roof of the 911 and the ramp body was filled with a rear spoiler intended for a Nissan Z. The missing B pillars were fabricated from sheet styrene.
The completed body parts were then painted with matte silver base coat, then Flaming Orange, with an over coat of Wet Look clear. The completed vehicle will fit in nicely with my trio of Jagermeister liveried ORANGE Porsches at the show in Carlisle.
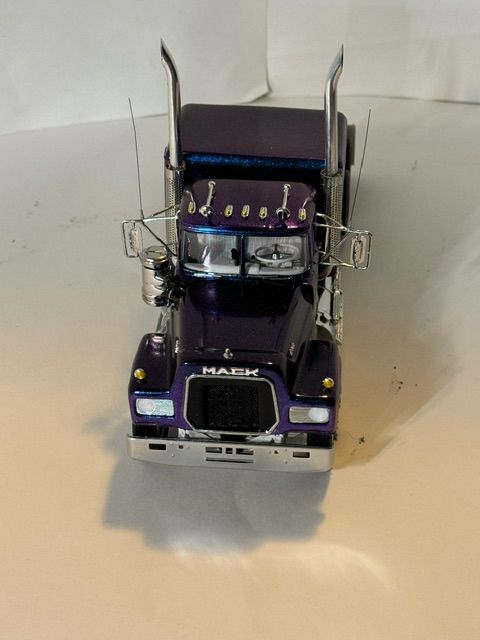
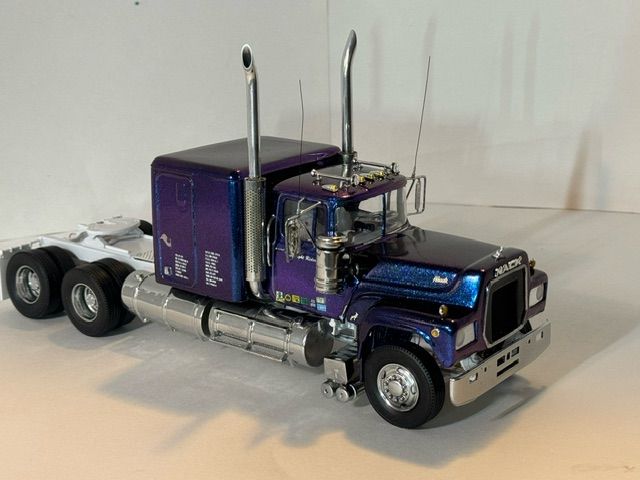
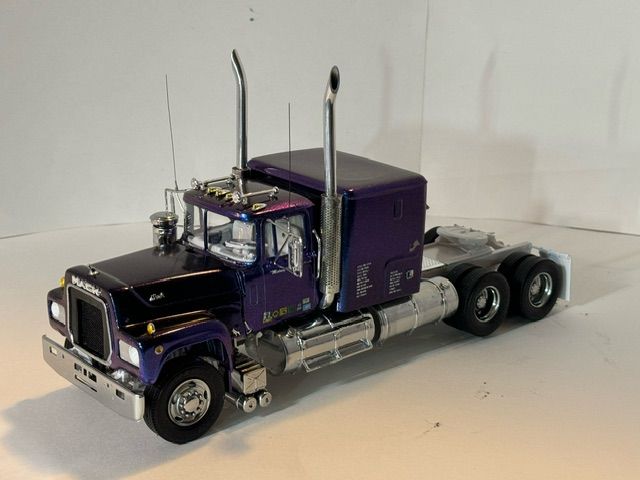
Been putting this off for a while, but decided to go ahead and get it done. 3 1/2 weeks in the making, and I’m glad to say I like the way it turned out.
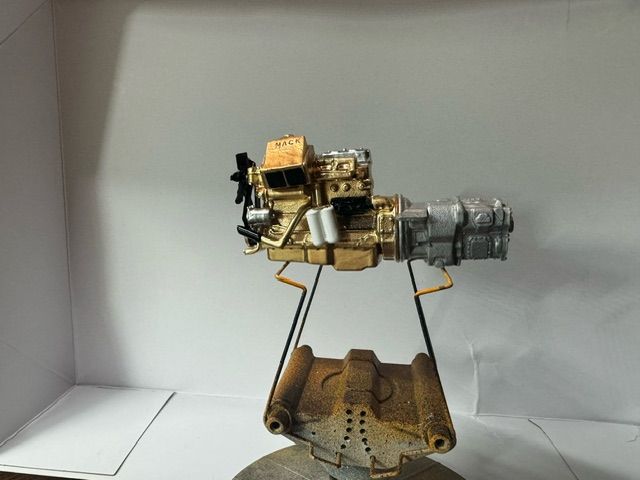
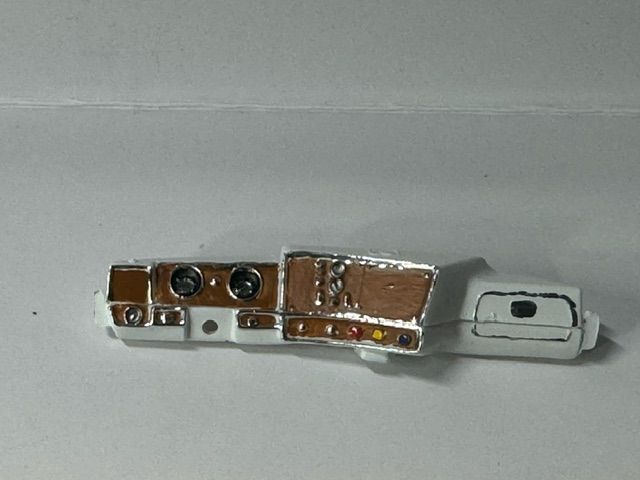
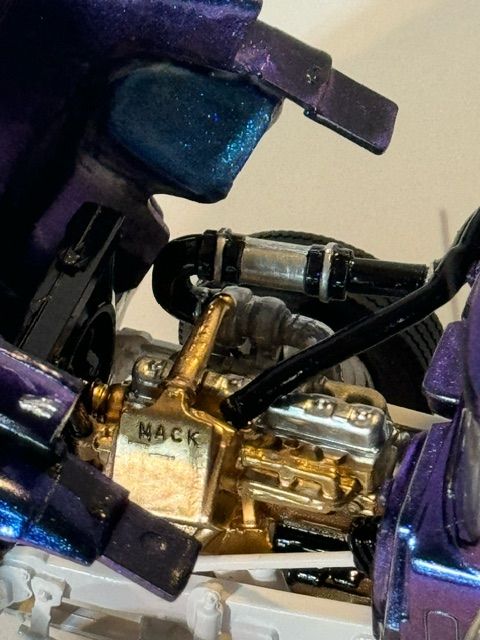
Started with the AMT Mack R685ST and went from there. Started by stretching the frame and driveshaft 2 inches. Added a R700 hood which is longer and necessitated moving the cab rearward about 1/2”. Added an intercooler from Auslowe to the engine. By doing this, I had to rework the air cleaner to have 2 outlets, one for the turbocharger and one for the intercooler. Had to massage the opening to accommodate both hoses. Added custom metal heat shields with longer metal stacks. The sleeper and fuel tanks are resin units I had lying around. Mirrors are aftermarket metal pieces and the wheels are 5 hole buds that Chad printed for me.
Went back to my rattle cans (for Ross) because I wanted to use the Testors Purple Sunrise color shift paint. Remembered why now I don’t continue to use them. Lol. Also had and issue with the sleeper with the paint not sticking. After 4 washes and 3 strippings, I finally got it covered. The mirrors, battery boxes, heat shields, wheels and fuel tanks painted in Revell chrome.
There are a few flaws here and there, but overall I’m happy with it. Gotta figure out what trailer to pair it with for the PennCon show in September.
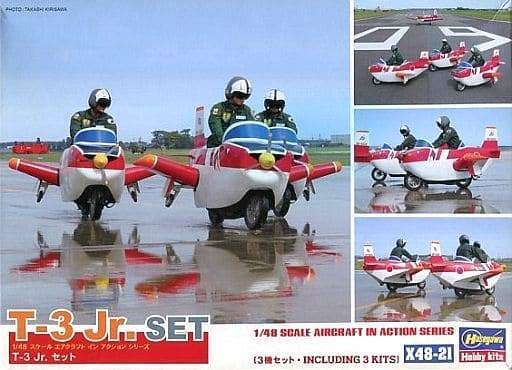
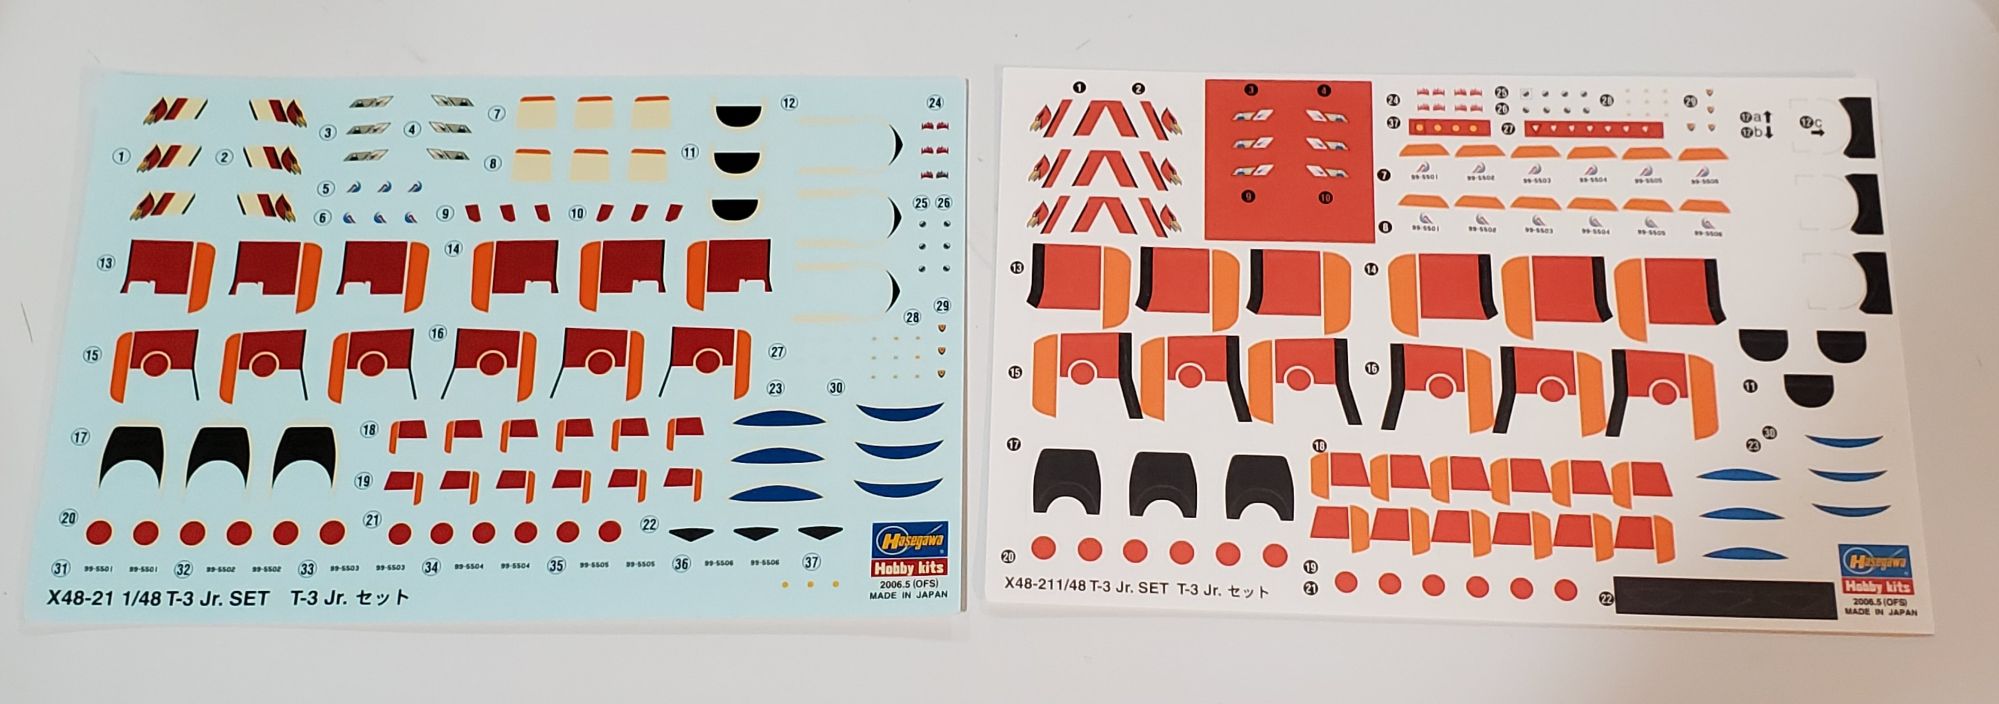
In my hunt to have all the T-34 Mentor kits that have been made, I learned about the Fuji T-3. The T-3 is a derivative of the Mentor that was used in Japan’s JASDF. And then as I continued my digging…I came across this abomination.
I present to you, the T-3 Jr.
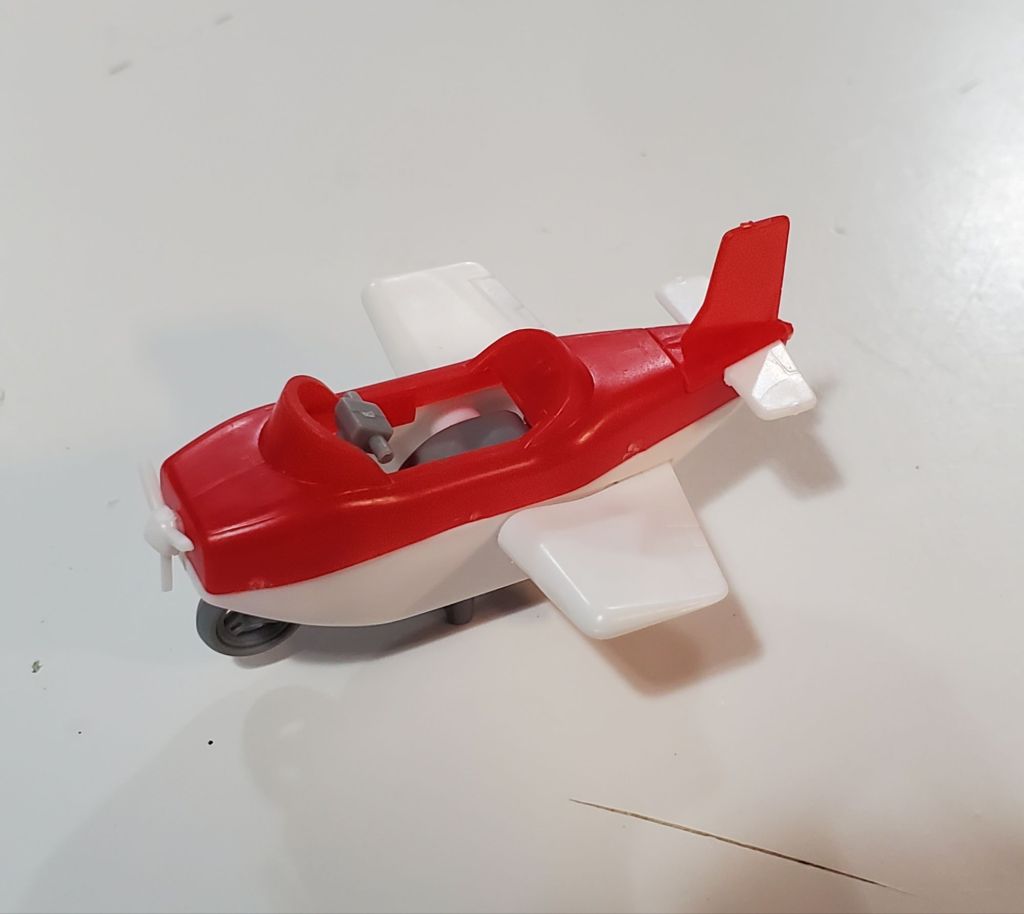
This is essentially a moped or scooter that has a wooden and papermache body added on top. These guys perform ground maneuvers, similar to how an aerial demonstration team would. In my researching, it seems they’ve been performing since 1998. They later “upgraded” to the T-7 Jr. There’s another group known as the Blue Impulse Jr which has vehicles based on the T-4. I dug pretty hard so I have lots more info on all these guys…. but let’s move on to the model.
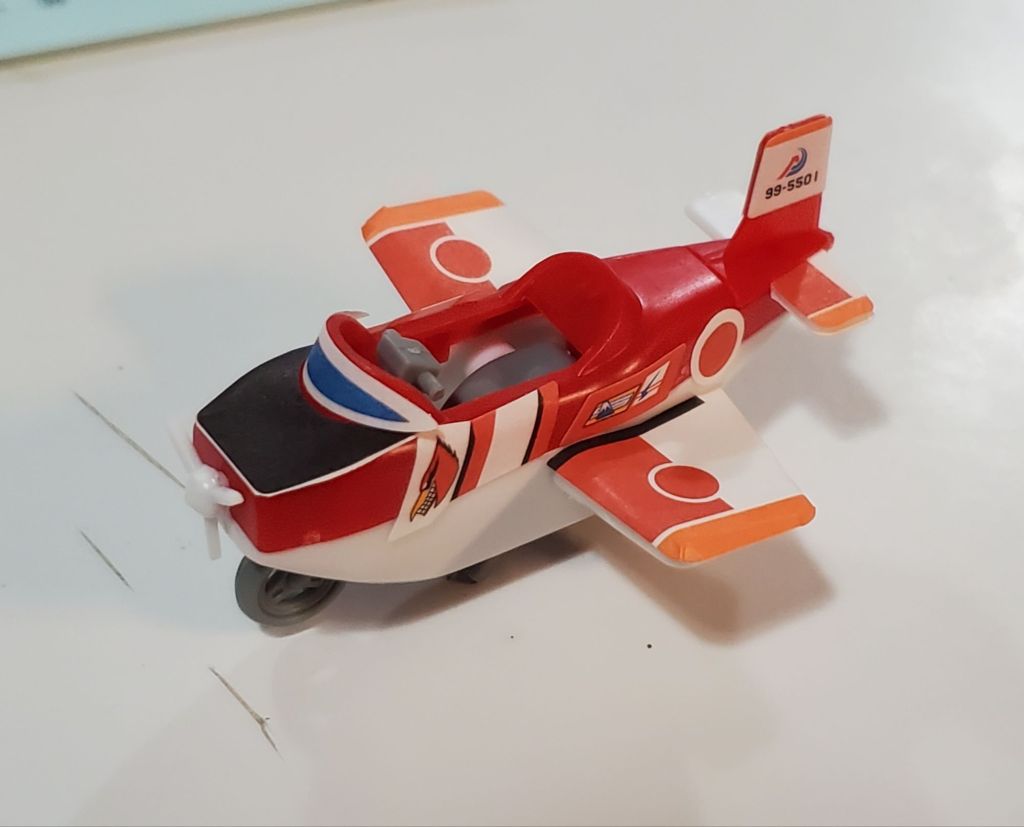
This set comes with 3 kits. Aside from the driver, all parts can simply snap together. It has both traditional water slide decals as well as basic stickers. My decals are very yellow and the regular stickers suck, so I’m going to be doing a lot of custom decals it looks like.
Anyway, I built one up just to see what was involved and to figure out the best painting strategy. I also tested the basic stickers but to use those I think you’d have to use glue.
I decided it would be easier to paint the scooter and the body separate to reduce masking and overspray risk but the parts are designed to snap into the scooter. I broke out the snippers and began modifying and now the body can be placed on top when I’m finished. I think it’s going to work well.
If anyone is interested in painting the figure for me, we can enter this in the Roanoke show against Scott and Chris. How funny would it be to have this thing sitting beside their massive 1/9 bike?