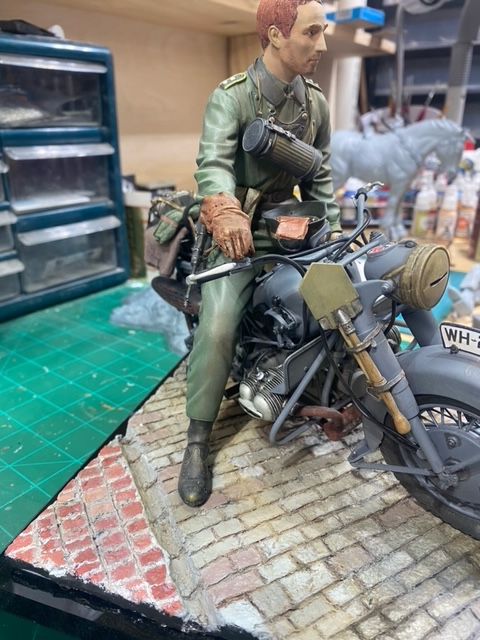
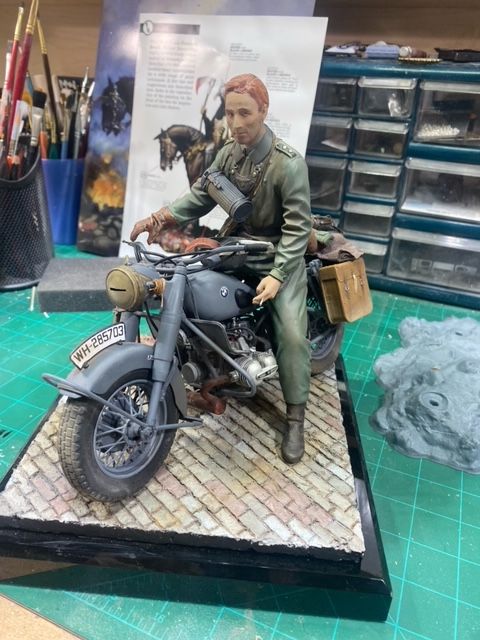
The collaboration project is all but done. Here is the figure on the base and motorcycle. Note the little cigarette pack in the upside down helmet! I like powders for weathering so I used greys and browns on the bike to match the rider. No mud or heavy dried dirt this go round.
Cheers.
Lets see how this collaboration effort fares at up coming shows!
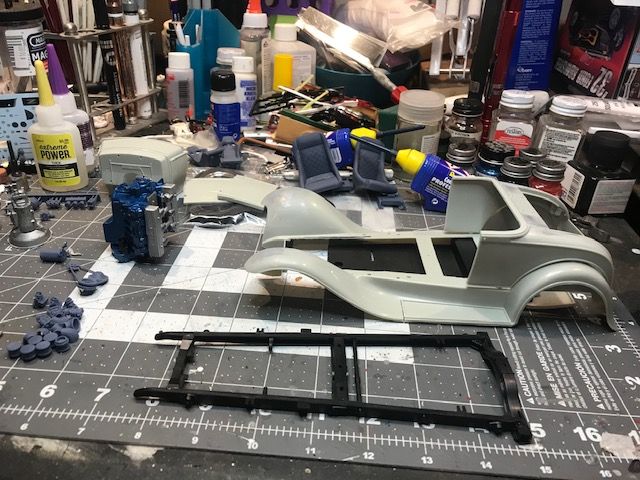
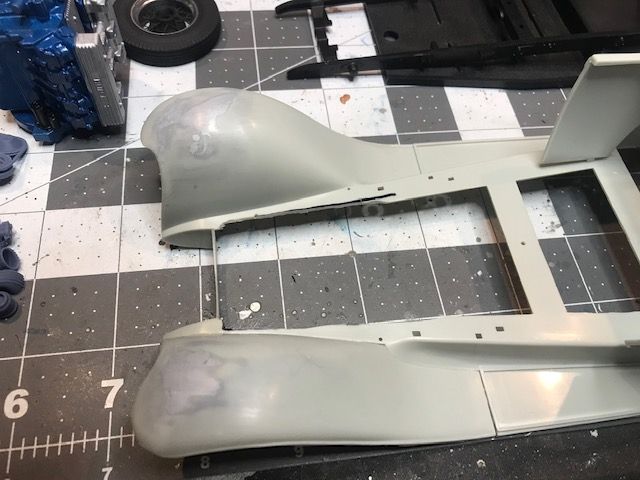
With my creativity flowing again I have started the build of a kit I scored at the NOVA show. This is a Minicraft 1:16 31 Ford Model A. The kit comes with some of vintage hot rodding’ greatest hits, a souped up flathead V8, dropped axle, quick change rear end, reversed steel wheels and white wall tires. Some of this stuff I’ll keep, some I will not. The Flathead is out, along with the wheel/tire package. In their place will be a 6 carb Buick nailhead V8 and 32 Ford wire wheels with “big and little” black wall tires. The ride height will also be getting a large adjustment, once I mock up the chassis and see where everything sits. The stock height headlight bar mounting points as well as all the chrome gingerbread on the rear deck have been removed and puttied over. More to come…
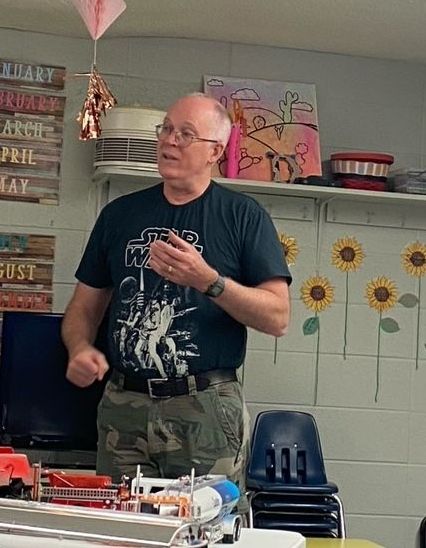
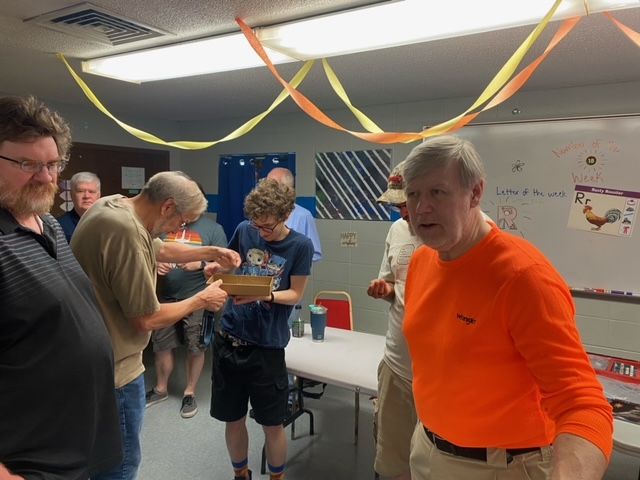
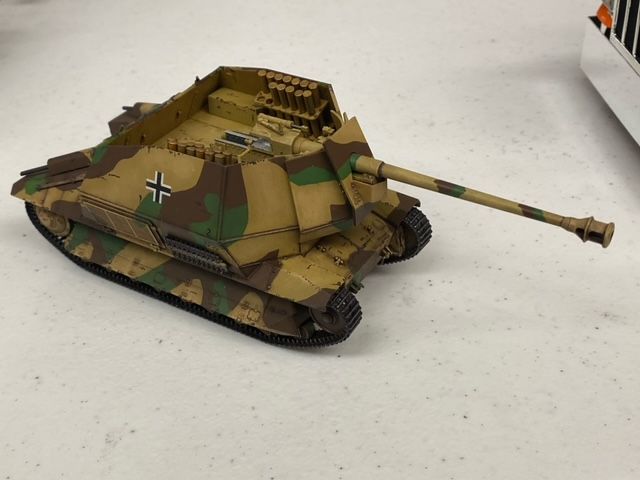
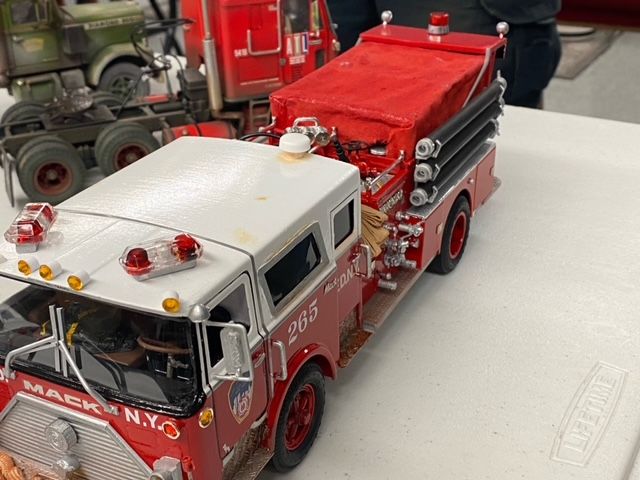
Good day gents. The June meeting went very well. There were many good looking models on the table. Scott bought several trucks he built in the past including one that was his first gold medal winner. That particular truck did look good. Jeff’s purple truck was equally good and John’s tanker truck for one of his clients was superb. The rusted up front half of theTitanic was very good and will look great when mated up with the stern section and the ocean floor base.
Todd’s discussion on fiber optics was “enlightening” (see that pun there!). The fact that he put in 1200 (or so) fiber light strands is mind numbingly impressive. Todd clearly understands this aspect of modeling and is our official subject matter expert on lighting henceforth.
Good news all, it appears IPMS USA liked our article submission so we should be seeing it in an upcoming edition soon. I sent the IRS the updated packet for the non profit designation, which I hope they accept and grant the request. That was about 3 weeks ago and I eagerly check the mail each day.
The August meeting will remain at the church. Dan’s store is too small for us to return to; I need to get word to him regarding that. While on Dan, the idea to move the rifle range day from the 15th to the 23rd was raised. As June 15 is next week, everyone who was going needs to chime in asap if they want the range day to stay on 15th or okay with it being moved on the 23rd. As far as I know everyone agreed to the 23rd. True?
Good luck to Mark and Randy at Nationals. If anyone is thinking about going to DownEastCon by Cherry Point NC 30 July let me know. I am thinking to go and it would be good to go with a bud ro two.
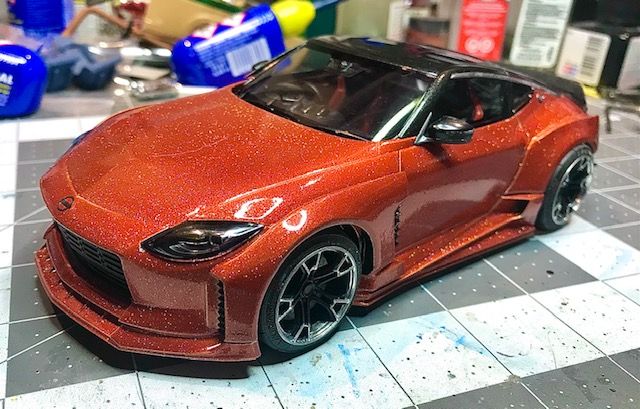
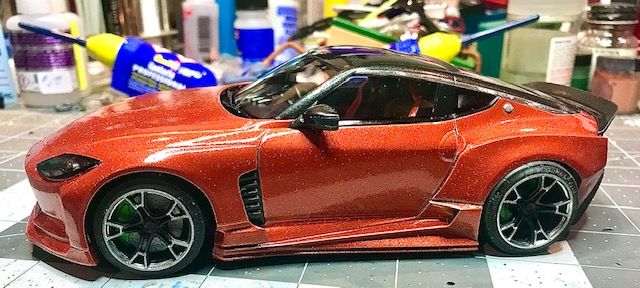
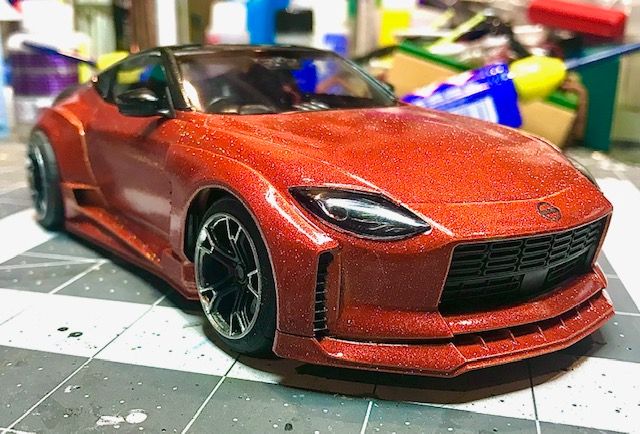
The slump is over! Finally got this one finished after struggling with paint issues and a motivational crisis. This is a 23 Nissan Z which has been augmented with a full wide-body kit and lowered suspension with wheels/tires. All add ons were sourced from Texas 3D Customs whom I have raved about in the past (they are fantastic I cannot recommend them highly enough).
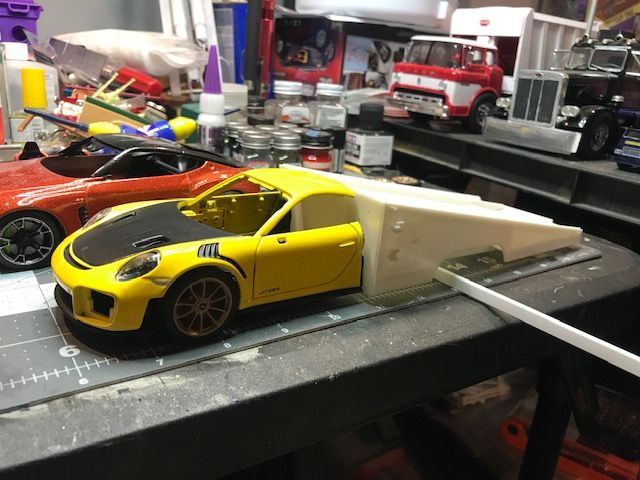
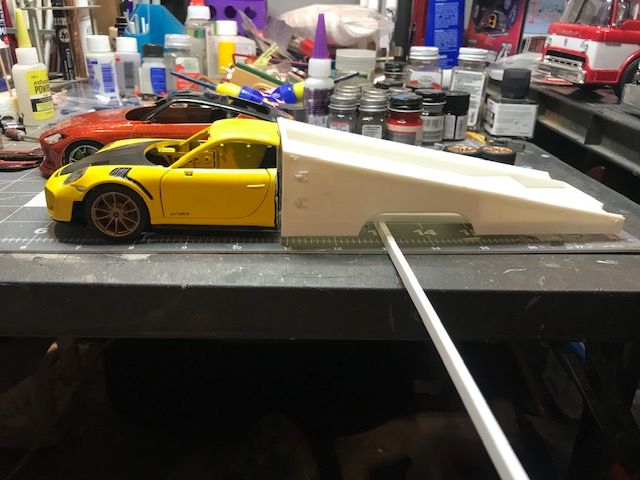
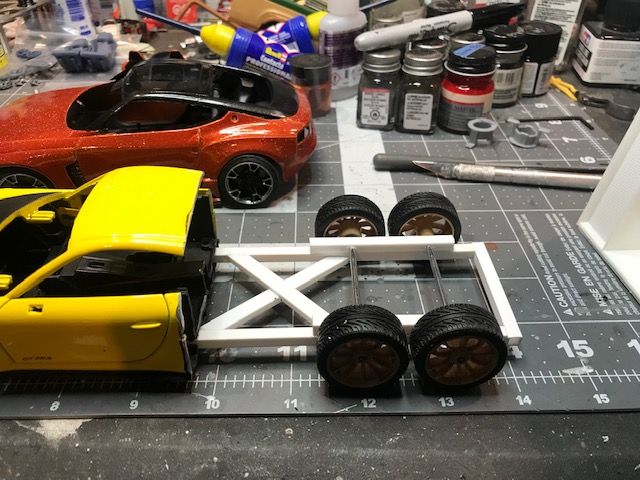
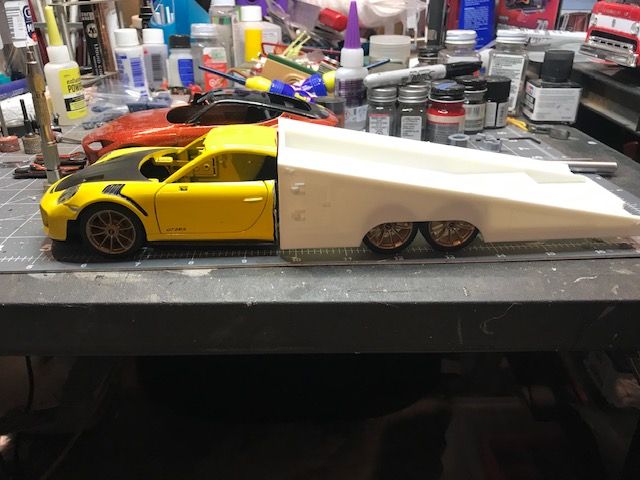
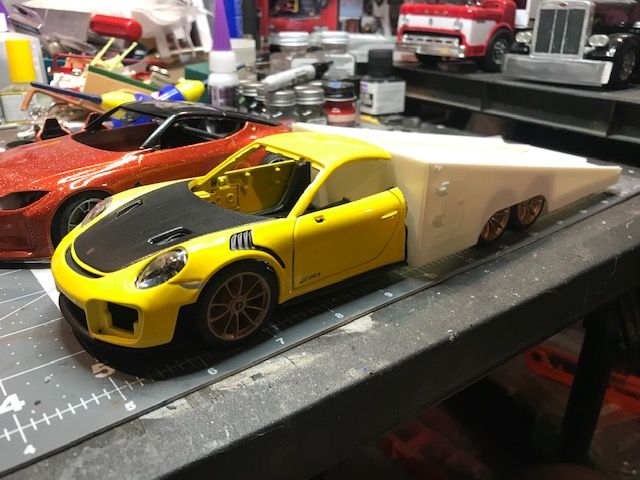
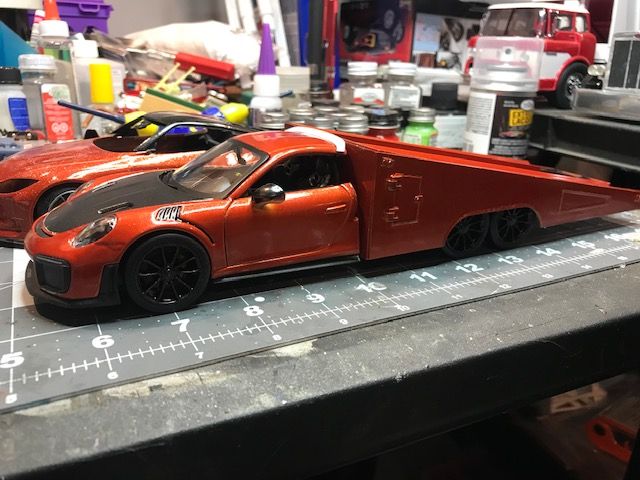
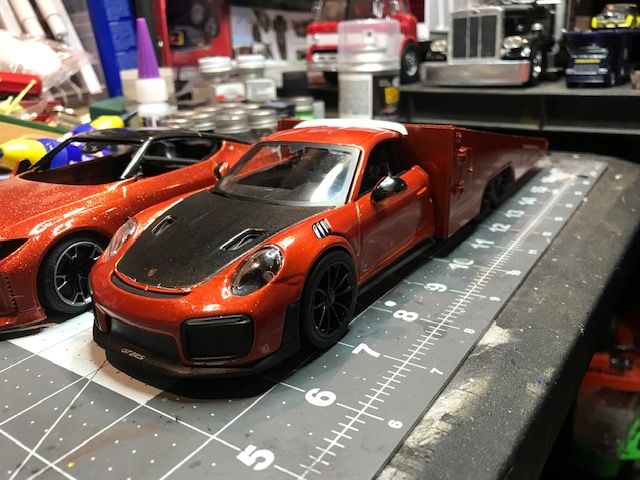
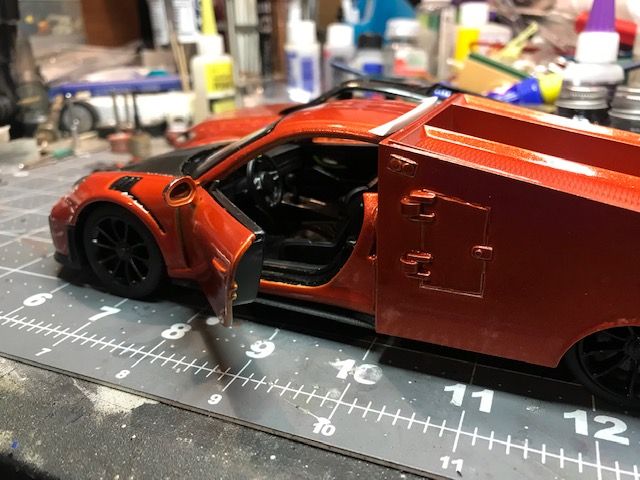
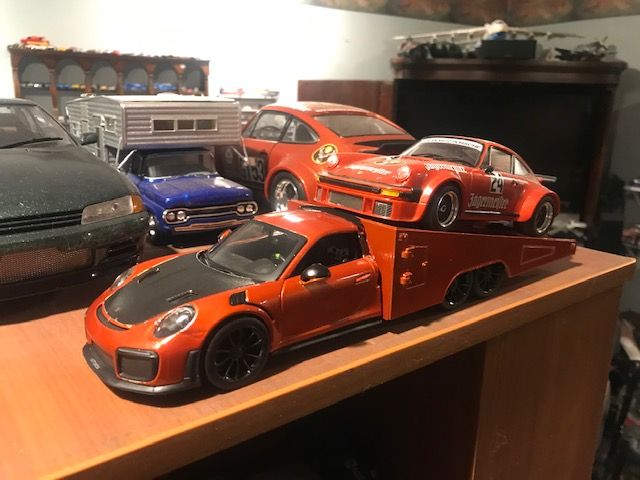
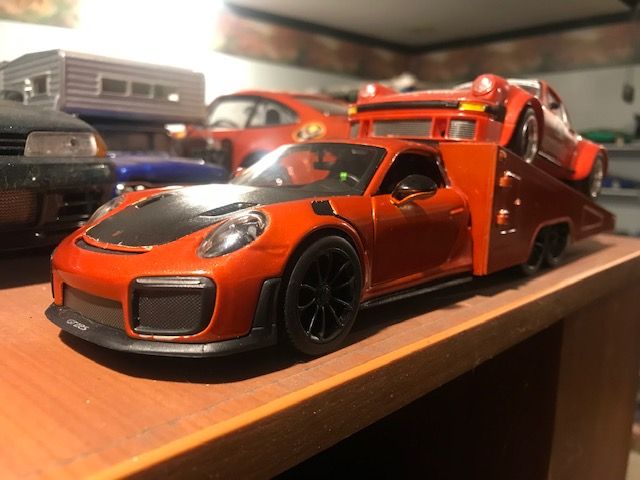
While extricating myself from a protracted building slump I was gifted a Maisto Assembly Line series die cast build it kit of a Porsche 911 GT3 RS. I already have one of these great little kits all built up so I really didn’t know what to do with number 2. Until I got to thinking about the “orange” theme of the upcoming PennCon show. I have in my stash a “racers wedge” back half of a ramp truck and thought “Why not try to build a Porsche ramp truck?
So here is my latest kit bashing. The metal body of the Maisto was cut in half right behind the B pillar. I then created a rear chassis section incorporating all four of the kits wheels in the rear. These kits come with two sets of wheels so I only needed to raid my spares for two matching tires for the front of the vehicle. The ramp portion was then assembled and grafted to the front portion with CA glue. The gap between the roof of the 911 and the ramp body was filled with a rear spoiler intended for a Nissan Z. The missing B pillars were fabricated from sheet styrene.
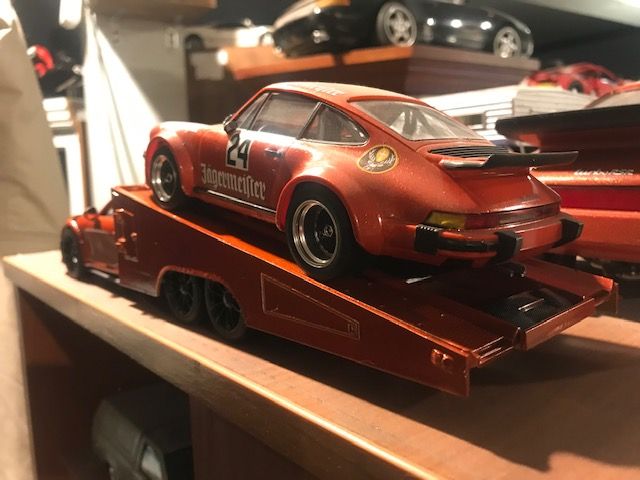
The completed body parts were then painted with matte silver base coat, then Flaming Orange, with an over coat of Wet Look clear. The completed vehicle will fit in nicely with my trio of Jagermeister liveried ORANGE Porsches at the show in Carlisle.
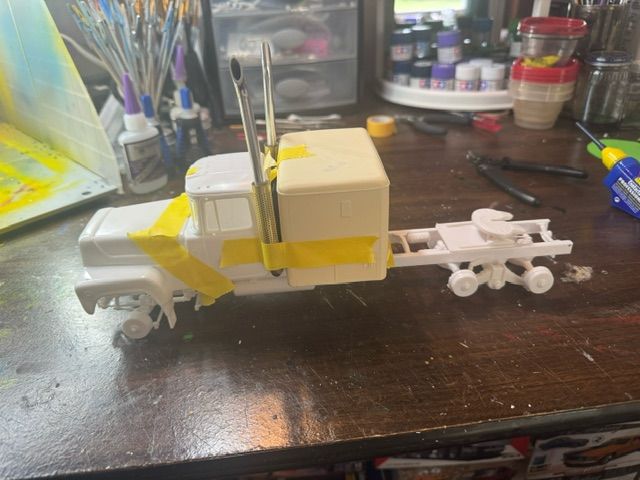
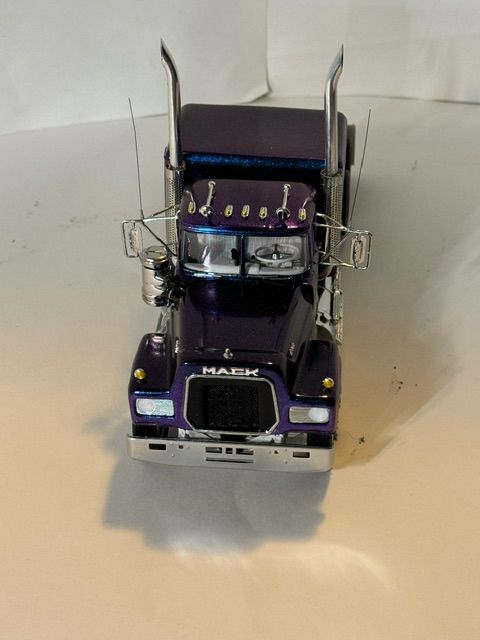
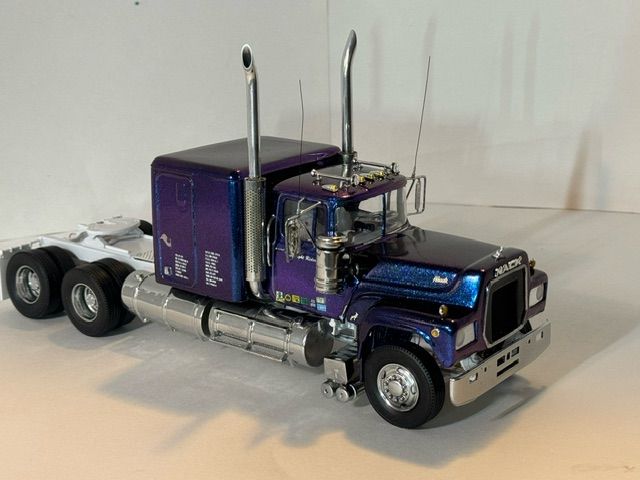
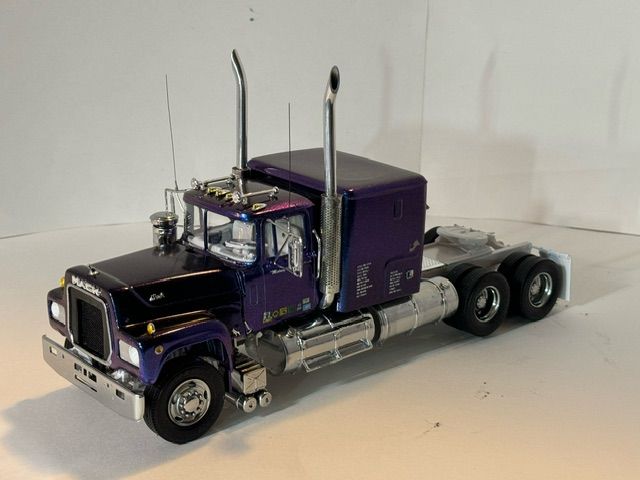
Been putting this off for a while, but decided to go ahead and get it done. 3 1/2 weeks in the making, and I’m glad to say I like the way it turned out.
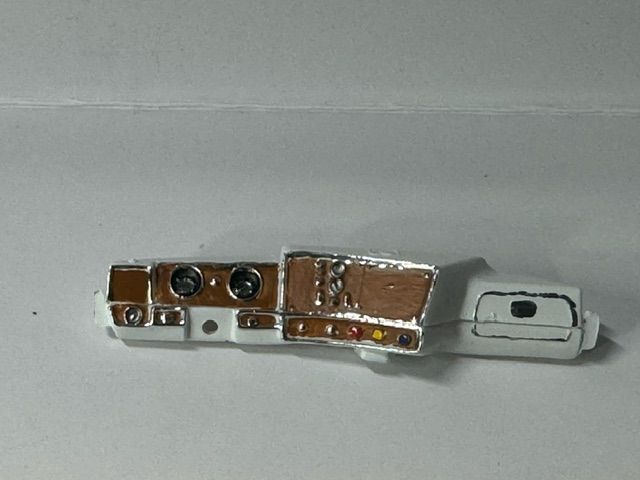
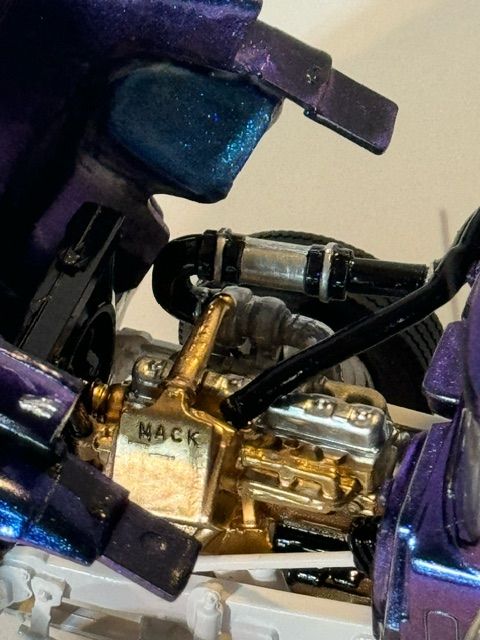
Started with the AMT Mack R685ST and went from there. Started by stretching the frame and driveshaft 2 inches. Added a R700 hood which is longer and necessitated moving the cab rearward about 1/2”. Added an intercooler from Auslowe to the engine. By doing this, I had to rework the air cleaner to have 2 outlets, one for the turbocharger and one for the intercooler. Had to massage the opening to accommodate both hoses. Added custom metal heat shields with longer metal stacks. The sleeper and fuel tanks are resin units I had lying around. Mirrors are aftermarket metal pieces and the wheels are 5 hole buds that Chad printed for me.
Went back to my rattle cans (for Ross) because I wanted to use the Testors Purple Sunrise color shift paint. Remembered why now I don’t continue to use them. Lol. Also had and issue with the sleeper with the paint not sticking. After 4 washes and 3 strippings, I finally got it covered. The mirrors, battery boxes, heat shields, wheels and fuel tanks painted in Revell chrome.
There are a few flaws here and there, but overall I’m happy with it. Gotta figure out what trailer to pair it with for the PennCon show in September.
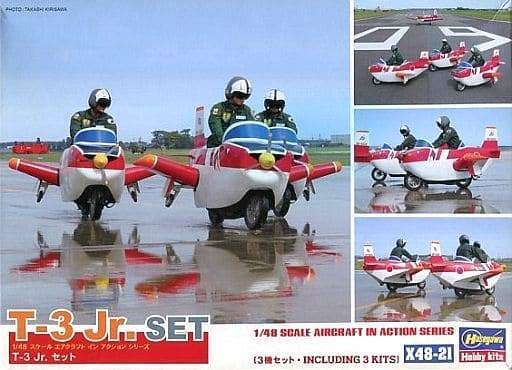
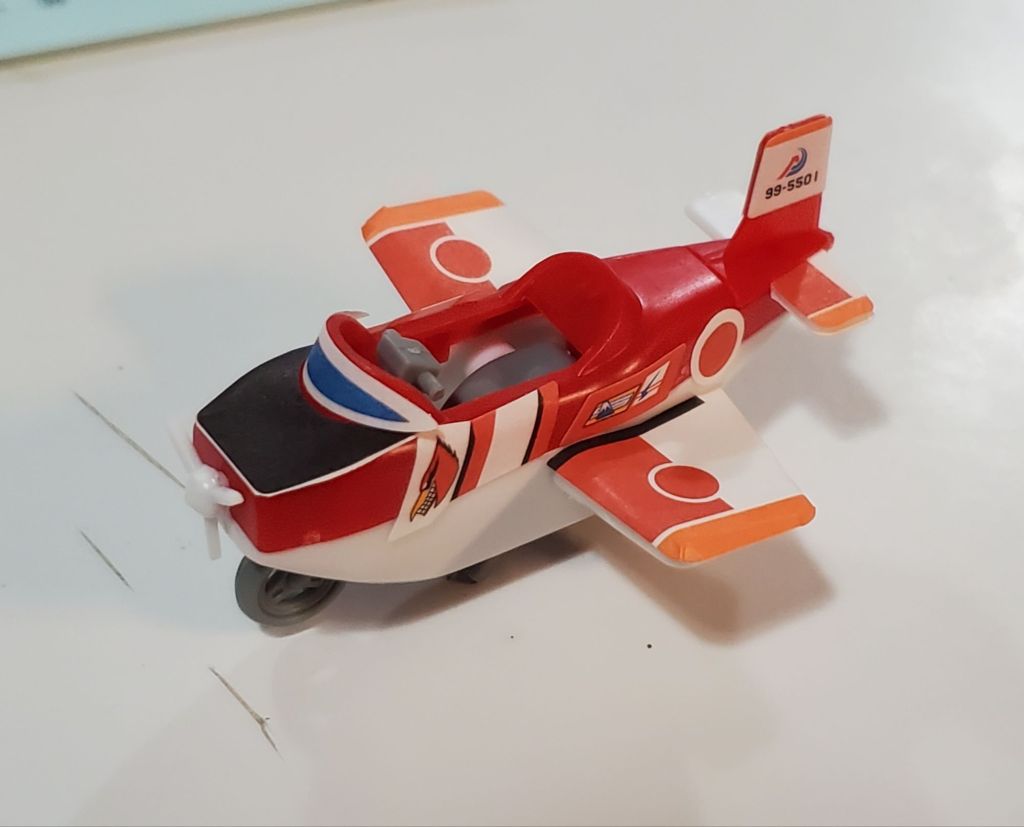
In my hunt to have all the T-34 Mentor kits that have been made, I learned about the Fuji T-3. The T-3 is a derivative of the Mentor that was used in Japan’s JASDF. And then as I continued my digging…I came across this abomination.
I present to you, the T-3 Jr.
This is essentially a moped or scooter that has a wooden and papermache body added on top. These guys perform ground maneuvers, similar to how an aerial demonstration team would. In my researching, it seems they’ve been performing since 1998. They later “upgraded” to the T-7 Jr. There’s another group known as the Blue Impulse Jr which has vehicles based on the T-4. I dug pretty hard so I have lots more info on all these guys…. but let’s move on to the model.
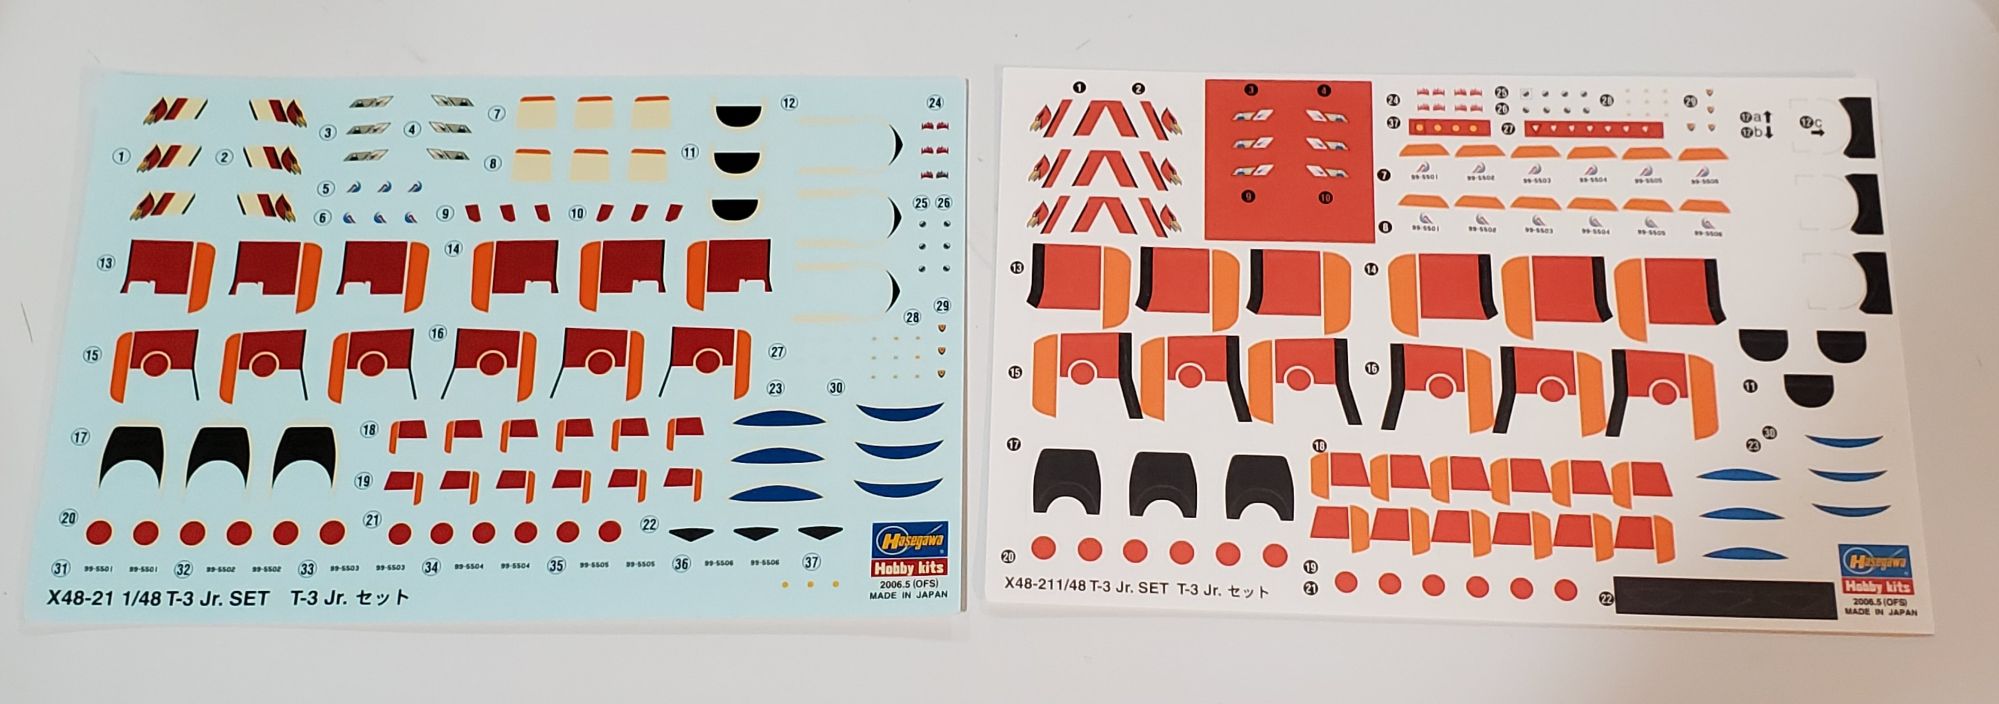
This set comes with 3 kits. Aside from the driver, all parts can simply snap together. It has both traditional water slide decals as well as basic stickers. My decals are very yellow and the regular stickers suck, so I’m going to be doing a lot of custom decals it looks like.
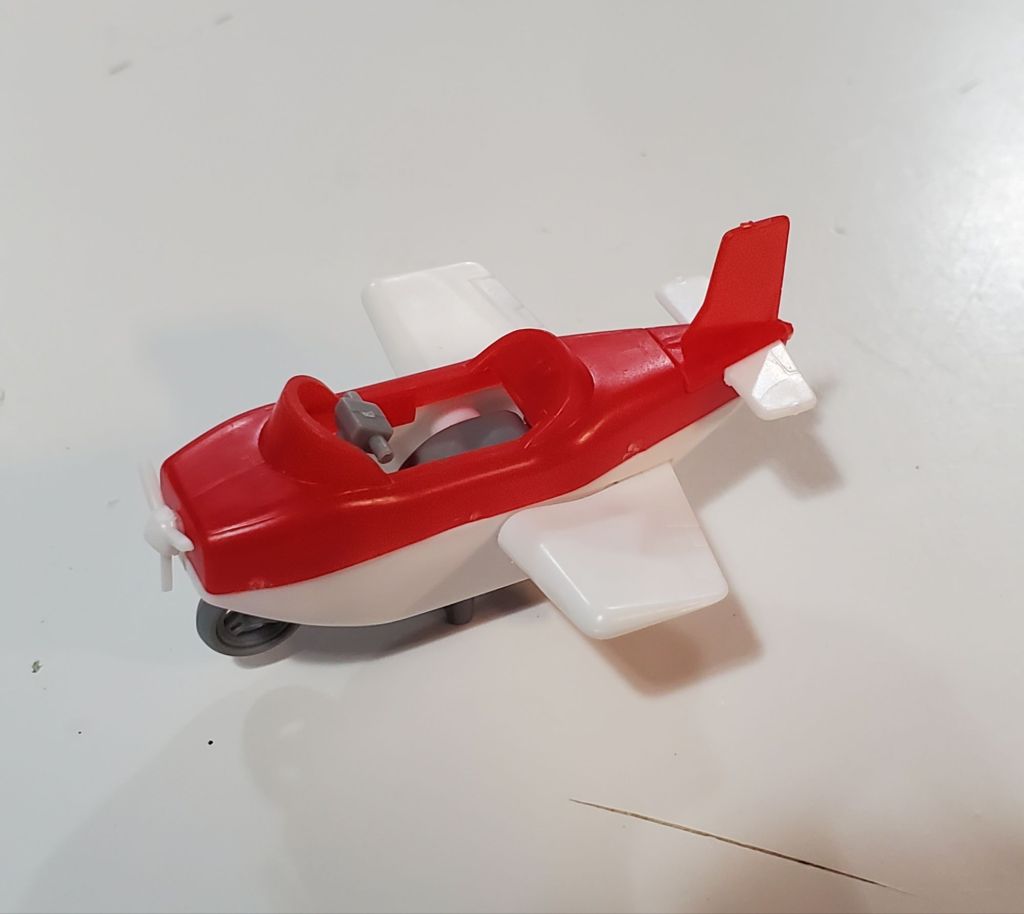
Anyway, I built one up just to see what was involved and to figure out the best painting strategy. I also tested the basic stickers but to use those I think you’d have to use glue.
I decided it would be easier to paint the scooter and the body separate to reduce masking and overspray risk but the parts are designed to snap into the scooter. I broke out the snippers and began modifying and now the body can be placed on top when I’m finished. I think it’s going to work well.
If anyone is interested in painting the figure for me, we can enter this in the Roanoke show against Scott and Chris. How funny would it be to have this thing sitting beside their massive 1/9 bike?
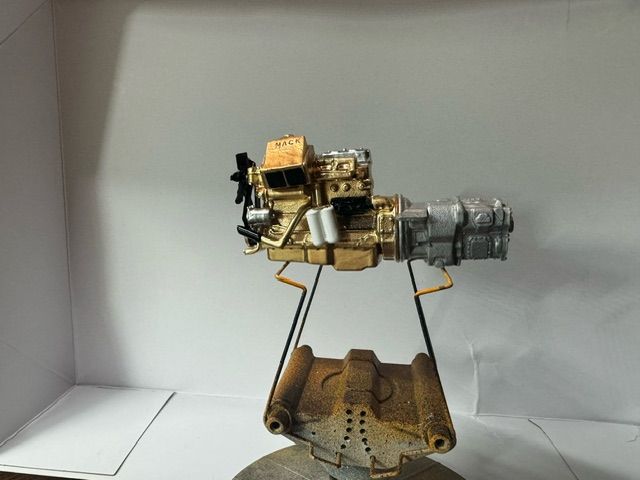
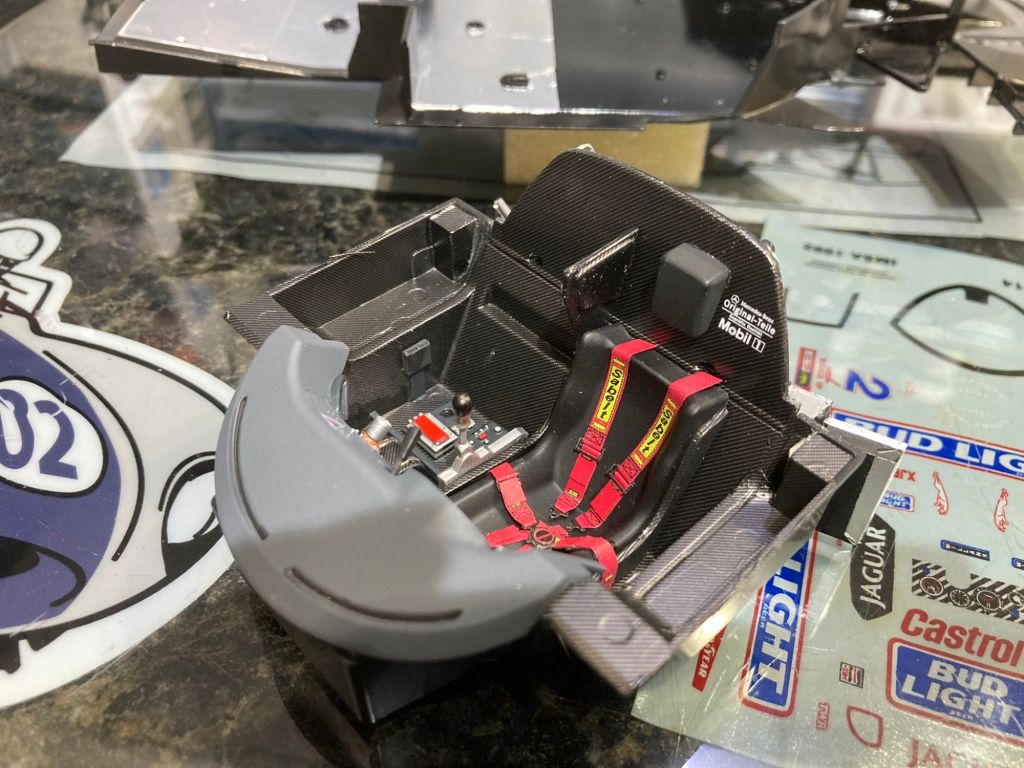
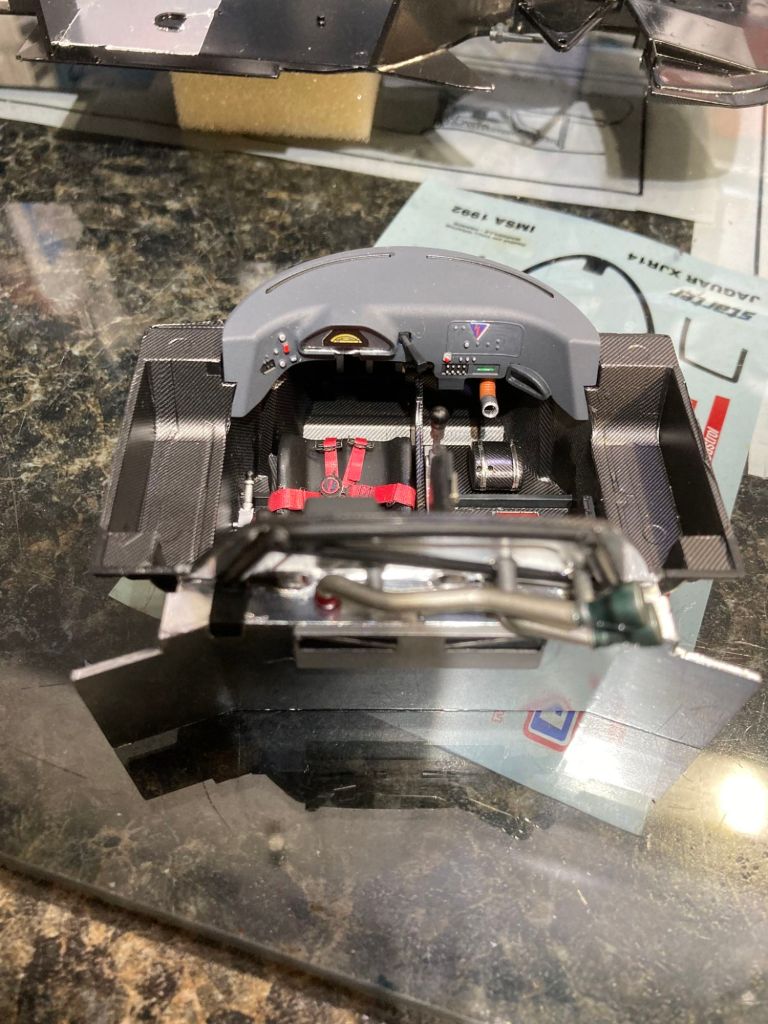
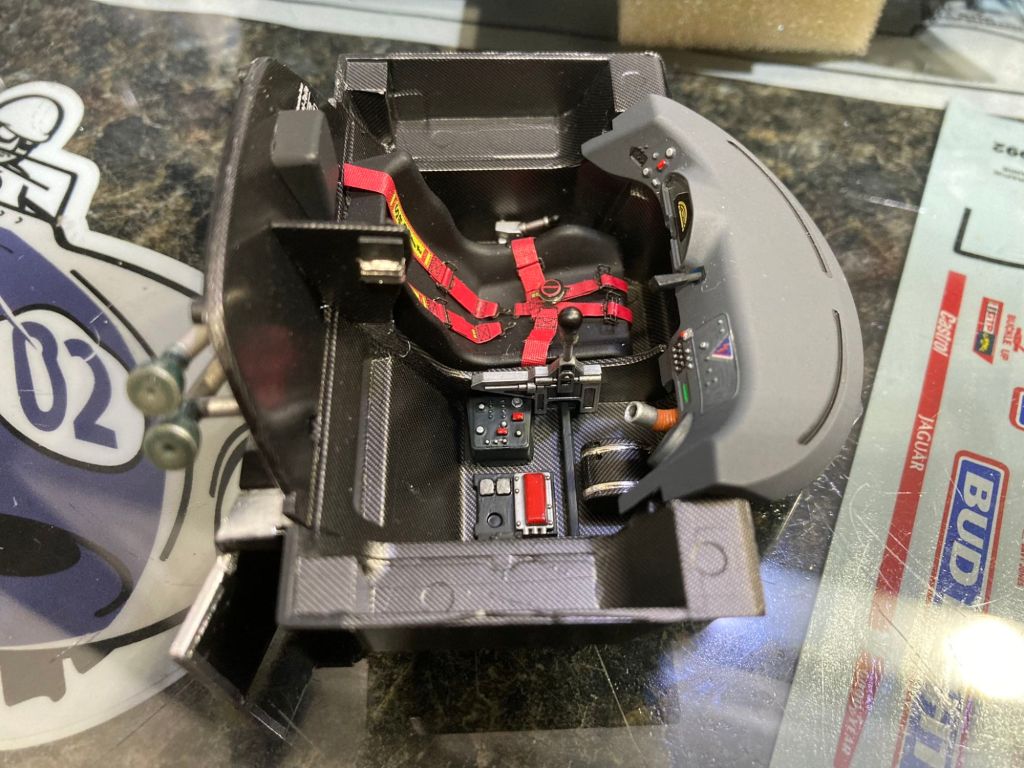
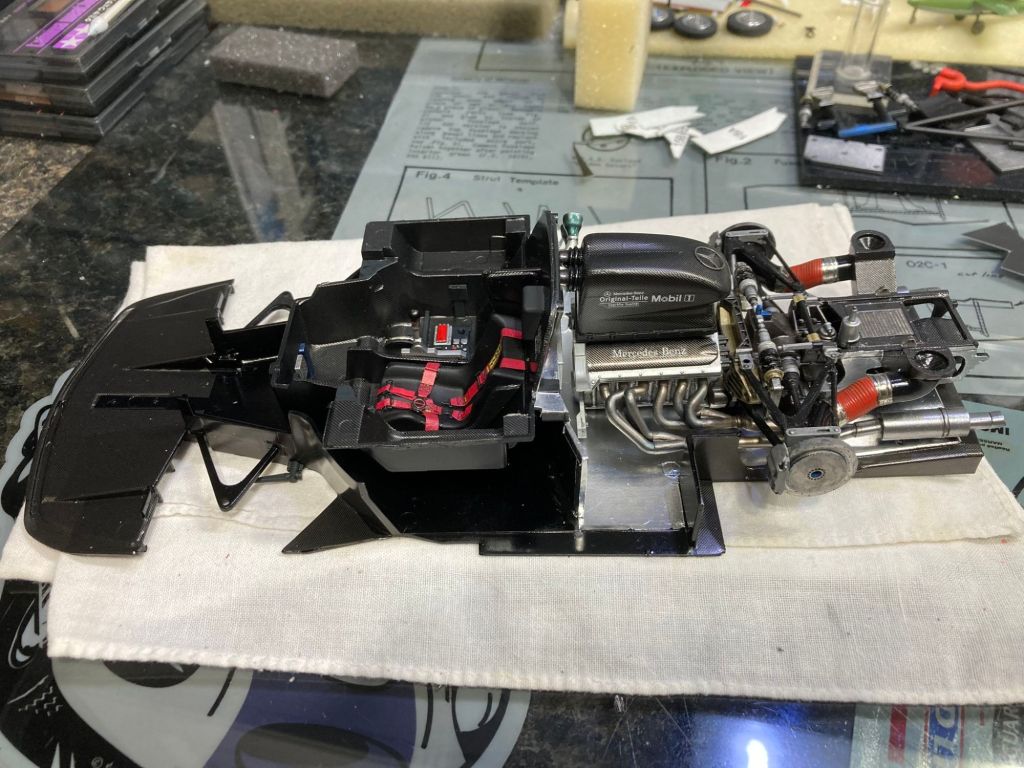
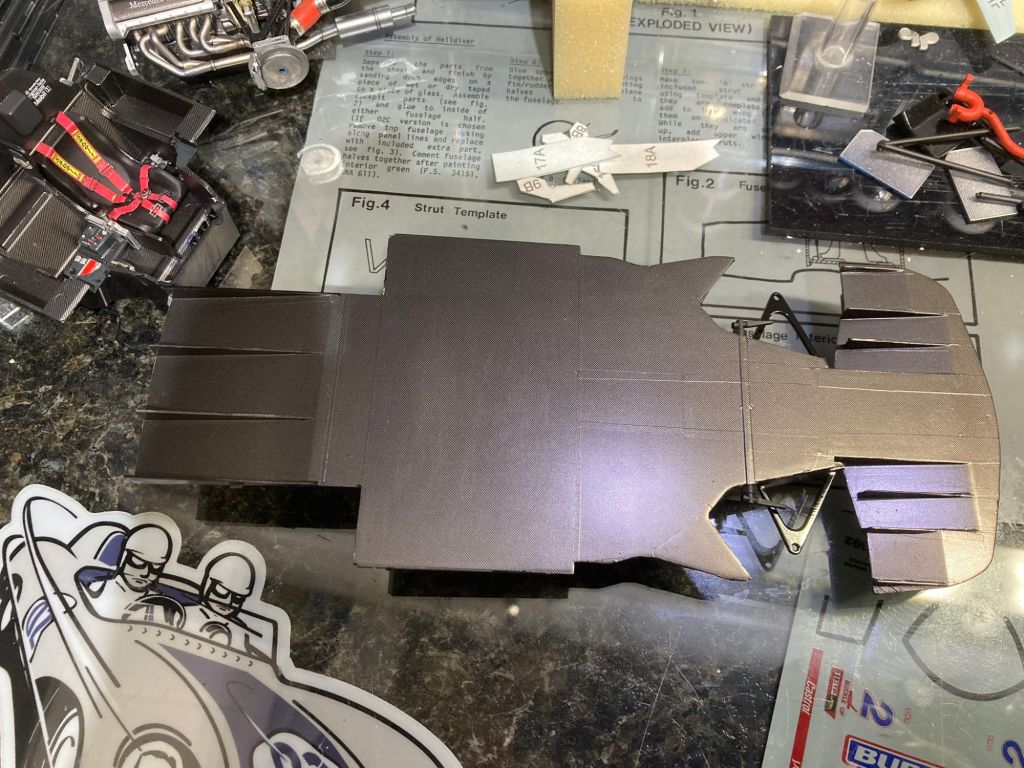
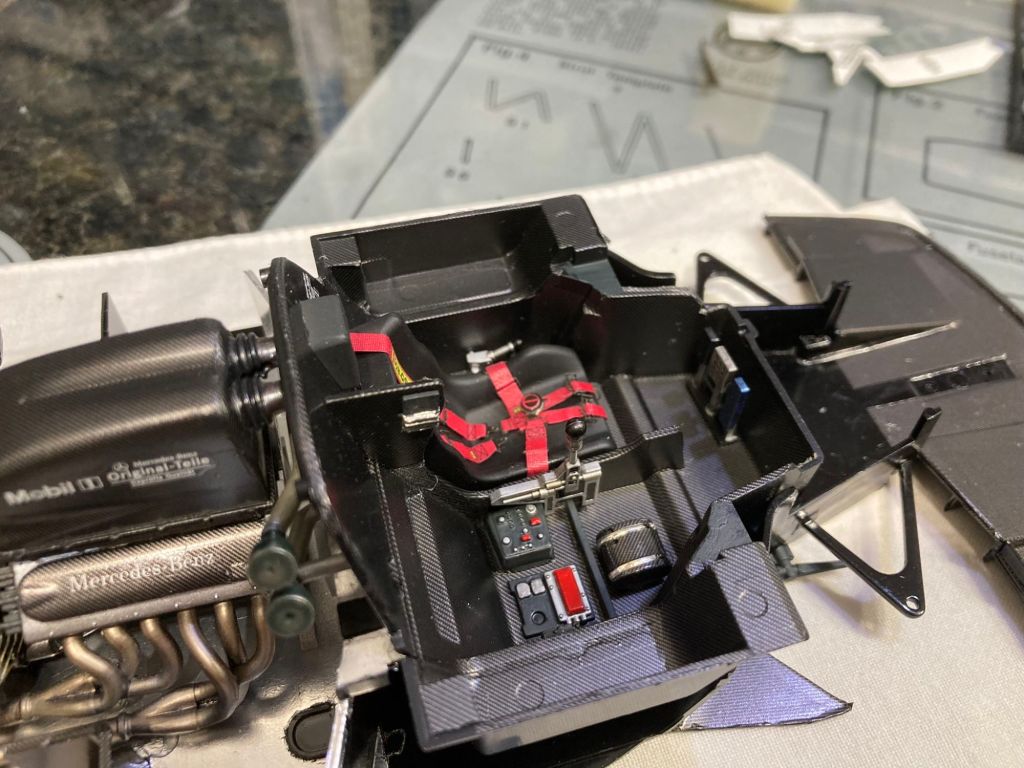
Slow progress has been made on my build. Most of the chassis is either covered in Carbon Fiber Decal or Bare Metal Foil. I have used 4 sheets so far. I should be able to use the scraps to cover any remaining areas, hopefully. As I guessed, I have had to make masks using Tamiya Tape to create the correct fitting decal segments for the splitters- front and back. That makes keeping the “grain” of the Carbon Fiber oriented in the same direction easy. I also had to create new ones for the cockpit. Many of the ones provided didn’t fit correctly or very poorly. Made me regret selling my spare kit (I could have used it to make templates without risk to the work already completed). Aluminum Bare Metal Foil was used to replicate the areas covered by Thermal Blankets to protect the chassis and cockpit from the heat of the engine. Nothing looks like metal like actual metal, so I try to use it whenever possible. Model Factory Hiro produces 1/24 Thermal Blanket material, but it is perpetually out of stock.
In the cockpit I used Eduard pre-painted 6 point seat belt kit instead of the “cheap” looking Kit Decal or the over-engineered and complicated set provided in the Hobbytyme PE set. I was amazed on how it looks and the easy of assembly of it. Wish I got more of them before they were removed from their line. I can’t find decent photos of the interior, so I had to rely on the Instructions and the “TLAR” method for painting the knobs and switches. There is a ton of wiring in the cockpit, but again, my poor references fail to show where things go. So when in doubt, leave it out.
I provided a pictures of the chassis with the cockpit and engine placed on the chassis. The Chassis needs to be sealed with Semi-gloss clear to protect the decals from handling. I will be using post-it notes to keep the clear off of the metal. Next update will have these items installed along with the front end Radiators, Steering Rack, and suspension.
My biggest disappointment has been the number of injection pins in the kit. They are everywhere and no matter how much I sanded and filled, it looks like I did nothing. Some will not be seen as they will be covered by other sub-assemblies, some will be hidden under the bodywork. Oh well, need to work on this for my next build. 50/50 chance it will be finished for IPMS/USA Nationals.
Hey gents. It’s okay to start over. I have been working on a 75mm lucky gold strike miner and was not happy with it. I had him at the 75% done level of painting but my attempt at a checkered shirt looked awful. I then painted over the pattern but that looked “heavy” and doctored. So off he went into a bath of alcohol and the entire figure was stripped of all the paint and he will be fully repainted. For you returning to our hobby or are new even us “old timers” muck it up. It’s okay! Just take a breath and start over!
Fyi. The dog was also redone. I think he came out better.
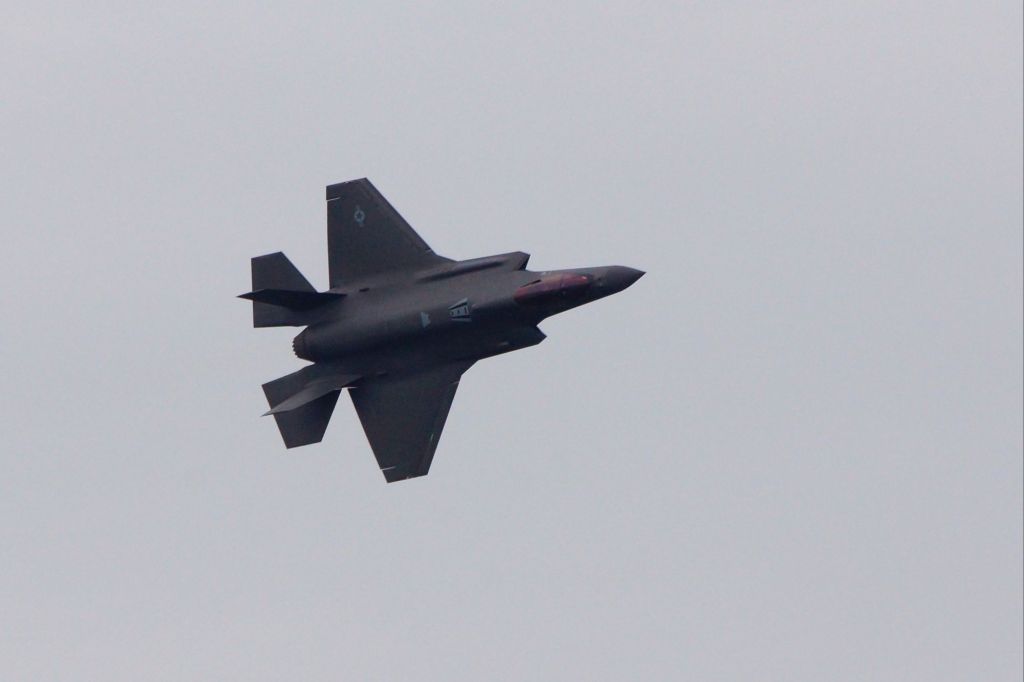
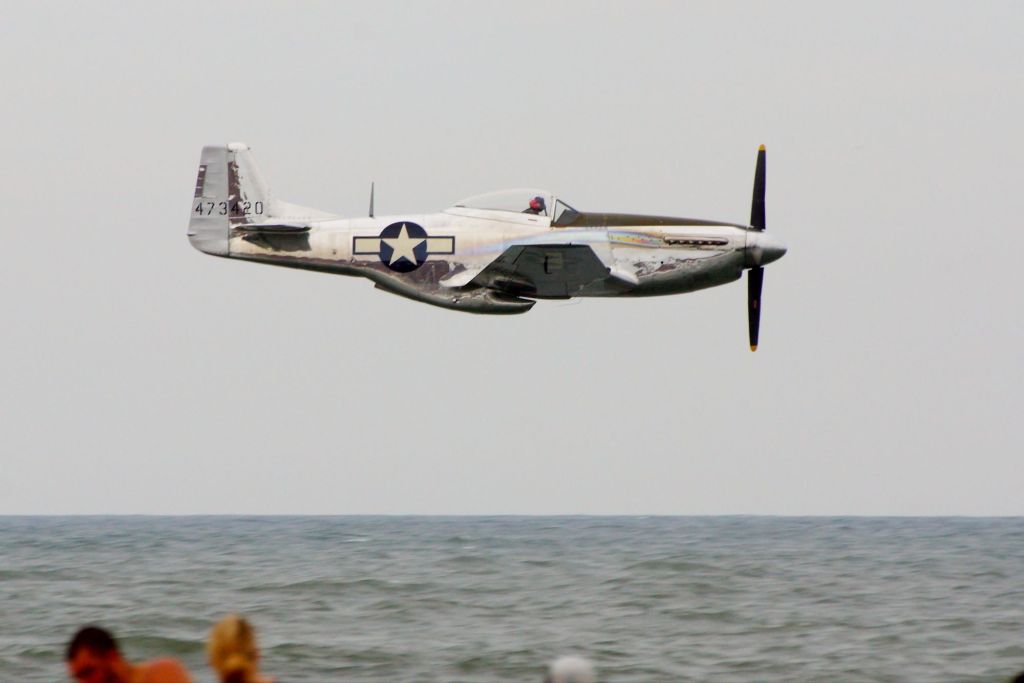
I can’t recall if Chris mentioned it in a previous meeting or not, but he and I had been talking about going to the Ocean City Air Show in late August. Either the 24th or 25th. It may be a ways off at the moment but I wanted to start planning and get a feel for how many others may be interested in going.
Current participants (more likely to be added):
FRECCE TRICOLORI – Italian demonstration team, similar to the Blue Angels or Thunderbirds
F-22 Raptor Demo Team
E/A-18 Growler Team
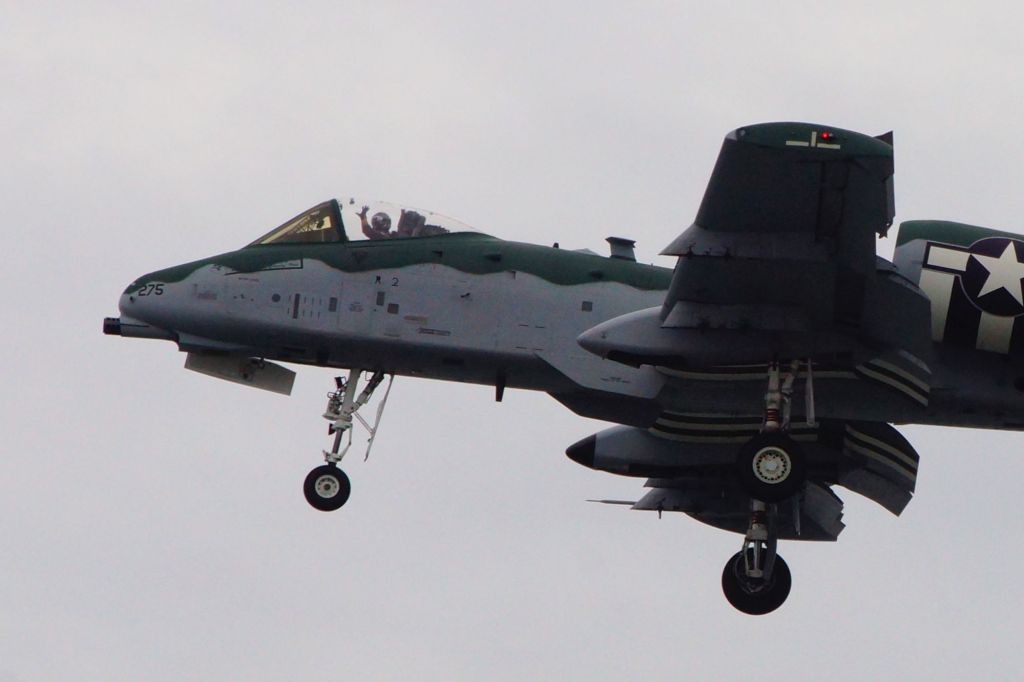
A-10 Thunderbolt II Team
C-17 Globemaster III Demo
West Point Parachute Team
I’ve seen several of these before and they were all great. The Tricolori team is the big draw for me this time, but I’m excited for all of them. The A-10 in particular is very cool too see in person. Online videos do NOT do those things justice.
The show takes place right on the beach over the water. The view is great from just about anywhere. The big downside (aside from being in MD) is that it’s probably going to be VERY hot. I can’t stand the summer heat but I can usually make an exception for airshows. It will also be pretty packed I’m sure. We went during height of the pandemic and it was still crowded.
There are tickets available if you want premium seats, but it’s free to the public, you’re just going to be left or right of center. I don’t plan on getting a ticket, but could be convinced if others wanted to. When I went last, parking was the bigger issue. We ended up paying someone $20 to park in their yard. I will be more than happy to cover our parking costs since I’m planning to go regardless.
If enough people are interested, it may be worth it for us to rent a van or something to carpool. It’s a 4 hour drive from Stephen’s City (5 for me) in normal traffic so figure a little longer given the heavy traffic. I’ve done the drive there and back in a single day, but it would be good if we had a couple people willing to share the driving.
If you want more info about the show you can go check out their website: https://ocairshow.com/
If you’re interested in going, comment here or let Chris or myself know. We’ll try to go over it again during the next meeting too.