Greetings !
I finally had some time to work on my 2024 “Build the same kit” project for another club I belong to. 2024 is any “Civilian Vehicle”. Hopefully this will be one I will actually complete.
My subject is a 1/24 Mercedes CLK GTR. A 1998 FIA GT 1 Sports car. This particular version is know by it’s Sponsor “Original Teile” , a blue car that features a “wrap” that exposed the rear engine. I had spent a long time gathering the parts and references to build this car. My original intent was to use the “Clear” body version from Tamiya, but the rarity of this issue was to much to resist selling it, so after finding a an open kit at a show in 2023, I also sold my sealed kit and got to work.

This kit has a ton of decals. Almost the entire body, chassis, interior, and part of the engine was Carbon fiber. I’m guessing 3-4 sheets of Scale Motorsports 1024 Carbon Fiber decal sheets will be needed. One of the packages from them has a pattern printed on the back of the sheet to allow proper fitment and placement of the decals. Carbon Fiber has a grain like wood. So one tries his best to make it match. It’s also very thick as it has a very slight texture to it. So it’s not a project to try if your “decal game” isn’t your strength.
After Priming and painting the body, I worked on the engine. Tamyia kits do follow the typical American Car kit assembly pattern: engine, interior, chassis, & Body. I finished the engine over the weekend. At least as much as I can until it is installed into the chassis. The block was pained Tamiya Flat Aluminum. The Transmission was Gunze Sango Burnt Iron, and the crash structure Gloss black. The Heads and rear part of the exhaust were painted Bare Metal from Model Car Garage. The exhaust headers are Alclad Pale Burnt Metal. Some of the more exotic colors you see are from Tamiya LP line of colors: Titanium Gold, Titanium Sliver, Gun Metal, Burnt Iron, and Gloss Aluminum to name a few. As you can see, there is a bunch of Carbon Fiber. The Air Box, crash structure , Heads, and rear wing supports all required decals. The Outside of the crash structure had a heat reflecting finish, so I replicated it using Aluminum Bare Metal Foil.
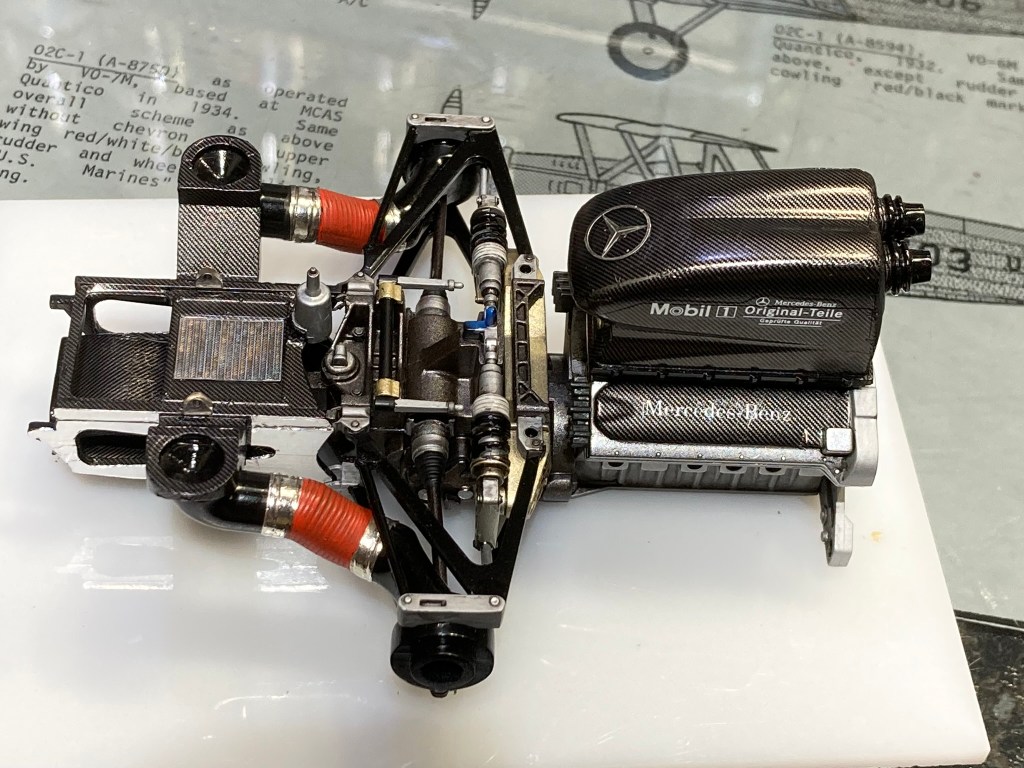
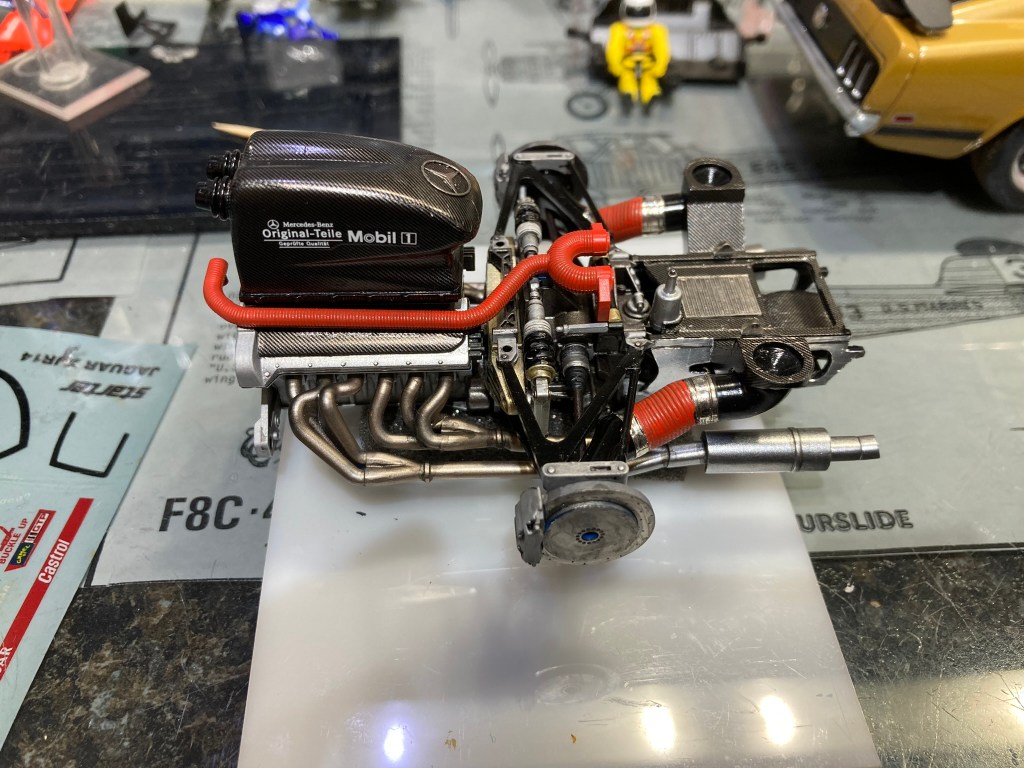
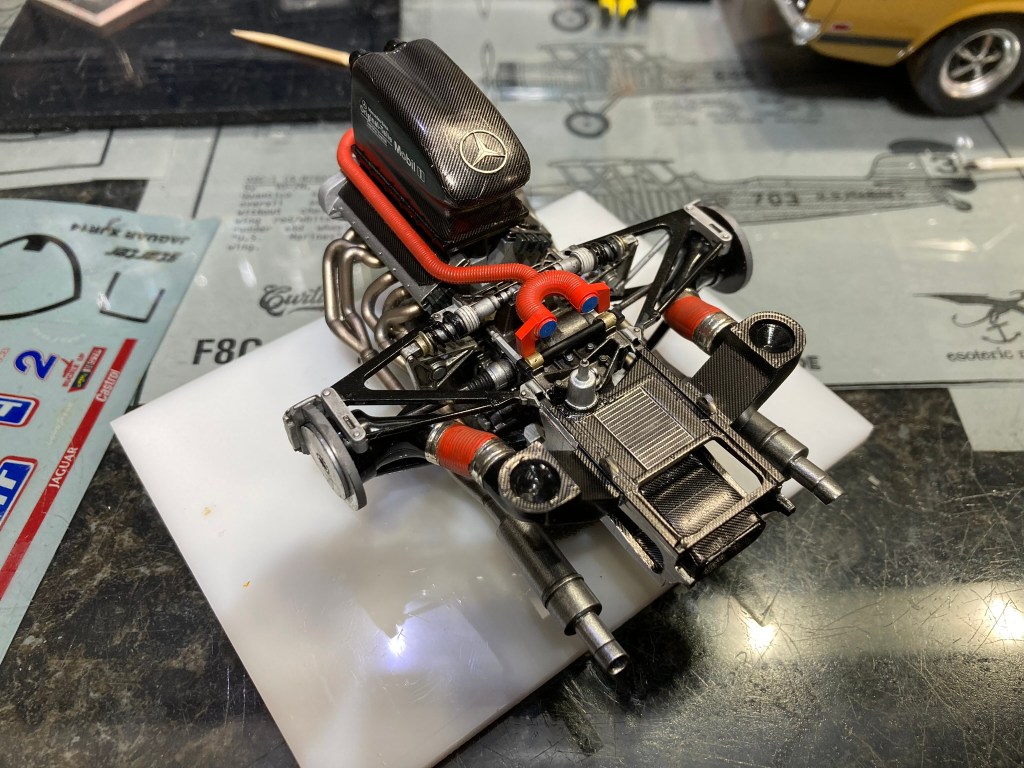
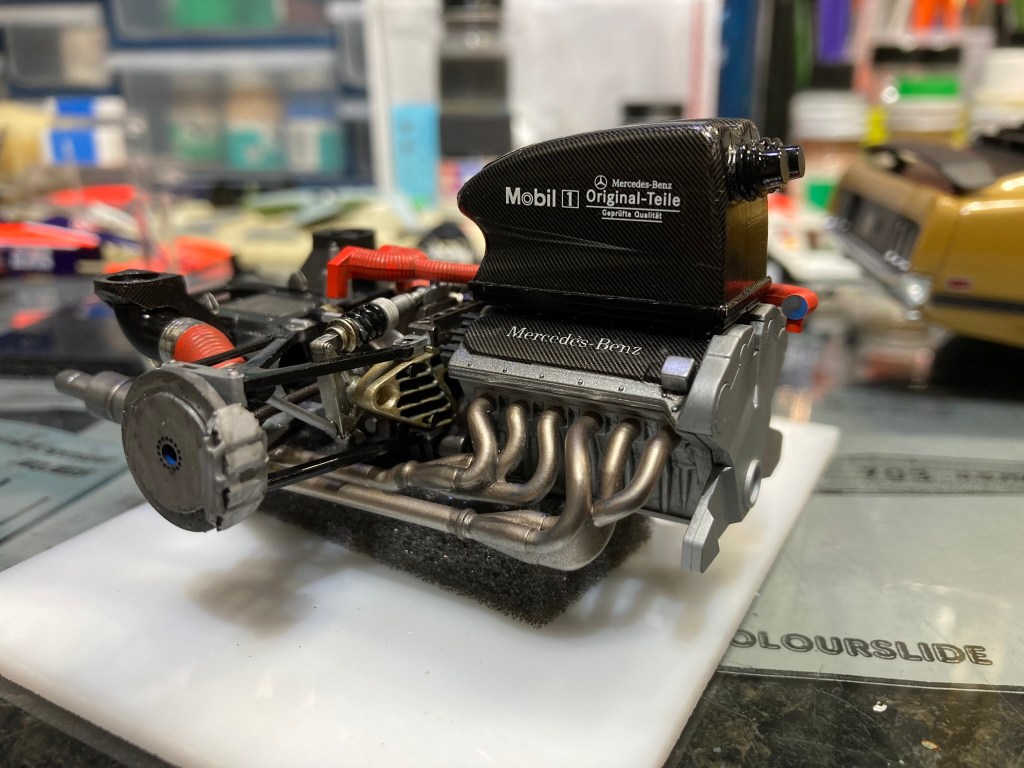
The Photo-etch set has a lot of parts, most not needed and over engineered. I did find some useful, however. For the engine, I used the transmission cooler and a pair of brackets . The set provides parts to re-build the rear wishbones and some of the support structure. Lots of micro sized rivets and tubing to put together that didn’t add one thing to the kit, and wasn’t any better than the kit provided parts.
I will provide updates as I complete sections. Interior is up next, but first I need to finish my 2023 “Build the same kit”- German Jet Aircraft from WWII.
Until Next time,
Mark Tutton

Mark, amazing engine! The detail work is typical of your level of work – which is very high. What is the German jet that you are doing?
LikeLike
1/144 He 162 Swept Wing Concept bird. It’s a Brengun kit.
LikeLike
I would like to see that when you’re done. I’ve had my eye on that kit for a while now.
-Chad
LikeLike
ha,,there is no “seeing” a 1/144 scale model…!!! 🙂
LikeLike
Blasphemy! I came close to marking your comment as spam. 🙂
LikeLike
hahaha,,,,
LikeLike
Tamiya makes beautiful kits, and you do exquisite work on them sir! Your detail painting and use of washes to highlight different textures and finishes is truly next level. If you are planning to attend the next club meeting I would be honored to have you offer the group some pointers on setting and sealing some of that kits decals.
LikeLike
Thats my favorite period of endurance racing. I have a Porsche 911 GT1 to build.
LikeLike