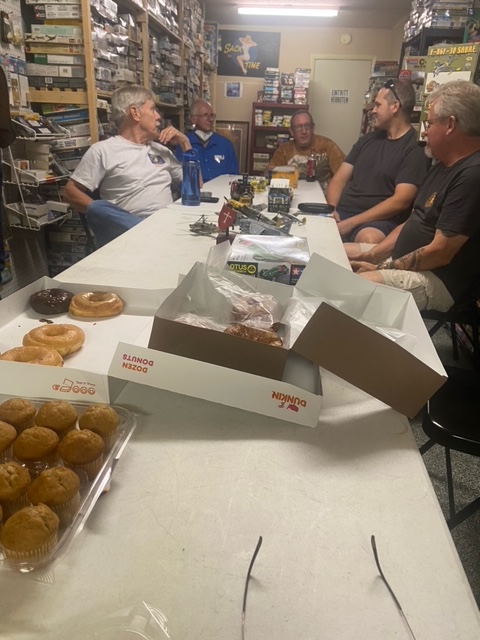
The September meeting got off to a rocky start as our contact at AMVETS was not present to open the Post hall. With Dan’s graciousness and his wife’s help, we re-huddled back at All Nation’s Hobby Shop. The rest of the meeting was great. There were many models brought by members and those who brought something talked about their build. Ross’s red hot rod was a scene-taker and Donovan’s Mirage was another great piece by him. Mark’s well-done automobile was a testament to taking your time! Scott put on an excellent tutorial on weathering and brought some examples of his work to show the net result of what a good weathering effort can produce. Thanks Mark as well for sending a group email on acrylic wash range he knows of and how to get it!
We talked about attending the upcoming PennCon and talked about other shows coming up. Mark mentioned PaxCon, which was thought to conflict with our October meeting but on later study showed it does not. Paxcon is on October 7 and our next meeting is on 14 October. AMVETS may be out, so the meeting will be at All Nation’s again.
Since standing up officially in March, we have grown from an initial five members to 15. I like our tradition of bringing yummy sweets to the meeting; the treats are quite good!
– Chris
Addition by Chad: Apologies for the poor photos. I failed to grab any good ones because I was distracted by all the snacks and focused on Scott’s demonstration…both of which were great!
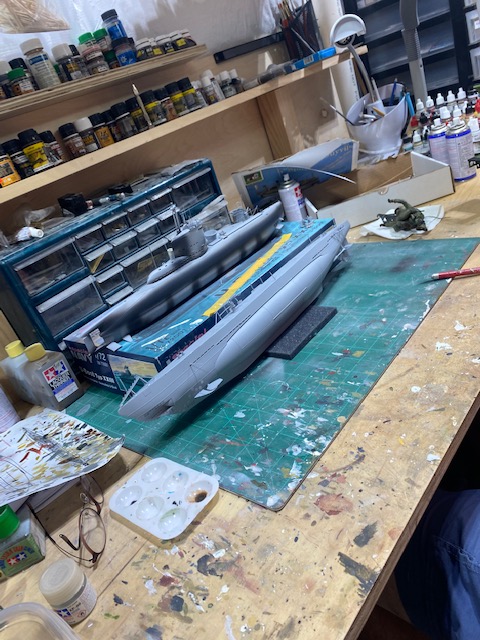
Gents, a few weeks back I showed you my new ship stand and the primer-coated submarine in “dry dock”. Here is an update on that sub with its primary colors on and post shading/highlighting applied. Next step: clear coating and panel lines.
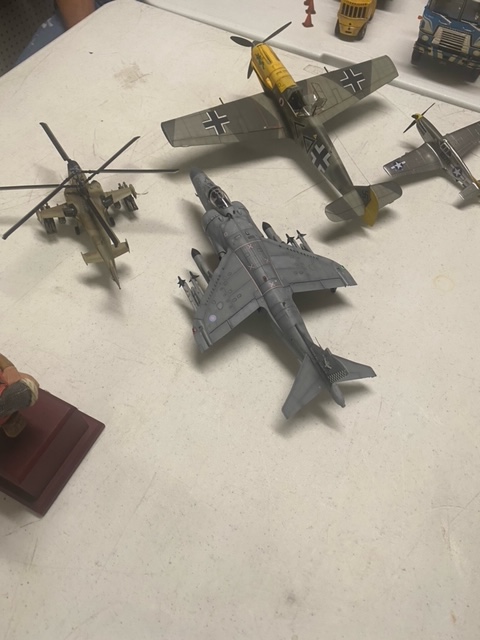
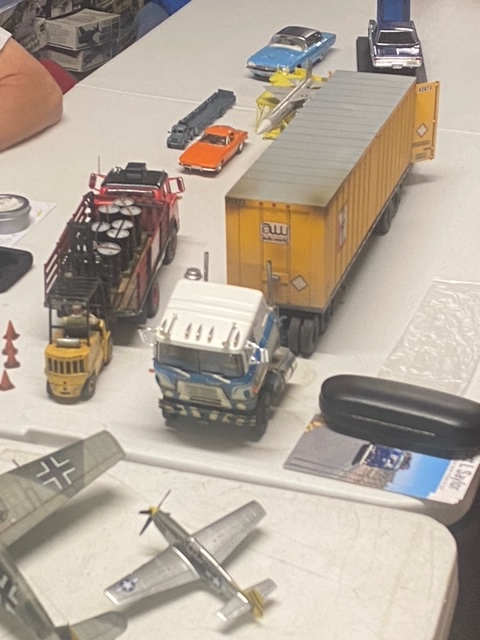
Good day modelers. At the August 19th meeting, several members brought completed kits and talked about how they put them together, painted them, and/or detailed them. Chris King brought a Crusader figure bust and talked about the use of acrylic paints; new member Donovan brought four aircraft and talked about how he used acrylics, lacquers, and oil paints for his builds. Everyone really liked his superb Harrier jump jet and the amazing detail he hand painted on the canopy of the jet. Scott brought several trucks which were amazing. He talked about how he put the trailers together and the detail on the semi as well as the interesting use of aluminum tape on his fuel drums. His models are always an eye catcher! Prospective new member Andre brought two great cars and a very unique missile – now that is something you don’t see often. The many boxes of donuts and sweets were a nice topper for a good meeting. That appears to be a yummy tradition our chapter has started!
The next meeting, September 9th, will be back at AMVETS and Scott is going to provide a demonstration on weathering techniques. Donovan will provide a demonstration at the October meeting on panel line highlighting. Remember PennCon 16 September; let’s show them how we in the Valley do it right and do it en masse!
Fellow builders; got a new stand for ship builds. It is working good so far. Here is a shot with the stand in action holding a Type II U boat. Now to finish it up!
The meeting for August has been moved to August 19th and will be held at All Nations Model and Hobby Shop at 11am. This has been updated on the Meetings page as well.
Please bring a model you’re working on or recently finished to discuss with the group. With PennCon coming up we want to expose everyone to new ideas or techniques that we can learn from.
Apologies for the late write-up for July’s meeting. Things were a bit chaotic at home and then we went on vacation to England for a week, so the priority dropped off on this a bit. But now I’m back and ready to re-focus.
This was our first meeting located at the AMVETS Post and I think we’re all in agreement that it’s a much better location as far as space and layout is concerned. Our meeting started with the usual round table (or square in this case I guess) discussions of the club’s financial status as we work toward our 501c3, upcoming shows and events, and other misc. topics that folks wanted to discuss. Once that concluded it was time to move on to the demonstration.
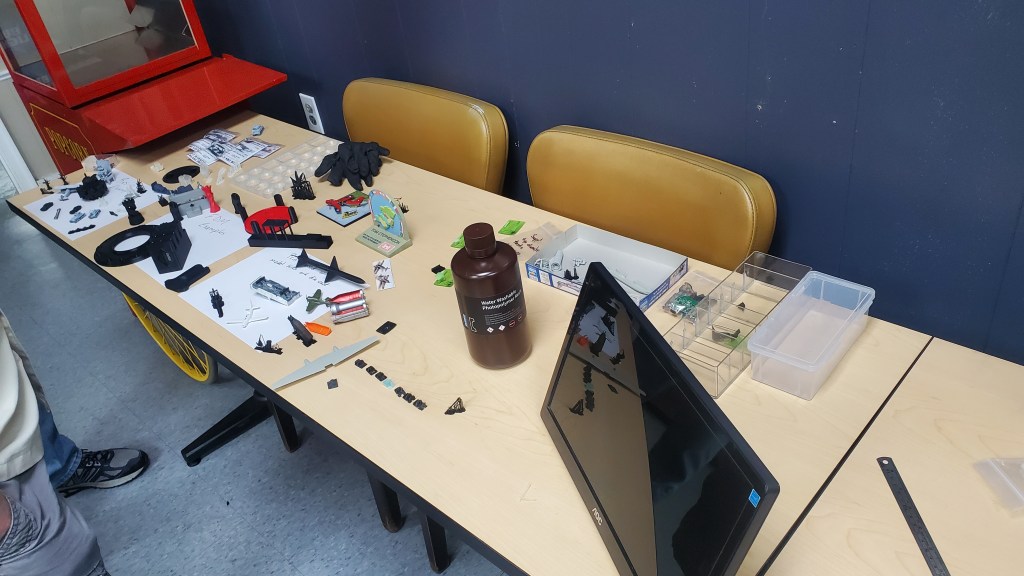
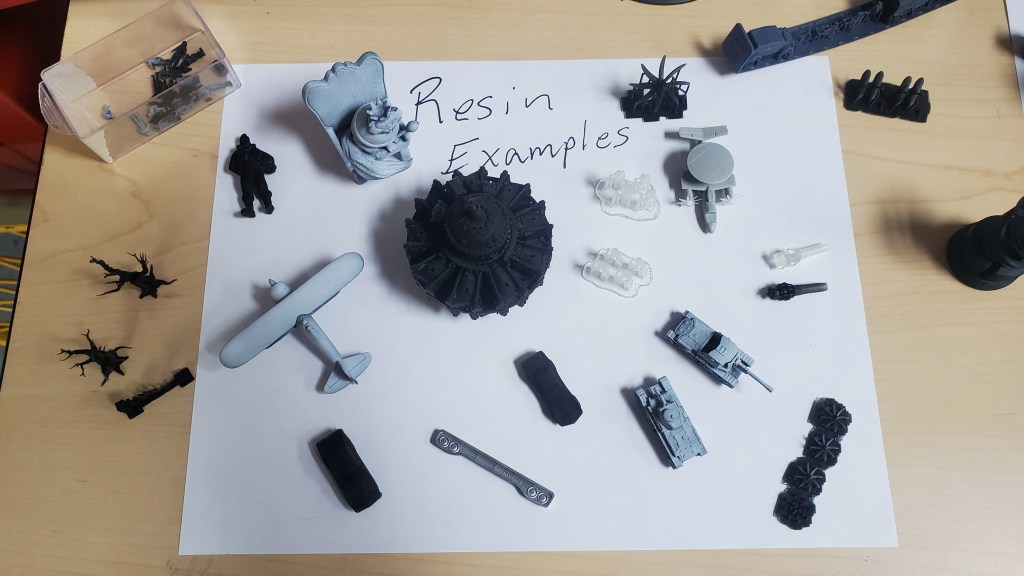
For July’s demonstration I brought in some 3D printing equipment and sample prints and we discussed what it takes to get started in 3D printing and how it can be used in scale modeling. We went over the sample pieces and talked about the post-processing required for good results, talked about the types of equipment used, looked at how models are oriented for printing, and took a very brief look at how models are designed. We looked at some models I had built using printed components and we discussed how it compared to resin casting which we had learned about at a prior meeting.
As with every tool on our workbench, a 3D printer is only there to compliment the work we already do. It’s going to be a long time before 3D printed kits replace injection molded kits as the standard, and in my opinion it may never happen, but printers and the associated technology have come a long way and if your impression of what 3D printers are capable of is more than a few years old it’s already way outdated. It’s now possible to make on-demand kits for subjects that wouldn’t be worth tooling up for a traditional kit, greatly increasing the subjects that we have access to. Already there are many individuals and companies, including myself, who make parts and accessories to be used in conjunction with traditional kits to create different variants of a subject or to simply add additional detail.
Types of Printers
3D printers come in a variety of types. All of them have a place and fill a certain need, but none of them are good for every purpose. When it comes to consumer-grade printers, there are really only a few types that you need to worry about:
FDM (Fused Deposition Modelling): This type of printer is what comes to mind when most people think of 3D printers. An extruder moves across an open bed as it melts and deposits plastic layer by layer until a model is created. Prints created using this technology are usually identifiable by their very prominent layer lines. In general, FDM prints are best suited for practical applications or large items. Need a knob for your washing machine? Want to make a decorative flower pot? Does your printed model need to be food-safe or flexible? In all of these cases, FDM is probably the best choice. These printers can use a variety of filament (the plastic that gets melted) from ABS plastic like our kits use, to plant based PLA, and even specialty material like Nylon. The various types of filaments could have their own dedicated post but you can already find a ton of info on the subject if you do a quick Google search.
Pros: Safer to handle Larger build area Greater range of material to use
Cons: More noticeable layers Less detailed prints More maintenance required
MSLA (Masked Stereolithography): The printer I brought in was an Elegoo Mars 2, MSLA printer. These types of printer use resin that is cured using UV light. MSLA printers use an LCD screen to block out areas of each layer and a UV light shines up through the exposed areas to cure only the areas required. This method allows the printer to cure an entire layer at once, so the time it takes to print 1 model is the same as it takes to print 15 (assuming they all fit on the build plate) whereas an FDM printer would increase the print time for every model you add as it has to move the extruder over every object for every layer.
MSLA printers are what you’ll most likely encounter in the scale modeling scene because of their ability to produce very fine detail and their relatively low cost. Since MSLA uses an LCD with very tiny pixels, you have far greater control over the detail than with FDM. This also produces a print that has significantly less visible layer lines and depending on the object and how it’s oriented, you may not even see the lines at all. However, resin is more brittle than most FDM material. The vast majority of the resin is also quite toxic and means you really shouldn’t use it for anything you plan to eat off of. Because of this, these types of printers are less ideal for items that you’ll handle in your daily life or which will serve a functional purpose. In addition, because the resin is a liquid, there is additional washing and final curing that has to happen with this type of print meaning it’s a little more involved than most FDM prints. You need to wear gloves and have a well ventilated workspace or wear a mask to avoid prolonged exposure to fumes.
Pros: Much finer detail Less visible layer lines Prints entire layer at once
Cons: Resin is toxic and more difficult to handle Requires additional cleaning and curing Fewer types of material to use
Common Printer Brands
FDM: Creality Prusa Elegoo
Resin: Elegoo Anycubic Formlabs
Software
Just like a traditional inkjet or laser printer, 3D printers require certain software to make them work. Before anything can be printed it needs to be designed and this requires some type of CAD software. Some CAD software is intended for dimension-based design work whereas others such as Blender work more like sculpting. Regardless of what software was used, once a model is fully designed you need what’s called a “Slicer” to break the model down into individual layers so the printer knows how to spit it out. Most printer manufacturers will recommend slicers to use when you purchase a printer, but often times you will find additional features in other slicers. Here are some of the more common programs for each purpose:
Sorry about the long-winded post but there was a good bit of interest during and after the demonstration so I wanted to make sure I wrote things up as well as I could for the site. There are many places online where you can learn way more so if this is something you’re interested in learning more about, do a quick search for some of the items above on Google or YouTube and you’ll be up and running in no time! You can also reach out to me directly or leave a comment here if you have any questions. I’m completely self-taught so I don’t pretend to be an expert, but I’m more than happy to share anything I can.
Our next meeting will be Saturday August 12th at 11am at the AMVETS again. There will be no formal demonstration this time so Chris has requested that everyone bring something they’ve been working on recently so we can get a feel for the types of models we all work on and ask each other questions about techniques used and things like that. And don’t worry, you don’t have to be an expert to show off your work! Please also bring any kits that you would like to donate to the club to sell at PennCon.
Hello members; how is your building going? For the August meeting, there will be no demonstrations, but members should bring a completed or nearly completed model and talk to the club about how you put it together. What paints did you use and why? What techniques did you use and why? The idea is to not just show off your talents, but to give ideas and suggestions to others who may be building a similar model. So come and show off – it’s okay!
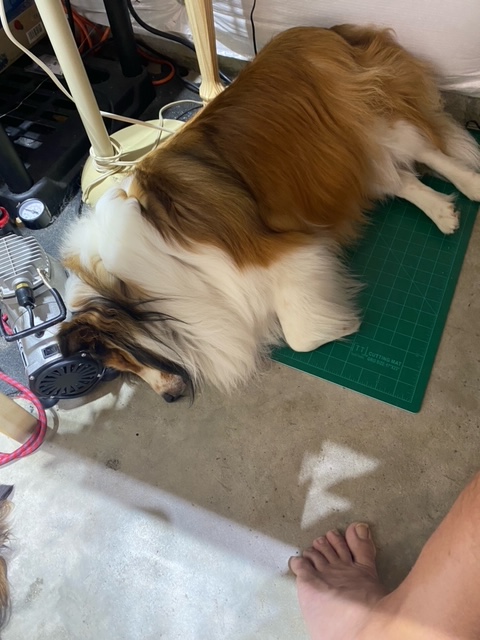
Hi members; here is my work bench. There are two German subs in “drydock” and a nearly completed 101st Airborne soldier. It’s a busy bench. There is one of my quality control officer by my compressor. What are you working on? What is your workbench layout!? Let’s hear from you.
As you all know, we met at the AMVETS post in Stephens City for July. If you are a veteran and would like to join that AMVETS post please let Chris know and he will give you information on how to join.
What are the collective thoughts on attending a car/air show this late summer? We can man a table to tout our club, show folks interested in modeling some built models and perhaps give some inexpensive kits to kids. There is a car/air show in Bath County called Wings and Wheels. It could be a good chance to have a fun outing together and car guys can look at cars and aircraft guys can look at airplanes! Welcome your thoughts!